
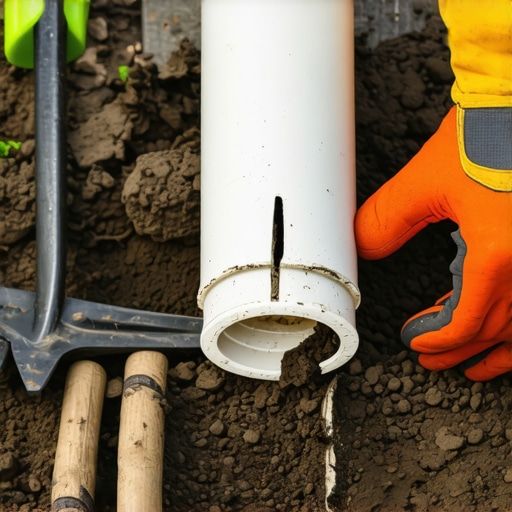
I always drill into my new crew members: if you don’t fix the soil grading first, every plant you put in the ground is just expensive compost. This technical wisdom applies twofold when dealing with the infrastructure buried beneath your hardscape. When an irrigation line fails under a concrete sidewalk, it is rarely a freak accident of the plastic. It is usually a failure of the engineering environment: soil settlement, root intrusion, or hydrostatic pressure that the installer failed to anticipate. I have seen countless DIY fixes where someone tries to shove a garden hose through a hole and call it a day. It will fail. Every time. In this forensic analysis, we are going to look at the microscopic reality of PVC failure and the industrial-grade methods required to restore a 60 PSI system without tearing out five figures worth of concrete.
Identifying the Leak Location and Hydraulic Symptoms
To locate a cracked irrigation pipe under a sidewalk, look for localized concrete discoloration, soil saturation at the slab edges, or a significant drop in zone pressure during operation. These symptoms indicate that the hydraulic integrity of the Schedule 40 PVC has been compromised, allowing pressurized water to erode the sub-base material. You cannot guess here. A mistake in excavation means wasted hours. I use a sonic leak detector if the visual signs are not obvious, but usually, the squish of the turf nearby tells the story. If you have done a recent yard cleanup or sod install and suddenly have a ‘soft spot’ near the walkway, you have found your culprit. Irrigation pipes are often buried too shallowly, leaving them vulnerable to the compaction forces of the concrete above. Don’t skip the diagnostic phase.
“The integrity of any pavement system is dependent on the stability of the subgrade and the management of subsurface water.” – ASCE Manual of Practice
How much does it cost to fix a pipe under a sidewalk?
The cost of repairing an irrigation pipe under a sidewalk typically ranges from $300 to $900 depending on the depth of the pipe and the length of the boring required. If you hire a hack, they will charge you $100 and leave you with a sinking sidewalk in two years. A professional focuses on the sub-grade stability. The materials are cheap: it is the labor and the technical precision of tunneling that drive the price. High-end landscaping firms factor in the cost of high-pressure boring tools and the expertise to avoid hitting gas or fiber-optic lines. Always call 811 before you dig; hitting a utility line turns a simple pipe repair into a $5,000 nightmare instantly.
The Forensic Diagnosis of Pipe Failure
Pipe failure under hardscapes is typically caused by root-induced shear or the lack of a protective sleeve during the initial landscaping installation. When a tree root, even a small one from a nearby shrub, finds its way under the concrete, it exerts tremendous pressure. PVC has a specific tensile strength, but it cannot withstand the constant, slow expansion of woody tissue. Alternatively, if the original installer did not use a larger diameter sleeve (like a 2 inch pipe protecting a 1 inch line), the friction of the concrete’s thermal expansion can literally saw through the plastic. We call this a ‘shear failure.’ It is a sign of a lazy contractor. When I see this, I know the rest of the system is likely compromised too. You have to look at the molecular level of the PVC; if the pipe is brittle and yellowed, it has been exposed to UV or chemical leeching, meaning the whole run needs replacement, not just the crack.
Can I use a flexible pipe to repair an irrigation line?
While poly-pipe is flexible, using it for a sub-slab repair is a massive risk due to its lower burst rating and susceptibility to rodent damage. Stick to Schedule 40 or Schedule 80 PVC for under-walkway applications. Schedule 80 has a wall thickness of 0.179 inches compared to the 0.133 inches of Schedule 40. That extra thickness is your insurance policy against future soil shifting. It is harder to work with, but in the world of professional landscaping, we build for the next decade, not the next week.
| Material Specification | Schedule 40 PVC | Schedule 80 PVC |
|---|---|---|
| Wall Thickness (1 inch pipe) | 0.133 inches | 0.179 inches |
| Max PSI (at 73 degrees F) | 450 PSI | 630 PSI |
| Corrosion Resistance | High | Very High |
| Primary Application | Standard Residential | High-Pressure / Industrial |
Methods for Sub-Slab Irrigation Repair
The most effective methods for repairing pipes under sidewalks involve either ‘Water Boring’ to create a new channel or ‘Tunneling’ using a specialized trenching shovel to reach the breach from both sides. You do not want to cut the concrete. Cutting the slab creates a structural weak point that will eventually lead to cracking and heave. Instead, we use the ‘Wet Bore’ technique. This involves attaching a high-pressure nozzle to a piece of PVC and literally water-jetting a hole through the soil beneath the slab. It is messy, but it works. You must maintain a straight trajectory. If your bore hits the bottom of the concrete, you will create a void that leads to a ‘sinkhole’ effect. This is why I hate ‘mow-and-blow’ guys who try this; they don’t understand soil physics. You need to keep the bore diameter as tight as possible to the pipe size.
“Improper compaction around irrigation components leads to differential settlement and eventual pipe shear.” – ICPI Tech Spec 2
- Step 1: Excavate the Access Pits. Dig two holes, one on each side of the sidewalk, at least 12 inches wider than the pipe.
- Step 2: Clear the Debris. Use a hand trowel to find the exact entry and exit points of the pipe.
- Step 3: The Boring Process. Use a 3/4 inch galvanized pipe attached to a garden hose to jet a path through the compacted sub-base.
- Step 4: Sleeving. Once the hole is clear, slide a 2 inch PVC sleeve through. This will protect your actual irrigation line.
- Step 5: Solvent Welding. This is where most people fail. You are not ‘gluing’ the pipe; you are chemically fusing the plastic.
- Step 6: Pressure Testing. Before you backfill, run the zone for 20 minutes. If there is a drip, you start over. Don’t skip this.
The Linguistic Reality of Solvent Welding
If you aren’t using purple primer, you aren’t doing the job. The primer is not just for show; it is a chemical agent that breaks down the surface tension of the PVC, softening the polymer chains so they can interlock with the cement. I see guys just slap ‘All-Purpose’ glue on a dirty pipe and shove it together. It will rot. Within six months, the vibration of the water hammer will shake that joint loose. You need to apply a thin, even coat of primer, then a generous layer of medium-body gray or clear cement. Turn the pipe a quarter turn as you insert it to ensure even distribution and hold it for at least 30 seconds. The cement needs that time to set the bond. If you let go too early, the pipe will ‘push out’ due to the air pressure inside, creating a weak joint that will blow the first time the system cycles on. It is about precision, not speed.
Maintenance and Long-Term Stability
After the repair is finished, the way you backfill the soil is just as important as the pipe itself. You cannot just throw the dirt back in the hole. You need to ‘lift’ the soil in 4-inch increments, tamping it down each time. If you leave air pockets, the next rain will cause the soil to settle, and the sidewalk will crack under its own weight. Use a manual tamper or the butt-end of a 4×4 post. If you are in a region with heavy clay, you might even consider backfilling with a bit of crushed stone or ‘modified’ gravel to ensure drainage away from the repair site. This prevents the ‘bathtub effect’ where water sits around your new joint and weakens the solvent weld over time. Real landscaping is about managing the invisible forces of nature. Respect the soil, and your pipes will stay dry on the outside. Failure to do so just means you will be digging this hole again next season. Don’t be that guy.