
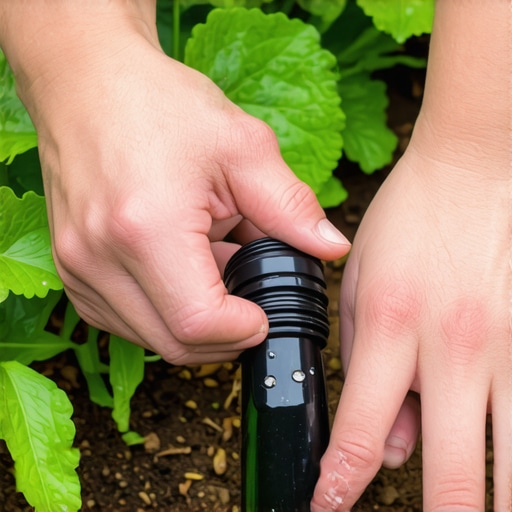
Understanding Low Pressure in Residential Drip Systems
Low pressure in backyard drip lines is typically caused by excessive run length, clogged filters, or incorrect tubing diameter leading to friction loss. To fix it, you must measure the dynamic PSI at the source, inspect the Y-filter for sediment, and ensure the total GPH (Gallons Per Hour) of all emitters does not exceed the flow capacity of your mainline. It is a hydraulic math problem, not a mystery.
I recently got called out to tear up a landscape where the owner had spent thousands on sod install and high-end nursery stock, only to watch it wither. The previous contractor had run 400 feet of half-inch poly tubing off a single valve. The emitters at the end of the line were bone dry. They didn’t understand the basic physics of water movement. When I cut into the line, the pressure was barely 5 PSI. You cannot grow a landscape on a trickle. It is just expensive compost at that point. If you do not fix the soil grading and the hydraulic delivery first, the rest of the job is a failure before you even start.
The Anatomy of Drip Irrigation Failure
When we talk about low pressure, we are usually discussing one of three things: mechanical blockage, physical damage, or poor engineering. A drip system operates in a narrow window of 20 to 40 PSI. If you fall below 15 PSI, the emitters will not open. If you go over 50 PSI, you will blow the fittings right off the poly tubing. Precision is the only way to ensure plant survival.
“Friction loss in small diameter tubing is the primary cause of emission non-uniformity in residential irrigation designs.” – Irrigation Association Technical Manual
The Physics of Friction Loss and GPH
Every foot of tubing and every elbow creates resistance. This is known as friction loss. If you are using 1/2 inch poly tubing, you are limited to roughly 200 to 250 Gallons Per Hour total flow. If you try to put 300 GPH of emitters on that line, the pressure will drop to zero long before you reach the end of the run. It is simple math. You must audit your emitters.
| Tubing Size (ID) | Max Recommended Flow (GPH) | Max Run Length (Feet) | Friction Loss per 100ft |
|---|---|---|---|
| 1/4 Inch (Vinyl) | 30 GPH | 30 Feet | High |
| 1/2 Inch (Poly) | 220 GPH | 200 Feet | Moderate |
| 3/4 Inch (Poly) | 480 GPH | 400 Feet | Low |
Do not skip the math. If your yard cleanup involved adding more plants, you likely exceeded the capacity of your existing valve. You cannot just keep adding emitters to the same line and expect it to work. The system will fail.
Step-by-Step Diagnostic Checklist
Use this checklist to identify the bottleneck in your system. Start at the water source and work your way to the last plant. Professional irrigation is about isolation and testing.
- Check the Backflow Preventer: Ensure the main shut-off valves are fully open. A partially closed gate valve will kill your GPM.
- Inspect the Y-Filter: Unscrew the filter canister. If it is packed with sand or algae, your pressure is being choked at the source.
- Test the Pressure Regulator: These devices can fail in the closed position. Use a pressure gauge after the regulator to ensure it is delivering 25 to 30 PSI.
- Walk the Line for Leaks: Look for unusually wet spots or bubbling soil. A single puncture in the poly line can drop the pressure for the entire zone.
- Flush the Headers: Open the end caps and run the water for two minutes. Silt buildup in the lines is common after a sod install or heavy landscaping work.
How many drip emitters can I put on one line?
The number of drip emitters you can put on one line depends on the emitter flow rate and the tubing diameter. For a standard 1/2 inch poly line with a max capacity of 200 GPH, you could theoretically run 200 emitters rated at 1 GPH each, or 100 emitters rated at 2 GPH each. However, you must factor in friction loss, which reduces this number by 20 percent for runs over 100 feet.
“Proper pressure regulation is mandatory for emission uniformity and prevents the premature failure of the lateral line connections.” – Texas A&M Agrilife Extension
Advanced Troubleshooting: The Solenoid and Diaphragm
Sometimes the issue is not the pipe, but the valve. An irrigation valve uses a rubber diaphragm to control flow. Over time, minerals in the water can calcify on the diaphragm or the small ports inside the valve body can clog. This prevents the valve from opening fully. If your filter is clean but the pressure is still low, the valve is the prime suspect. Take it apart. Clean the grit out. Check the spring. If the rubber is cracked, replace the diaphragm. It is a five minute fix that saves a hundred dollars in service calls.
Why are the emitters at the end of my line not dripping?
Emitters at the end of a line fail to drip because the dynamic pressure has fallen below the emitter’s opening threshold. This is caused by excessive run length or too many emitters on a single circuit. To fix this, you must either split the zone into two separate lines or upgrade the mainline to a larger diameter pipe to reduce friction loss.
Maintaining System Integrity After Yard Cleanup
After a major yard cleanup, it is common for drip lines to be buried or crushed by heavy foot traffic or equipment. Soil compaction around a poly line can restrict flow just as effectively as a kink. If you recently had a sod install, check that the staples used to hold the sod did not pierce your irrigation lines. This happens more often than most homeowners realize. Digging a small trench to inspect the sub-main is often necessary. If the soil is heavy clay, the weight of the new sod and the water saturation can actually flatten thin-walled tubing.
Always use professional grade components. Big-box store kits are designed for one season. They use thin-walled poly that kinks if you look at it wrong. Spend the extra money on commercial grade 700-series poly and pressure-compensating (PC) emitters. PC emitters are designed to deliver a steady flow regardless of whether they are first or last on the line, as long as the minimum PSI is met. This is the difference between a landscape that survives and one that thrives.
Check your system every month. It takes two minutes to look at the filter and walk the perimeter. If you see a plant drooping, do not just turn up the timer. Find out why the water is not getting there. Usually, it is a pressure issue. Fix the pressure, and the plants will take care of themselves.
{“@context”:”https://schema.org”,”@type”:”HowTo”,”name”:”How to Fix Low Pressure in a Drip Irrigation Line”,”step”:[{“@type”:”HowToStep”,”text”:”Verify the water source pressure and ensure the main valve is fully open.”},{“@type”:”HowToStep”,”text”:”Clean the Y-filter by removing the screen and rinsing away sediment.”},{“@type”:”HowToStep”,”text”:”Check the pressure regulator for mechanical failure using a downstream gauge.”},{“@type”:”HowToStep”,”text”:”Calculate the total GPH of all emitters to ensure it does not exceed the line capacity.”},{“@type”:”HowToStep”,”text”:”Flush the lines by removing end caps to clear any internal debris or silt.”}]} {“@context”:”https://schema.org”,”@type”:”FAQPage”,”mainEntity”:[{“@type”:”Question”,”name”:”How many drip emitters can I put on one line?”,”acceptedAnswer”:{“@type”:”Answer”,”text”:”You can typically put up to 200 1-GPH emitters on a 1/2 inch poly line, but you must subtract 20 percent for friction loss on long runs.”}},{“@type”:”Question”,”name”:”Why are the emitters at the end of my line not dripping?”,”acceptedAnswer”:{“@type”:”Answer”,”text”:”This is caused by pressure loss due to excessive run length or too many emitters on the zone, dropping the PSI below the threshold needed to open the emitters.”}}]}