
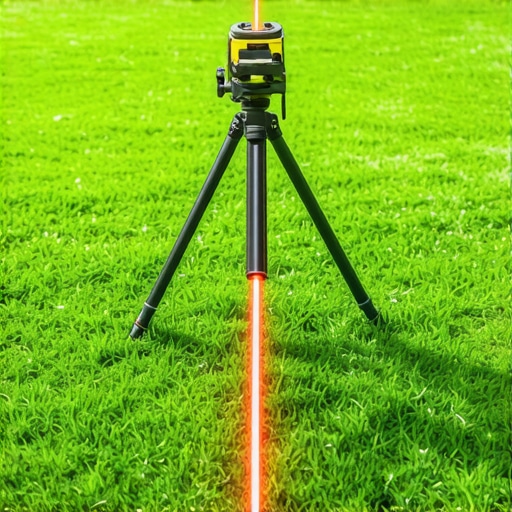
I have spent three decades fixing mistakes that never should have happened. Last month, I stood over a $30,000 bluestone patio that I was about to jackhammer into rubble. Why? Because the previous contractor decided he could “eyeball” the pitch. Three years of heavy rains turned that patio into a basin, forcing hydrostatic pressure against the home’s foundation until the basement mold was a health hazard. The client was out thirty grand because someone was too lazy to spend 20 minutes with a rotary laser level. In this business, if you don’t respect gravity, gravity will eventually bankrupt you. Landscaping is not about aesthetic fluff; it is about managing water and soil physics. Using a laser level is the only way to ensure your drainage, sod install, and irrigation systems function for twenty years instead of twenty days.
The Critical Importance of the 2% Slope Rule
To establish a functional backyard slope, you must maintain a minimum 2% grade, which equates to a 1/4-inch drop for every linear foot of distance away from a structure to prevent standing water and foundation damage. This ensures that surface runoff moves at a velocity sufficient to prevent pooling without causing soil erosion. If you are working with heavy clay, that percentage might need to increase to ensure the percolation rate of the soil doesn’t lead to saturation. You are fighting a constant battle against gravity, and the laser level is your only honest witness.
“A retaining wall doesn’t fail because of the stone; it fails because of the water trapped behind it.” – Hardscape Engineering Axiom
How much slope do I need for a backyard?
The standard requirement for effective backyard drainage is a 1-foot drop for every 50 feet of distance, though a 2% slope is the industry gold standard for patios and turf areas. For sod install projects, keeping the grade smooth is just as important as the pitch, as micro-depressions will hold water and rot the root system of your new grass. If you’re installing irrigation, your pipe depth must account for these grade changes to maintain consistent pressure and prevent low-head drainage issues. I tell my crew: measure twice, dig once, and never trust your eyes. Your eyes are liars; the laser is the truth.
Choosing the Right Tools: Why Transits and String Lines Fail
For any serious landscaping project, a self-leveling rotary laser is the mandatory standard. String lines sag. Bubble levels are too short to account for crustal shifts in the land. A rotary laser projects a 360-degree beam of light that stays perfectly level across hundreds of feet. You combine this with a grade rod and a laser receiver. The receiver slides up and down the rod and emits a high-pitched beep when it hits the beam. This allows you to map out your entire yard in a grid, identifying every high and low spot before you ever touch a shovel. This is site prep, and it is 80% of the job.
How do you calculate grade with a laser level?
To calculate grade using a laser level, you first establish a benchmark—a fixed point like a foundation sill—then use the laser receiver on a grade rod to measure the vertical distance from that benchmark to the ground at various points, subtracting the differences to determine the total fall. If your benchmark reading is 50 inches and your target point 20 feet away reads 55 inches, you have a 5-inch drop. That is a 2.08% slope. It is simple math, but most guys skip it and wonder why their sod is a swamp by July.
| Project Type | Minimum Slope (%) | Drop per 10 Feet | Primary Goal |
|---|---|---|---|
| Turf/Sod | 1.5% – 2.0% | 2.0″ – 2.4″ | Prevent Root Rot |
| Paver Patios | 2.0% | 2.4″ | Surface Runoff |
| Retaining Walls | 1.0% (at base) | 1.2″ | Hydrostatic Relief |
| French Drains | 1.0% – 2.0% | 1.2″ – 2.4″ | Gravity Flow |
The Step-by-Step Layout for Site Grading
Start by clearing the area. Yard cleanup isn’t just about hauling away debris; it is about removing obstructions that interfere with the laser beam’s line of sight. Set your tripod on the highest point of the yard if possible, but make sure it is stable. If the tripod legs sink into soft mud, your readings are worthless. Stamp the feet into the ground. Level the head. Turn on the laser and let it self-compensate. This is where you find out exactly how much dirt you need to move. Most homeowners underestimate soil volume by half. If you need to raise a 1,000-square-foot area by 2 inches, you aren’t buying a few bags of dirt; you are ordering 6 cubic yards of clean fill.
- Step 1: Establish your Benchmark (fixed reference point).
- Step 2: Set the Rotary Laser on a stable tripod at a central location.
- Step 3: Record the “Start” height on your grade rod at the structure foundation.
- Step 4: Determine your target “Finish” height based on the required 2% drop.
- Step 5: Mark the yard with stakes and marking paint at 5-foot intervals.
- Step 6: Adjust soil levels until the receiver beeps at the calculated target height on every stake.
“Surface drainage is the first line of defense against subgrade saturation and subsequent structural failure.” – Civil Engineering Soil Mechanics Handbook
Biological Impact: Why Slope Matters for Sod and Plants
Proper grading is as much about biology as it is engineering. When you perform a sod install on a flat or poorly sloped yard, water sits in the thatch layer. This creates an anaerobic environment. The roots can’t breathe. They rot. You get fungal outbreaks like Pythium blight or Brown Patch. By using a laser level to ensure a consistent slope, you are managing the soil microbiology. You are forcing the water to move through the profile rather than sitting on top of it. This is why irrigation design must follow the grade. You place your heads so they aren’t spraying into the wind or puddling at the bottom of a slope. Precision matters. Every inch counts. If you ignore the laser, you are just throwing money into the mud.