
The Anatomy of a Failed Hardscape
You walk out your back door and feel that tell-tale wobble. A paver tips, water squirts up from the joint, and you see the unmistakable dip of a structural failure. It is a mess. It is a trip hazard. Most importantly, it is a sign that the fundamental engineering beneath your feet has been compromised. When pavers shift, they are telling a story about the ground beneath them. Usually, that story involves poor compaction, water mismanagement, or a contractor who valued speed over structural integrity. I have seen it a thousand times: a beautiful surface hiding a chaotic, unstable base. If the base fails, the project is dead. It is that simple.
The Hardscape Autopsy: A Lesson in Base Failure
I recently got called out to tear up a $30,000 patio that was sinking because the previous contractor used stone dust as a base material over uncompacted clay. Within two seasons, the frost heave had turned a level entertaining space into a miniature mountain range. The homeowner thought they just needed a bit more sand. I had to break the news: the entire 800-square-foot install was junk. We spent three days just excavating the ‘muck’—that saturated, unstable slurry created when stone dust meets high water tables. We replaced it with a properly engineered 2A modified stone base, compacted in 2-inch lifts. If you do not respect the physics of soil, the soil will eventually claim your investment. Do not skip the prep. It is the only part that actually matters.
Why Your Pavers are Shifting
Paver shifting occurs due to inadequate sub-grade compaction, poor drainage leading to hydrostatic pressure, and the use of incorrect base materials like stone dust or unwashed sand. When the soil saturation levels fluctuate during seasonal changes, an unstable base expands and contracts, forcing the interlocking pavers out of alignment and causing surface lippage.
“A retaining wall doesn’t fail because of the stone; it fails because of the water trapped behind it.” – Hardscape Engineering Axiom
The Role of Hydrostatic Pressure and Drainage
Water is the universal solvent and the primary enemy of any hardscape. If your irrigation system is leaking or spraying directly onto the edge of a patio, you are feeding the beast. Water infiltrates the joints, saturates the bedding sand, and begins to wash away the fine particles that create the ‘interlock.’ Once those fines are gone, the pavers move. This is why landscaping and proper yard cleanup are critical before any reset. You have to ensure the grade falls away from the patio at a minimum of 1/8 inch per foot. If the water has nowhere to go, it goes under your stones. It will rot the base from the inside out. Don’t ignore the pitch.
How much modified gravel do I need for a patio base?
Calculating the base material is a matter of volume and density. For a standard pedestrian patio, you need a minimum of 6 inches of compacted 2A modified stone. To calculate, multiply your square footage by the depth in feet (e.g., 0.5 feet for 6 inches), then divide by 27 to get cubic yards. Always add 20% for compaction. If you don’t account for the ‘fluff factor’ of loose gravel, you will run short once the plate compactor hits the dirt. Compact until it rings.
| Material Type | Recommended Use | Compaction Rating | Drainage Capability |
|---|---|---|---|
| 2A Modified (Crushed Stone) | Primary Base Layer | Excellent (98% Proctor) | Moderate |
| ASTM C33 Sand | Bedding Layer (1 inch) | N/A | High |
| #57 Clean Stone | Drainage/Permeable Base | Good | Superior |
| Stone Dust/Screenings | Avoid (Non-Structural) | Poor | Very Low (Frost Heave Risk) |
The Engineering Behind the Failure
The failure of a paver system is typically a failure of the Proctor Density, where the soil or base material has not been compacted to its maximum dry density. When heavy loads or freeze-thaw cycles act upon low-density subgrades, the material undergoes differential settlement, resulting in the undulating surface common in amateur installs.
The Mechanical Interlock Myth
Many DIYers think the weight of the stone holds it in place. Wrong. It is the sand. Specifically, it is the friction between the sand particles and the vertical walls of the pavers. This is the mechanical interlock. When you use cheap, rounded play sand instead of angular ASTM C33 sand, you lose that friction. The pavers become individual islands instead of a unified structural slab. They will shift. It is inevitable. Use the right sand. No exceptions.
How deep should I dig for a paver reset?
If you are resetting a failed area, you must dig until you hit ‘virgin soil’—undisturbed earth that hasn’t been softened by water. Usually, this means removing the old pavers and at least 4-6 inches of the existing base. If the soil underneath is soft clay, you may need to go deeper and install a geotextile fabric to separate the subgrade from your new gravel. Without that fabric, your expensive gravel will eventually sink into the clay. It’s called ‘soil migration.’ Stop it before it starts.
The Step-by-Step Reset: A Professional Guide
To reset shifting pavers, you must excavate the affected area, stabilize the subgrade with compacted crushed stone, install a leveled bedding layer of angular sand, and re-establish the interlock with polymeric jointing sand. This process ensures structural longevity and prevents weed growth and insect infestation from compromising the paver joints.
- Remove shifting pavers and scrape out old bedding sand.
- Inspect the base for ‘pumping’ (wet, spongy spots).
- Add 2A modified stone and compact in 2-inch lifts with a plate compactor.
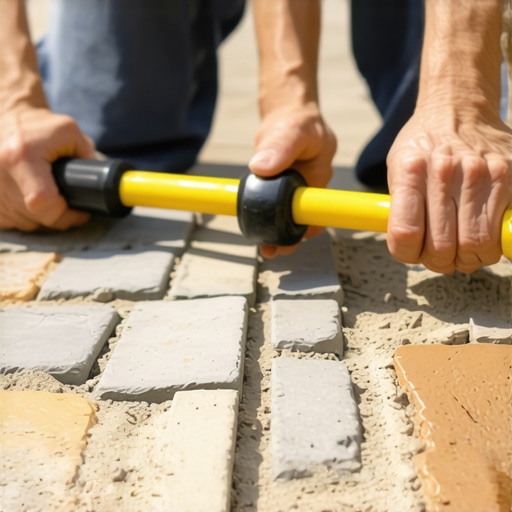
- Screed 1 inch of fresh ASTM C33 bedding sand using 1-inch pipes.
- Relay pavers, ensuring a tight fit with consistent joint widths.
- Sweep in high-quality polymeric sand and vibrate the pavers to set the interlock.
Precision is mandatory. If your screed pipes are off by a quarter-inch, you will see it in the final product. Use a string line. Check your levels every three feet. Don’t trust your eyes; they lie. The level doesn’t.
Maintenance and Prevention
Long-term paver stability requires maintaining the integrity of the edge restraints and the jointing sand to prevent lateral movement and water infiltration. Without rigid edge restraints, the perimeter pavers will migrate outward, causing the field stones to lose their interlocking tension and eventually sink.
“Standard specifications for graded aggregate base materials must meet ASTM D2940 to ensure proper structural support under varying moisture conditions.” – ICPI Manual
After a sod install or major yard cleanup, check your patio edges. If the soil has settled away from the plastic or concrete edge restraint, the pavers will start to ‘creep.’ Backfill those edges with heavy soil and pack it down. Keep your irrigation heads directed away from the hardscape. Excess water is the quickest way to turn a $20,000 patio back into a pile of expensive rocks. Manage the water, or the water will manage you.
The Importance of Polymeric Sand
Do not use regular sand for the joints. Polymeric sand contains additives that, when wetted, create a flexible but firm bond. It keeps the water out and the sand in. It also stops ants from mining under your pavers. If you see ‘ant hills’ coming up between your stones, your interlock is being hollowed out. Clean the joints and install fresh polymeric sand. It is a cheap insurance policy for a very expensive floor. Do it right the first time. The dirt is waiting for you to fail.