
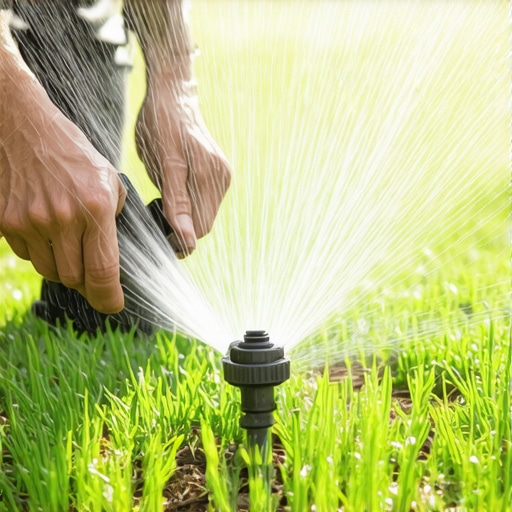
The Costly Mistake of Head-to-Head Failure
Sprinkler zone overlap issues can be resolved immediately by swapping standard high-angle spray nozzles for precision rotary nozzles or matched-precipitation rate (MPR) nozzles to eliminate dry spots and over-watering. When neighboring sprinkler heads fail to throw water completely to the base of the next head, you create dry, dead zones in your turf. This structural error in irrigation layout causes localized dry spots that mimic fungal infections but are actually pure dehydration. Fixing this doesn’t require trenching up your entire yard; it requires a calculated nozzle swap based on water pressure and spray patterns.
I always drill into my new crew members: if you don’t fix the soil grading and irrigation delivery first, every plant you put in the ground is just expensive compost. Just last month, I walked onto a property where the homeowner had spent $8,000 on fresh sod install services, only to watch it turn into a patchwork of yellowing straw within three weeks. They assumed it was a disease and blasted it with expensive fungicides. I stepped out onto the lawn, turned on their irrigation system, and saw the real culprit: their head-to-head coverage was short by exactly three feet between zone one and zone two. The spray from one head was misting out into nothingness before it could reach the adjacent head. The soil in between was bone dry, while the grass directly next to the heads was drowning in pooled water. We did a complete nozzle swap on twelve heads, re-balanced the pressure, and saved the remaining sod without digging a single trench.
“Irrigation uniformity is the single most critical factor in maintaining turfgrass health while conserving municipal water resources. Uneven water distribution leads to localized dry spots and nutrient leaching.” – Texas A&M AgriLife Extension Service
What Is Head-to-Head Coverage and Why Does It Fail?
Head-to-head sprinkler coverage is the design principle where the water spray from one sprinkler head must reach all the way to the adjacent sprinkler head. This creates a uniform blanket of water across your lawn. When coverage falls short, you get uneven growth, dry patches, and wasted water. The issue is usually caused by pressure drops, incorrect nozzle selection, or poor initial installation geometry.
Many DIY installers believe that if water is touching the ground, the grass is getting irrigated. That is a myth. The spray pattern of a standard fixed-arc spray nozzle is highly uneven, depositing more water near the middle of its throw than at the very end or right at the base of the head. To achieve a uniform application rate, the weak outer edge of one nozzle’s spray must be reinforced by the spray from its neighbor. When this overlap fails, you get under-watered strips of turf that eventually die back to the dirt.
Why did my sprinkler pressure drop over time?
Sprinkler pressure drops are typically caused by municipal water fluctuations, mineral scaling inside the nozzle orifices, partially closed backflow preventer valves, or hidden underground line leaks. If your pressure drops below 30 PSI, standard spray nozzles will mist rather than throw, destroying your zone overlap.
To fix this, you must first verify your working pressure using a pressure gauge attached to a pitot tube or threaded onto a riser. If pressure is the issue, swapping to high-efficiency rotary nozzles can solve the problem. Rotary nozzles require less operating pressure and lower gallons per minute (GPM) to cover the same distance, making them ideal for systems experiencing pressure degradation.
The Anatomy of a Precision Nozzle Swap
A precision irrigation nozzle swap involves calculating the required radius of throw, selecting matched precipitation rate nozzles, and physically replacing the old high-volume spray heads with rotary nozzles. This process reduces water consumption by up to 30% while ensuring every square inch of turf receives the exact same depth of water. You must match the nozzle’s precipitation rate across the entire zone to prevent dry spots.
When executing a nozzle swap during a yard cleanup or irrigation overhaul, do not mix different types of heads on the same valve zone. If you have standard spray nozzles mixed with rotary nozzles, you will end up with some areas receiving triple the amount of water as others. Keep zones uniform.
| Nozzle Type | Optimal Pressure (PSI) | GPM Demand | Precipitation Rate (in/hr) | Wind Resistance |
|---|---|---|---|---|
| Standard Spray | 30 PSI | High (1.5 – 3.5 GPM) | 1.5 – 2.0 in/hr | Poor (Mists easily) |
| Rotary Nozzle (MP Rotator) | 40 PSI | Low (0.5 – 1.2 GPM) | 0.4 – 0.6 in/hr | Excellent (Heavy droplets) |
| High-Efficiency Spray | 30 PSI | Medium (1.0 – 2.5 GPM) | 1.0 – 1.2 in/hr | Moderate |
As the table demonstrates, rotary nozzles deliver water at a much lower precipitation rate. This slow rate is highly beneficial because it allows the soil to absorb water without runoff, particularly in heavy clay soils. It takes longer to run the zone, but you use significantly less water overall and eliminate the pooling that ruins fresh landscaping work.
How to Swap Irrigation Nozzles Step-by-Step
Swapping your sprinkler nozzles requires turning off the main water line, pulling up the pop-up stem, unscrewing the old nozzle, flushing the line, and screwing on the new high-efficiency rotary nozzle. This simple maintenance task can be completed in an afternoon with minimal tools. Follow this systematic process to ensure a clean installation.
- Step 1: Identify and Mark Low-Performance Heads. Run the irrigation zone and use flags to mark heads that are misting, weeping at the base, or failing to reach their neighboring heads.
- Step 2: Clean and Flush the System. Turn off the system. Unscrew the nozzle from the first flagged head. Turn the zone on briefly to flush out any dirt or grit trapped in the riser. Don’t skip this. A single grain of sand will clog a new rotary nozzle instantly.
- Step 3: Install the New Filter Screen. Insert the check-valve filter screen that comes with your new nozzle into the pop-up stem. This screen prevents debris from entering the delicate internal gears of the rotary head.
- Step 4: Thread on the New Nozzle. Hand-tighten the new rotary nozzle clockwise onto the stem threads. Do not use pliers; you will strip the plastic threads.
- Step 5: Adjust the Arc and Radius. Turn the zone back on. Use the manufacturer’s adjustment tool to set the left and right spray edges (arc) and reduce or increase the distance of the throw (radius) to achieve perfect head-to-head overlap.
How much water does a rotary nozzle save?
Rotary nozzles typically reduce water consumption by 30% compared to traditional spray nozzles because they deliver water in thick, wind-resistant streams rather than a fine mist. This ensures water actually lands on the soil instead of evaporating in the air or blowing onto your driveway.
This efficiency is critical during hot summer months when wind drift can steal half of your irrigation water before it ever touches the grass. By switching to rotary nozzles, you also reduce the load on your water meter, which can help you comply with local water restrictions while keeping your sod install looking pristine.
Long-Term Maintenance of Your Calibrated Irrigation System
Maintaining a calibrated irrigation system requires bi-annual filter cleanings, checking head straightness to prevent tilt, and adjusting run times as the seasons shift. Even the best nozzle setup will degrade if soil settles and tilts the heads away from their perpendicular orientation. A tilted head throws water into the air on one side and into the dirt on the other.
“An irrigation system is only as efficient as its maintenance schedule. Left unchecked, physical shifts in soil and biological growth will degrade water distribution uniformity by 10% to 15% annually.” – Irrigation Association Handbook
During your regular yard cleanup routines, take five minutes to clear turf grass from growing over the pop-up heads. Edging around each head prevents the grass blades from blocking the nozzle spray, which is a common cause of dry patches. Clean the internal filter screens once every spring to remove mineral deposits and algae buildup. A clean system is a reliable system.