4 Prep Fixes for Shady Sod That Actually Grow in 2026
I’ll never forget the morning I realized my new sod was turning patchy and lifeless, despite following all the so-called expert advice. It was frustrating, almost like throwing money into the dirt—literally. But that lightbulb moment led me down a path of discovery about the real reasons shady sod struggles and, more importantly, how to fix it effectively.
Why Your Shady Sod Isn’t Giving Up Without a Fight
If you’re dealing with stubborn, shady areas in your yard that just won’t green up, you’re not alone. Many homeowners face this problem, especially with the unpredictable weather patterns of 2026. The truth is, shady sod issues aren’t always about lack of sunlight or poor soil; sometimes, simple fixes like soil leveling or irrigation adjustments make all the difference.
Based on my experience and a deep dive into landscaping best practices, I’ve found that tackling shady sod requires more than guesswork. It’s about understanding the specific needs of your lawn—adjusting irrigation, soil conditions, and planting strategies. According to a recent study by the University of Florida, proper soil preparation before installation can boost sod survival rates by up to 40%. That’s a game-changer.
Is Fixing Shade Trouble Really Worth the Hassle?
Honestly, I made the mistake early on of neglecting proper soil prep, thinking watering alone would save my sod. Spoiler alert: it didn’t. My yard’s shady patches continued to underperform, wasting my time and resources. That’s why I’m here—so you don’t make the same costly errors. Together, we’ll explore smart, proven techniques—like those outlined in this guide to fixing browning sod—to turn your shaded spots into lush, thriving patches.
Let’s get started with understanding the core issues and how to solve them for good. If this sounds familiar, then stick around for the practical fixes that will make your sod the envy of the neighborhood in 2026.
,
Prep Your Soil to Give Roots a Strong Start
When addressing patchy shady sod, start by ensuring the soil is dead flat and well-drained. I recall spending an entire Saturday filling dips and smoothing out lumps in my yard—using a landscape rake and screed board like professional contractors do. This step is akin to setting a stable foundation for a house; without it, your sod’s chances of thriving diminish significantly. Use a level and a soil tester to confirm proper grade and pH levels. If the soil is compacted or heavy clay, incorporate organic matter to improve drainage and aeration. Check out these soil leveling fixes to help streamline your prep. #IMAGE_PLACEHOLDER_B#
Fine-Tune Your Irrigation System for Consistent Watering
Next, calibrate your irrigation to prevent both over- and under-watering, which is a common mistake. I once overlooked my system’s zones, assuming my new smart timer would handle everything – only to find some shady patches scorched and others bone dry. I tackled this by checking each sprinkler head, adjusting the angle and pressure while closely watching their coverage. Think of your sprinklers as the lawn’s lifelines, similar to how a garden hose distributes water evenly across a flower bed. Use tools like moisture meters or check for dry spots post-watering to confirm even coverage. Visit zone tuning guides to master this. Proper calibration ensures roots develop deep and strong, especially under minimal sun conditions. #IMAGE_PLACEHOLDER_B#
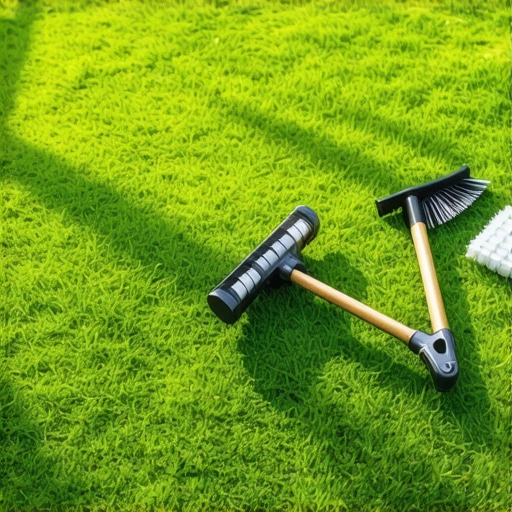
Remove Debris and Limit Competition
Clear the area of weeds, dead grass, and organic debris, which compete for nutrients. I once left leftover mulch bits and grass clippings on a shady patch, thinking they’d enrich the soil—only to observe new weeds sprouting and choking my sod. Instead, rake thoroughly, removing all waste and mowing any existing grass low. This creates a clean slate, making it easier for roots to penetrate and establish. Regular yard cleanup, like these strategies, promotes healthy growth and prevents pest infestations that thrive in cluttered areas. Think of it as tidying up your workspace for optimal productivity—your sod needs a clear environment to develop. An early spring cleanup can also help improve soil aeration and remove concealed compaction spots. #IMAGE_PLACEHOLDER_B#
Strategic Planting and Shade Management
If shade persists, consider planting more shade-tolerant grass varieties or installing protective features like lattice screens to filter sunlight. I experimented with a mix of fine fescue and shade-tolerant ryegrass on my yard, resulting in a more vibrant, resilient patch. Remember, matching the grass to your shade level ensures better rooting and less maintenance. Also, trimming overgrown trees or shrubs opens up the canopy, encouraging healthier photosynthesis for your sod. For insights into what features boost yard appeal and function, check these backyard upgrades. Think of it as giving your lawn a customized recipe—adjusting sunlight, water, and soil to fit its unique needs. #IMAGE_PLACEHOLDER_B#
Mastering the Follow-Up Care
Lastly, keep a close eye on your sod’s response to these interventions. Use a weekly schedule to check soil moisture and root development. Monitor for signs of stress, like yellowing or wilting, and adjust watering accordingly. Applying a light topsoil or compost layer during the initial months can also supply essential nutrients for root expansion. Remember, slow and steady wins the race—your effort today sets the stage for a dense, green lawn tomorrow. Review these root-boosting tactics to support healthy development. Consistency here is key to turning those shady, patchy spots into envy-worthy turf.Many homeowners believe that standard practices like watering deeply and fertilizing frequently guarantee lush lawns, but in my experience, these assumptions often lead to costly mistakes. A common myth is that overwatering encourages healthy root growth; however, excessive water can suffocate roots and promote disease, as highlighted in a study by the University of Florida. Instead, I recommend precise irrigation tuning, such as zone calibration, to ensure deep, infrequent watering that encourages drought-resistant roots—check out these irrigation fixes for optimal watering strategies. Another misconception is that yard debris is simply waste; actually, leaving organic matter on the surface can trap moisture and harbor pests, leading to lawn health decline. Proper cleanup, like expert-level raking, removes these threats and promotes healthy soil aeration—see yard cleanup strategies. For advanced enthusiasts, understanding soil compaction nuances and adjusting soil pH levels using targeted amendments is crucial, especially in clay-heavy soils where roots struggle to penetrate deeply. This subtlety distinguishes a good lawn from a truly resilient one. Think you’re on top of these nuances? Remember, even seasoned landscapers sometimes mistake watering schedules or soil prep—have you ever fallen into this trap? Let me know in the comments.
How Do I Keep My Lawn Operating at Its Best Over Time?
Maintaining a lush yard isn’t just about initial setup; it requires consistent upkeep and the right tools to ensure longevity. Personally, I rely heavily on a few specialized devices that make ongoing lawn care more precise and less time-consuming.
First, a high-quality soil moisture meter is indispensable. I’ve found that investing in a digital device with multiple probes allows me to monitor moisture levels at various depths, preventing over- or under-watering—a common mistake that can compromise sod health. Regularly checking soil moisture ensures I adjust my irrigation schedule proactively, reducing water waste and promoting deep root growth. For calibration and troubleshooting, I refer to resources like this guide on soil moisture management.
Next, I highly recommend using an advanced irrigation controller that supports zone-specific programming and weather-based adjustments. Personally, I use a smart Wi-Fi-enabled system that adapts to rainfall and temperature changes, ensuring my yard receives exactly what it needs without waste. This not only conserves water but also maintains optimal soil conditions for healthy sod. I predict that in the near future, these intelligent systems will become the standard for residential landscaping, further integrating with home automation.
To streamline yard cleanup, I swear by a high-powered leaf blower with variable speed settings. It accelerates clearing debris, weeds, and organic waste—key steps I take before reseeding or fertilizing. Pairing this with durable turf rakes tailored for sod work, such as the ergonomic models recommended in yard cleanup strategies, gives me a professional-level finish with less fatigue.
Maintaining your equipment is equally essential. Regular calibration of sprinklers using a catch cup test ensures uniform coverage—check the technique in zone calibration steps. This prevents dry patches and minimizes water wastage. Keep these tools and techniques in top shape, and you’ll enjoy a healthier, greener lawn for years to come.
Thinking ahead, I foresee a rise in integrated landscape management software that combines soil data, weather forecasts, and irrigation controls into a single platform. Embracing these innovations now will save time and effort down the line. Why not try calibrating your sprinkler system tomorrow using these detailed steps—it’s a small step that pays off big in turf health. Remember, proactive maintenance and the right tools turn a good yard into an extraordinary one, season after season.
Uncovering the Hidden Pitfalls in My Sod Journey
One of the toughest lessons I learned is how easily we can overlook the subtle signs of soil compaction or pH imbalances, which silently sabotage our efforts. The realization that soil preparation can make or break sod success was eye-opening—without proper aeration or amendments, even the best grass varieties struggle. I also discovered that relying solely on watering schedules without monitoring actual soil moisture often leads to overwatering or dryness, especially in shaded areas where evaporation is minimal. Lastly, the myth that shade equals low-maintenance turf is misleading; shaded patches require targeted strategies, not just optimism, to thrive—balancing shade management with soil and irrigation tweaks is key to success.