
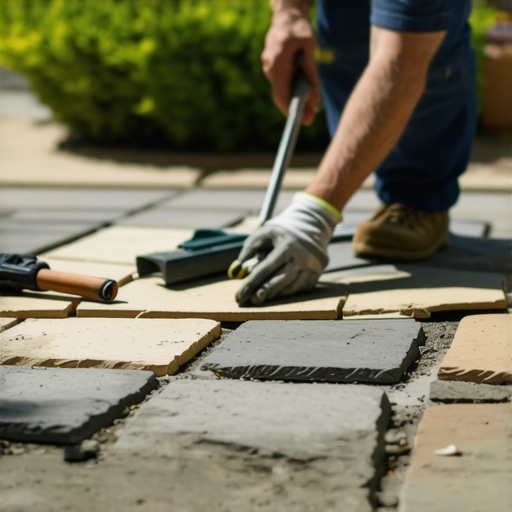
Why Most Budget Walkways Fail Before the First Winter
I recently got called out to tear up a $30,000 patio and walkway sequence that was sinking into a soup of mud and displaced stone because the previous contractor thought he could skip the base preparation. He told the homeowner that the heavy clay soil would act as a natural stabilizer. He was dead wrong. Within six months, the hydrostatic pressure from trapped groundwater pushed the stones upward during the first freeze-thaw cycle, and by spring, the entire path looked like a tectonic disaster. If you do not understand the physics of soil grading and compaction, you are not landscaping; you are just burying money in the dirt. Real budget-friendly work means doing it once and doing it right so you don’t pay for a forensic excavation three years later.
Planning Your Flagstone Layout for Long-Term Stability
A budget-friendly flagstone walkway requires precise planning of the excavation depth, material sourcing, and drainage pitch to ensure the path remains level and safe for decades. By focusing on a dry-set installation using local irregular stone, you can drastically reduce material costs while maintaining high-end curb appeal and structural integrity. It is about engineering, not just aesthetics.
Before you touch a shovel, you have to survey the site. Most homeowners think they can just slap stones on top of the grass. Wrong. You need to account for the finished grade. If your path sits lower than the surrounding sod install, it becomes a literal creek during rainstorms. You need a minimum 2% pitch away from your home’s foundation. This isn’t a suggestion; it is a building requirement to prevent basement flooding and foundation settlement. Start by marking your path with marking paint, then perform a yard cleanup to remove all organic matter. Any grass left under your base will rot, create air pockets, and cause the stones to shift. It is a biological certainty.
How much modified gravel do I need for a walkway base?
To calculate your base material, multiply the total square footage of your walkway by the depth of your base (usually 4 inches for foot traffic) and divide by 27 to get the cubic yardage. For a standard 50-foot walkway that is 3 feet wide, you will typically need about 2.5 cubic yards of 2A modified crushed stone. Always order 10% more than you think you need to account for compaction loss. When you run a plate compactor over that gravel, it is going to shrink. That is the goal. You want a density that resists frost heave.
The Engineering of the Base Layer
The base layer of a flagstone walkway acts as a drainage plane and a structural foundation that distributes the weight of foot traffic into the subgrade. For a budget-friendly project, using compacted crushed stone rather than a poured concrete slab saves thousands in labor and material while providing permeability that benefits the local ecosystem. This layer is the heart of the project.
“A retaining wall or hardscape feature doesn’t fail because of the stone; it fails because of the water trapped behind or beneath it.” – Hardscape Engineering Axiom
Once you have excavated to a depth of roughly 6 to 8 inches, you must address the subgrade. If you have heavy clay, you need to use a non-woven geotextile fabric. This prevents the native soil from migrating upward into your clean gravel. If you skip this, your gravel will eventually disappear into the mud, and your walkway will sink. Use 4 inches of 2A modified stone (crushed limestone or granite), applied in 2-inch lifts. You cannot compact 4 inches at once. Hit it with a power tamper twice for every lift. The tamper should literally bounce off the surface when you are finished. If it feels soft, keep going. You are aiming for 95% standard proctor density.
Material Selection: Choosing Flagstone Without Breaking the Bank
Sourcing flagstone locally is the most effective way to reduce costs, as shipping heavy stone across state lines is where the landscaping budget usually disappears. Opt for irregular flagstone (stand-up grade) rather than sawn, dimensional stone; it is significantly cheaper and provides a more natural look that integrates with existing irrigation systems and garden beds. Look for stone that is 1.5 to 2 inches thick. Anything thinner will snap like a cracker if the base settles even a fraction of an inch.
| Material Type | Estimated Cost (per sq ft) | Durability Rating | Maintenance Level |
|---|---|---|---|
| Irregular Flagstone | $5.00 – $8.00 | High | Low |
| Dimensional Pavers | $8.00 – $15.00 | High | Moderate |
| Pea Gravel / River Rock | $1.00 – $3.00 | Low | High |
| Concrete Slabs | $6.00 – $12.00 | Moderate | Low |
Visit a local stone yard, not a big-box retailer. Big-box stores sell thin, palletized decorative stone that isn’t meant for structural walking paths. Talk to the guys at the yard about “seconds” or broken pallets. Since you are building an irregular path, broken pieces are your best friend. You can piece them together like a puzzle. This is the information gain the pros won’t tell you: the shape doesn’t matter as much as the thickness consistency.
Do I need a weed barrier under flagstone?
Yes, but not the cheap plastic kind. You need a heavy-duty geotextile. Plastic weed barriers trap water, leading to fungal growth and slippery stones. A breathable fabric allows water to pass through into the aquifer while preventing soil mixing. It also makes future yard cleanup easier by preventing deep-rooted weeds from taking hold in the jointing sand. Don’t skip the fabric to save $40; it is a recipe for a maintenance nightmare.
Step-by-Step Installation: The Dry-Set Method
The dry-set method for installing flagstone involves laying the stone directly onto a 1-inch bed of washed concrete sand or stone dust, allowing for natural movement and easy repairs. This technique eliminates the need for mortar and grout, which are prone to cracking in climates with significant temperature fluctuations. It is the most budget-friendly and DIY-accessible approach for a high-quality result.
- Step 1: Screen your 1-inch sand bed over the compacted gravel. Use 1-inch PVC pipes as screed rails to get it perfectly flat.
- Step 2: Lay your largest flagstones first at the entry and exit points. These are your anchors.
- Step 3: Place the remaining stones, keeping joints between 1 and 2 inches wide. If a stone wobbles, add sand under the low spots.
- Step 4: Check for tripping hazards. Every stone must be flush with its neighbor. Use a rubber mallet to set them.
- Step 5: Fill the joints. For a budget build, use stone screenings. For a more permanent, weed-resistant finish, use polymeric sand.
“Soil compaction is the most overlooked aspect of site preparation, yet it is the primary factor in the longevity of any exterior hardscape.” – Penn State Agricultural Extension
Integrating Irrigation and Final Landscaping
A new walkway often disrupts your existing irrigation system. Before you lay your stone, find your lines. If a sprinkler head is now located in the middle of your path, you must move it. Don’t just bury it. This is how you get sinkholes. Dig back to the lateral line and use a swing pipe to relocate the head to the edge of the path. Once the walkway is set, you will likely have a gap between the stone and your lawn. This is the time for a sod install. Cut clean edges and tuck the new sod tightly against the flagstone. This prevents the jointing material from washing away and creates a professional, finished look. A proper yard cleanup at this stage, removing all excess gravel and debris, ensures the surrounding turf can recover quickly. High-end landscaping is 10% installation and 90% finishing details. Don’t be the hack who leaves a mess.
The Long-Term Maintenance Schedule
Maintenance is where the