
Why Most DIY Garden Edging Collapses Within Two Seasons
To build garden borders that last, you must understand that garden edging is a structural retaining system designed to resist lateral soil pressure, freeze-thaw cycles, and relentless lawn mower tire impacts. Most residential lawn borders fail because they rely on cheap plastic strips or shallow bricks tossed onto loose topsoil. Real landscape masonry requires structural stability, starting with a dedicated excavation and a compacted base to manage subsurface moisture and prevent shifting.
“A retaining wall doesn’t fail because of the stone; it fails because of the water trapped behind it.” – Hardscape Engineering Axiom
I always drill into my new crew members: if you don’t fix the soil grading first, every plant you put in the ground is just expensive compost, and every stone border is destined to tilt. Last spring, my crew had to excavate a sprawling flowerbed where a homeowner had laid expensive concrete pavers directly onto clay soil without a trench. Within eight months, hydrostatic pressure pushed the clay outward, tilting the pavers like a row of broken teeth. We had to dig up 150 linear feet of stone, re-grade the clay, establish a proper drainage plane, and rebuild the entire border from the aggregate layer up. It was an expensive lesson that could have been avoided with a proper brick-on-end trench install.
What Is the Brick-on-End Trench Method?
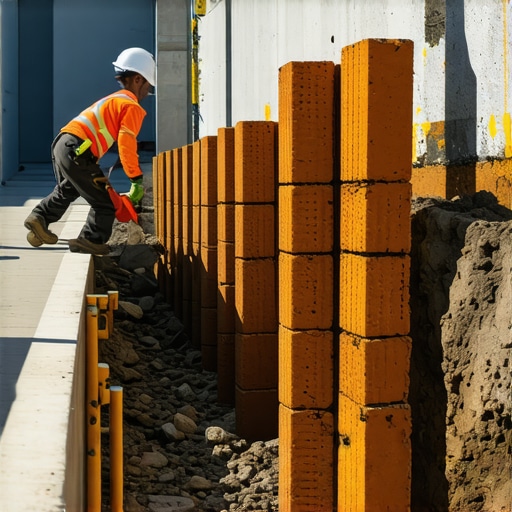
The brick-on-end trench method is a heavy-duty landscaping technique where bricks are buried vertically on their narrow ends inside a hand-dug trench filled with compacted aggregate. This method creates a deep, six-inch physical barrier that stops running turfgrass roots (like Bermuda or Kentucky Bluegrass) from invading planting beds while establishing a clean, permanent mower edge. Unlike metal or plastic, vertical bricks leverage their own weight and deep base setting to resist shifting when run over by commercial lawn mowers.
This method works. By dropping the brick deep into the subgrade, you create a root barrier that cannot be breached by common turf runners. It also keeps your organic mulch inside the bed during heavy rains. We use this system when a client wants a clean look without paying for poured concrete curbing.
How Much Sand and Gravel Base Is Required for Brick Edging?
For a durable brick-on-end border, you need a three-inch compacted base of modified gravel (such as 21A or QA aggregate) topped with a one-inch bedding layer of coarse concrete sand. This combined four-inch structural foundation is critical to prevent settling and frost-heaving during winter temperature swings. Never use fine play sand or dirt for your base, as these materials wash out during heavy rainstorms.
| Material Layer | Recommended Thickness | Purpose | Technical Specification |
|---|---|---|---|
| Subgrade Soil | Excavated to 10″ depth | Native load-bearing foundation | Compacted to 95% Proctor density |
| Road Base Gravel | 3 Inches | Structural support & drainage | CR-6 or 21A Modified Crushed Limestone |
| Coarse Sand | 1 Inch | Screeding & fine leveling layer | ASTM C33 Concrete Sand |
| Brick Border | 6 Inches (Vertical) | Weed barrier & physical border | Hard-burned clay pavers (ASTM C902) |
To calculate your material volume, multiply your total trench length by trench width (usually 6 inches) and depth. Convert this number to cubic yards. Always add a 15% compaction allowance to your final aggregate order.
How Do I Calculate My Material Volume for the Trench?
To calculate the required gravel and sand, multiply your total trench length (in feet) by the width of the trench (0.5 feet) and the depth of the aggregate layer (0.33 feet). Divide the total cubic feet by 27 to find the cubic yards needed. Always round up to ensure you do not run short during compaction.
Step-by-Step Guide to Installing Brick-on-End Trench Edging
Before you swing a mattock, call 811 to map out your property’s underground utilities. Trenching through a live sprinkler line or lighting wire will ruin your afternoon. Follow this precise installation checklist to get professional results:
- Mark the Border: Lay out the bed edge using a thick garden hose for curves or a chalk line for straight runs, then spray it with high-visibility marking paint.
- Excavate the Trench: Cut a vertical trench six inches wide and ten inches deep using a spade shovel, keeping the lawn-side wall completely sheer.
- Tamp the Subgrade: Compact the raw soil bottom of the trench using a hand tamper until the ground is solid and shows no footprint indentations.
- Lay the Gravel Base: Add three inches of modified gravel in one-inch increments, tamping each layer down firmly with a hand tamper.
- Add Bedding Sand: Spread one inch of damp concrete sand over the gravel base, using a custom-cut wood screed board to create a flat, uniform bed.
- Set the Bricks: Place your clay pavers vertically (on-end) against the sheer lawn side of the trench, tapping them flush with a heavy rubber mallet.
- Backfill and Lock: Pack native soil against the lawn side and pour concrete sand into the gaps between bricks, sweeping it clean and wetting it down to lock the border.
Do not skimp on tamping the gravel. The gravel must be so compacted that the steel tamper literally bounces off the surface when dropped. If you see shifting when you step on the gravel, keep tamping.
Maintaining Your Lawn and Garden Border
A brick-on-end border is low maintenance, but it still requires attention during seasonal cleanups. Over time, organic matter will settle into the joints between the bricks, creating a germination bed for windblown weed seeds. Spraying a pre-emergent herbicide along the border twice a year will prevent these seeds from rooting.
“Pre-emergent herbicides must be applied prior to weed seed germination, typically in early spring when soil temperatures reach 55 degrees Fahrenheit.” – Penn State Agricultural Extension
Every spring, run a hard edger along the grass side of the bricks to sever any stubborn turf roots trying to climb over the border. If a brick settles due to localized water pooling, pull it out, pack more aggregate beneath it, and tap it back into alignment with your mallet. Regular irrigation system checks are also critical to ensure sprinkler heads are not spraying directly against the brick faces, which can wash out the joint sand over time.
What Is the Best Way to Keep Grass From Growing Between Bricks?
The most effective way to stop grass and weeds from growing between bricks is to sweep polymeric jointing sand into the gaps, mist it lightly with water, and let it cure. The polymers harden into a flexible mortar that binds the bricks together and blocks root penetration while allowing water to drain. Avoid regular soil or play sand, as they encourage weed germination.
Will Frost Heaving Destruct a Vertical Brick Border?
Frost heaving will only destroy a brick border if you omit the gravel drainage base. If you place bricks directly onto raw clay soil, the water trapped in the clay will freeze, expand, and push the bricks upward out of alignment. A three-inch base of clean, compacted gravel provides voids for freezing water to expand without shifting the bricks.