
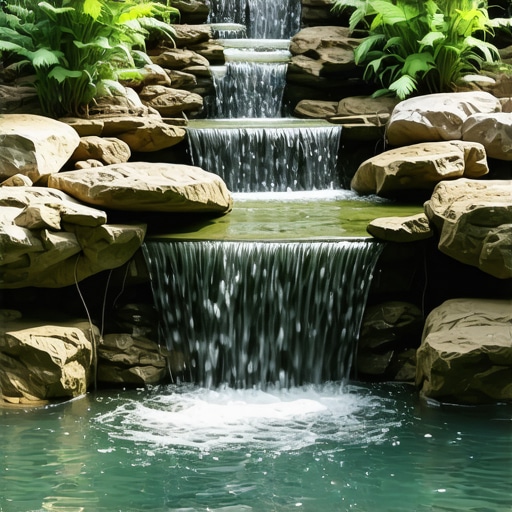
Designing a Backyard Waterfall for Maximum Sound Impact
Most backyard water features are expensive disappointments. Homeowners spend thousands only to end up with a trickle that sounds like a leaky faucet rather than the powerful, white-noise-generating cascade they envisioned. I recently got called out to tear up a $30,000 patio that was sinking because the previous contractor failed to account for the 800 gallons of water leaking from a poorly sealed waterfall basin every week. The hydrostatic pressure had turned the modified gravel base into a slurry. If you don’t respect the physics of water, it will destroy your landscaping. Creating maximum sound impact isn’t about buying the biggest pump; it is about managing the fall height, the strike zone depth, and the resonance of the stone.
The Physics of Acoustic Waterfall Design
To achieve maximum sound impact in a backyard waterfall, you must optimize the vertical drop height and the collision surface to generate specific decibel levels that mask ambient neighborhood noise. Sound is produced by air being trapped and compressed by the falling water curtain, so a 24-inch vertical drop onto a shallow, stony pool will create a significantly higher frequency ‘chatter’ than a 12-inch drop into a deep plunge pool.
How big of a pump do I need for a 2 foot waterfall?
For a standard 2-foot waterfall, you need a pump capable of delivering 1,500 to 2,500 Gallons Per Hour (GPH) at the specific head height of your feature. Head height isn’t just the vertical distance from the pump to the spillway; it includes the friction loss of every foot of pipe and every 90-degree elbow. Use 2-inch Schedule 40 PVC instead of 1.5-inch flexible tubing to reduce friction and maintain the flow volume required for a thick, loud water curtain.
“A retaining wall doesn’t fail because of the stone; it fails because of the water trapped behind it.” – Hardscape Engineering Axiom
The Ground-Up Build: Engineering the Foundation
Before a single rock is moved, the site must be prepared with the same rigor as a structural foundation. We start with a yard cleanup that involves stripping all organic matter down to the subsoil. If you build a 5,000-pound rock feature on top of topsoil, it will settle, the liner will tear, and your investment will vanish into the mud. We excavate the basin and the stream bed, then apply a 2-inch layer of washed masonry sand to protect the 45-mil EPDM liner from stone punctures.
Waterfall Sound Mechanics: Comparison Table
| Waterfall Type | Drop Height (Inches) | Pump GPH per Foot Width | Acoustic Profile |
|---|---|---|---|
| Sheet Cascade | 18-36 | 1,500 | White Noise/Consistent |
| Broken Stream | 12-24 | 2,000 | Rhythmic/Gurgling |
| Plunge Pool | 36+ | 2,500+ | Deep Bass/Booming |
Hydraulic Logic and the ‘Strike Zone’
The ‘strike zone’ is where the magic happens. If the water hits a flat rock, the sound is percussive and sharp. If it hits a deep pool, it’s a low-frequency rumble. For maximum impact, I use a ‘tiered strike’ method. This involves placing ‘amplifier rocks’—hard, non-porous stones like granite—at varying heights to break the water curtain. This creates a multi-tonal soundscape that mimics a mountain creek.
What is the best stone for a loud backyard waterfall?
The best stone for sound resonance is igneous rock, specifically granite or basalt, because their high density reflects sound waves rather than absorbing them like porous limestone or sandstone. Larger ‘boulder-grade’ stones should be used for the main structure, while smaller river cobble (3-5 inches) should be placed in the strike zone to vary the pitch of the falling water.
Integrating Irrigation and Sod Install
A waterfall doesn’t exist in a vacuum. The surrounding landscaping must be engineered to handle the increased moisture. We often have to reroute the existing irrigation lines to ensure we aren’t over-saturating the soil around the waterfall’s structural base. Once the feature is tested for 48 hours, we perform a sod install using a high-quality turf like Kentucky Bluegrass or Turf-Type Tall Fescue, depending on the USDA hardiness zone. This sod acts as a biological filter for runoff before it hits the feature’s basin.
- Excavation: Dig 6 inches deeper than your planned depth for the base.
- Compaction: Use a plate compactor until the base reaches 95% Proctor density.
- Liner: Use 45-mil EPDM only; never use PVC liners for permanent features.
- Plumbing: Solvent-weld all Schedule 40 PVC joints; avoid hose clamps underground.
- Filtration: Install a biological skimmer to keep the pump clear of debris.
“Surface water runoff and subsurface hydrostatic pressure are the primary catalysts for structural hardscape failure in residential environments.” – Principles of Geotechnical Engineering
The 24-Hour Leak Test Protocol
Do not skip this. Once the liner is in and the plumbing is connected, fill the basin and mark the water level. Let it sit for 24 hours with the pump off to check for basin leaks. Then, run the pump for 24 hours to check for ‘splash-out’ or stream-bed leaks. If the water level drops more than 1/4 inch (accounting for evaporation), you have a leak. Finding a leak after the boulders are set is a nightmare that costs thousands to fix. It will rot the surrounding soil and ruin your sod install.
Maintenance and Long-Term Performance
A high-impact waterfall requires a clean system. Every spring, perform a thorough yard cleanup around the feature to prevent leaf litter from entering the skimmer. Check the pump’s intake for calcium scale, especially in regions with hard water. Maintaining the water chemistry is vital; high pH levels can lead to algae blooms that slick the rocks and dampen the sound resonance. Keep the water clear, the stones clean, and the pump at the correct GPH, and your waterfall will remain a structural and acoustic masterpiece for decades.