
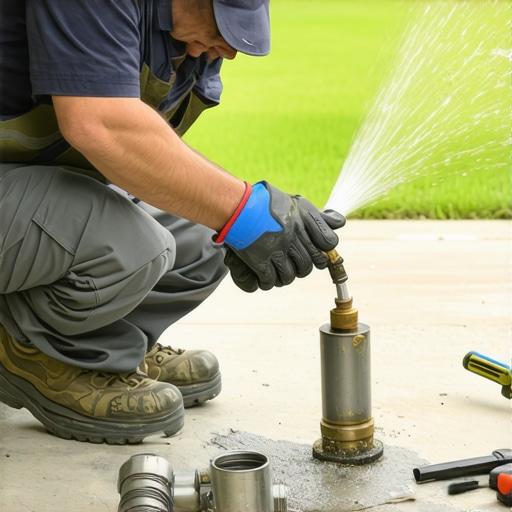
The Forensic Autopsy: Why Irrigation Systems Fail Underground
I recently got called out to tear up a $30,000 patio that was sinking because the previous contractor ignored a hairline fracture in a 2026 PVC line. Most guys see a wet spot and think ‘leaky head.’ They don’t look deeper. I found that the original installer didn’t use a proper base, and the hydrostatic pressure of the water-saturated clay soil literally crushed the pipe against a jagged piece of limestone. It was a mess. The patio was heaving, the sod was rotting from the roots up, and the homeowner was hemorrhaging money. I had to excavate the entire sub-base just to reach the failure point. This is why soil grading and proper material selection aren’t optional; they are the foundation of engineering. If you don’t understand how soil shear affects buried infrastructure, you shouldn’t be holding a shovel.
The Mechanics of No-Glue Slip Fix Repairs
To fix a broken irrigation pipe using a no-glue slip fix, you must first clear all debris, cut out the damaged 2026 pipe section with a square-cut tool, and insert a telescopic mechanical coupling or push-fit fitting that uses internal EPDM O-rings to create a watertight seal. These fittings eliminate the need for solvent welding, which is prone to failure in the wet, muddy conditions typical of a yard cleanup or emergency repair. This method allows for immediate system pressurization without the 24-hour cure time required by traditional PVC cements.
“Standard Class 200 PVC pipe has a thinner wall than Schedule 40, making it more susceptible to external point-loading from rocks or roots.” – Plastic Pipe Institute Technical Manual
How much pressure can a no-glue slip fix handle?
Most mechanical slip-fix couplings for irrigation are rated for 150 to 200 PSI, which far exceeds the 40 to 70 PSI found in most residential lateral lines. However, the integrity of the seal depends entirely on the cleanliness of the pipe exterior. If you have even a speck of grit on that 2026 pipe, the O-ring will scar. It will leak. Clean it until it shines. I tell my crew that the pipe needs to be clean enough to eat off of before they slide that fitting on. We use a scouring pad to remove any oxidation or ‘glaze’ from the manufacturing process. It’s a five-minute step that prevents a five-hour callback.
| Pipe Type | Wall Thickness (Inches) | Pressure Rating (PSI) | Best Repair Method |
|---|---|---|---|
| 2026 (Class 200) | 0.060 – 0.090 | 200 PSI | Mechanical Slip-Fix |
| Schedule 40 | 0.109 – 0.154 | 280-450 PSI | Solvent Weld or Slip-Fix |
| SDR-21 | 0.060 – 0.100 | 200 PSI | Gasketed Coupling |
Phase 1: Excavation and Forensic Diagnosis
Stop digging like a maniac. When you suspect a leak under a new sod install or near a landscaping feature, you need to use a trenching spade, not a pickaxe. You’re looking for the ‘source point.’ Water travels the path of least resistance, so the surface puddle is rarely directly over the break. Dig a hole at least 12 inches wider than the pipe on all sides. You need room to work. If you’re cramped, you’ll get mud in the fitting. Mud is the enemy of the O-ring. Once the pipe is exposed, wipe it down. Identify the pipe rating. If it’s 2026 thin-wall pipe, you have to be extremely careful with your pipe cutters. These pipes can shatter if the blade is dull or the ground is too cold.
Why do sprinkler pipes break in 2026 PVC systems?
Thermal expansion and contraction account for nearly 30% of failures in shallow-buried irrigation systems. In regions with significant freeze-thaw cycles, the soil moves. If the pipe is ‘pinched’ by a rock or a concrete footer, it can’t flex. It snaps. Using a no-glue slip fix provides a small amount of mechanical ‘give’ that a rigid solvent weld does not. It acts almost like an expansion joint. This is a critical advantage when you’re doing a yard cleanup and realize the previous guys buried the lines only 4 inches deep. Always aim for 8 to 12 inches of cover to protect against aeration tines and lawn equipment.
- Trenching Spade: For precise excavation without severing nearby lines.
- PVC Pipe Cutters: Ensure a square, burr-free cut.
- Emery Cloth: To prep the pipe surface for the O-ring.
- Mechanical Slip-Fix: Sized specifically for 2026 or Schedule 40.
- Marking Paint: To map the line before backfilling.
Phase 2: Installation of the Telescopic Coupling
Once the damaged section is removed, measure the gap. A standard slip-fix coupling has a ‘collapsed’ and ‘extended’ length. Your gap must be smaller than the maximum extension but larger than the collapsed body. Slide the nut and the gasket onto the pipe if using a compression style. If using a push-fit ‘SharkBite’ style for irrigation, just mark the depth. Push it home. You should feel a distinct ‘thud’ when the pipe seats against the internal stop. It’s a tactile confirmation. I don’t trust any fitting that doesn’t ‘talk’ back to me during the install. Don’t skip the deburring. A sharp edge on the PVC will slice the O-ring like a razor.
“The primary cause of joint failure in residential irrigation is improper cure time of solvent cements in high-moisture environments.” – Irrigation Association Standards
Can I use a slip fix on a main line?
Yes, provided the fitting is rated for constant pressure. Many cheap ‘slip’ couplings found at big-box stores are only rated for lateral lines (after the valve). For a main line, I only use high-pressure mechanical couplings with a locking collar. If that fitting slips off under 80 PSI of constant pressure, you’re going to have a sinkhole in your yard by morning. Check the PSI rating stamped on the side of the fitting. If it doesn’t say at least 150 PSI, throw it away. I’ve seen ‘pro’ contractors use drain-waste-vent (DWV) fittings on irrigation lines. Those people are hacks. They don’t belong on a job site.
Phase 3: Backfilling and Sod Restoration
Don’t just throw the dirt back in. This is where most people fail. You need to ‘shade’ the pipe. This means hand-packing fine soil or sand around the repair before throwing the heavy clods and rocks back in the hole. If a rock sits on top of your new slip-fix, the first time a mower drives over it, the point-load will crack the fitting. Pack it in 3-inch ‘lifts.’ Step on it. If the soil isn’t compacted, it will settle later, leaving a trip hazard in your lawn. If you’re doing a sod install over the repair, ensure the soil is level and slightly mounded to account for future settling. Water the area immediately to help the soil particles bind.
The Long-Term Outlook for No-Glue Repairs
A properly installed mechanical fix will outlast the pipe itself. The O-rings are made of high-grade synthetic rubber that doesn’t degrade in the soil. The real threat is poor installation. If you’re doing a yard cleanup, check your irrigation controller first. If the pump is cycling on and off when the system is supposed to be off, you have a leak. Don’t wait. A small leak under a sod install will turn into a nightmare of fungus and root rot. Fix it now. Use the right parts. Don’t be the guy who uses duct tape and ‘hope’ to fix a pressurized water line.