
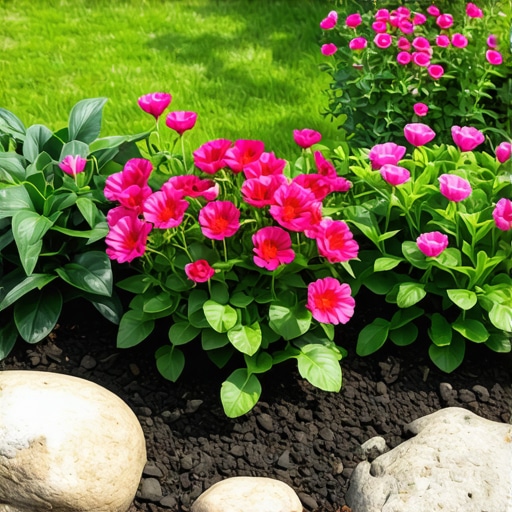
The Engineering Logic of a Professional Rock Border
To build a simple rock border for flower beds, you must prioritize excavation depth, base compaction, and hydrostatic drainage to ensure stones remain level and prevent soil erosion into the surrounding turf or sod install zones. A border is not just a visual boundary; it is a structural barrier that manages the transition between two distinct biological zones. If you fail to account for the physics of the soil, your rocks will sink within two seasons. Guaranteed.
I recently got called out to tear up a $30,000 patio that was sinking because the previous contractor failed to realize that the clay subgrade was holding water like a bathtub. The same logic applies to your flower bed borders. If you simply place rocks on top of the grass, you are creating a dam. Water will pool, your soil will sour, and the freeze-thaw cycle will heave those expensive stones until your yard looks like a landslide. We do things differently here. We build from the subgrade up. You cannot expect a stable finish on a fluid foundation. It is the height of negligence to ignore soil grading during a landscaping project. I have seen countless homeowners waste thousands on high-end nursery stock only to have the plants drown because their ‘simple’ rock border blocked the natural path of runoff.
“A retaining wall doesn’t fail because of the stone; it fails because of the water trapped behind it.” – Hardscape Engineering Axiom
The Science of the Trench: Why Depth Matters
The first mistake is skipping the trench. You need to excavate at least 4 to 6 inches down. This isn’t just about aesthetics; it is about establishing a ‘keyway’ that locks the stones into the earth. When we perform a yard cleanup, we often find that the biggest issue is lack of edge definition. A deep trench allows you to install a base of compacted aggregate. I prefer 3/4-inch modified stone or ‘crusher run.’ This material has both large chunks and fine dust, which, when compacted, creates a solid, unyielding surface that still allows for micro-drainage.
How deep should I dig for a flower bed border?
For a professional-grade rock border, you should dig a trench 6 inches deep and 2 inches wider than your largest stones to allow for a 2-inch compacted aggregate base and proper lateral stability. This depth ensures that the stones sit below the frost line’s immediate influence and prevents grass roots from creeping under the border into your flower beds.
| Rock Type | Density (lbs/cu.ft) | Porosity | Primary Failure Mode |
|---|---|---|---|
| River Rock (Smooth) | 145-155 | Low | Rolling/Shifting out of alignment |
| Limestone (Angular) | 160-170 | Medium | Chemical leaching (raises soil pH) |
| Granite Boulders | 165-180 | Very Low | Sinking due to excessive weight |
| Flagstone (Stacked) | 140-150 | Medium | Delamination in freeze-thaw cycles |
Selecting Your Material: More Than Just Aesthetics
Stop buying those bagged rocks from big-box stores. They are overpriced and often lack the structural integrity needed for a long-term border. If you are in a region with heavy clay, like the Southeast, you need a rock that can withstand high moisture without crumbling. If you are in a sandy environment, your concern is preventing the rocks from ‘diving’ into the loose soil. Use a non-woven geotextile fabric at the bottom of your trench. This separates the soil from your gravel base, preventing the two from mixing and losing structural integrity. Don’t use the cheap plastic ‘weed barrier’—it doesn’t drain. Use professional grade 4-ounce fabric. It is the only way to ensure your irrigation systems don’t wash out your foundation.
Is limestone or granite better for garden borders?
Granite is superior for long-term stability and soil health because it is chemically inert and extremely dense, whereas limestone can leach carbonates into the soil over time, significantly raising the pH levels and potentially harming acid-loving plants like azaleas or blueberries. Granite’s angular fractures also allow for better interlocking when stacking or placing stones in a border configuration.
- Step 1: Mark the line with a garden hose or marking paint. No straight lines—nature doesn’t work in 90-degree angles.
- Step 2: Excavate the trench to a 6-inch depth. Save the soil for grading elsewhere.
- Step 3: Lay down your non-woven geotextile fabric. Ensure it crawls up the sides of the trench.
- Step 4: Add 2 inches of 3/4-inch modified gravel. This is your foundation.
- Step 5: Compact the gravel. Use a hand tamper. The tamper should literally bounce off the surface when it is ready.
- Step 6: Place your stones. Set the largest stones first. These are your ‘anchors.’
- Step 7: Backfill with a small amount of aggregate to lock the stones in place.
- Step 8: Integrate your irrigation heads. Ensure the border doesn’t block the spray pattern of your rotors or misters.
The Biological Impact of Rock Borders
A rock border affects the micro-climate of the root zone. Rocks act as thermal masses, absorbing heat during the day and releasing it at night. This can be beneficial in cooler climates but can stress plants in high-heat zones like Arizona or Texas. You must also consider the nitrogen cycle. If you are doing a fresh sod install next to your new border, the rocks can create a ‘heat island’ effect that dries out the edge of the turf faster than the rest of the lawn. You will need to adjust your watering schedule to compensate for this localized evaporation. Do not scalp the grass near the rocks. It will die. Keep it high to shade the soil.
“Effective landscape edging is 20% about the visible stone and 80% about the subterranean management of water and root systems.” – Nursery & Landscape Association Standards
Maintenance and Long-Term Stability
Your border will settle. It is inevitable. However, a properly built border will settle evenly. Every spring, as part of your yard cleanup, you should check for any stones that have been pushed out of alignment by frost heave. If a stone has moved, do not just push it back. Remove it, check the gravel base, re-tamp, and reset. This is the difference between a professional landscape and a DIY mess. Also, watch for ‘mulch volcanoes’ against your rocks. Mulch should never be higher than the border itself. If it is, the mulch will wash over the rocks during a heavy rain, ruining the aesthetic and providing a bridge for weeds to cross into your bed. It will rot the stems of your shrubs if it piles too high. Don’t skip the maintenance. A border is a living part of the yard. Treat it with the respect engineering demands.