
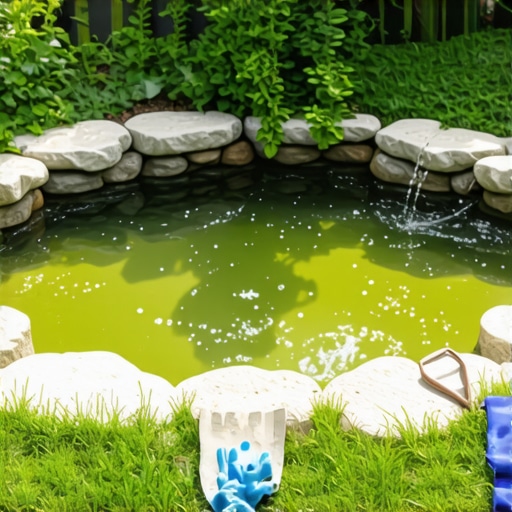
How to Install a Simple Backyard Pond in One Weekend: An Engineering Approach to Water Features
Planning a backyard pond is 80 percent engineering and 20 percent aesthetics. Most DIY enthusiasts fail because they treat a water feature like a plastic tub in the ground rather than a living biological filter and structural excavation. To build a pond that lasts decades rather than months, you must understand soil compaction, hydrostatic pressure, and the nitrogen cycle. Forget the ‘pond kits’ sold at big-box stores. Real ponds require 45-mil EPDM liners, high-efficiency pumps, and properly graded shelves. A weekend install is possible, but only if you have your elevations shot and your materials staged before Friday night.
The Professional Creed: Soil Before Stone
I always drill into my new crew members: if you don’t fix the soil grading first, every plant you put in the ground is just expensive compost. The same rule applies to ponds. I’ve seen $10,000 installations fail because the contractor didn’t realize the yard sloped toward the feature. When it rained, the pond became a catch basin for every chemical and bit of silt on the property. We spent three days excavating a French drain system just to save the fish from nitrogen toxicity. You must control the water outside the pond before you can manage the water inside it. Don’t skip the transit level. One inch of error across a ten-foot span will leave your liner exposed and your pump running dry.
Selecting the Site: More Than Just a Flat Spot
To install a backyard pond, you must select a site with at least six hours of sunlight for biological health while ensuring the location sits on high ground to prevent runoff contamination. Avoid placing the feature under heavy canopy trees like walnuts or oaks to minimize leaf debris and root intrusion. Check for underground utilities via 811 before any excavation begins. Soil stability is your primary concern; avoid areas with high water tables where hydrostatic pressure can ‘float’ your liner out of the ground. It is a disaster. You need a stable, well-draining substrate to support the weight of the water, which weighs approximately 8.34 pounds per gallon.
“Site drainage is the most critical factor in pond longevity. Surface runoff entering a pond carries sediment, fertilizers, and herbicides that can collapse the delicate aquatic ecosystem.” – Penn State Agricultural Extension
The Materials Breakdown: Why Quality Beats Price
Don’t buy PVC liners. They are brittle and fail within three seasons. Professional builds use 45-mil EPDM (Ethylene Propylene Diene Monomer) because it is UV resistant and stays flexible even in sub-zero temperatures. You also need a non-woven geotextile underlayment. This isn’t optional. It protects the liner from sharp rocks and prevents gas bubbles from forming underneath. Your pump should be rated for the total volume of the pond, capable of turning over the entire water mass at least once per hour. If your pond is 500 gallons, you need a 500 GPH pump at your specific ‘head height’ (the vertical distance the pump must push the water).
| Material Item | Professional Specification | Estimated Cost (500 gal) |
|---|---|---|
| Liner | 45-Mil EPDM Rubber | $250 – $400 |
| Underlayment | 8oz Non-Woven Geotextile | $80 – $120 |
| Pump | Submersible Mag-Drive (800 GPH) | $150 – $220 |
| Filtration | Pressure Filter with UV Sterilizer | $300 – $500 |
| Rock/Boulders | Cleaned River Rock (Mixed sizes) | $200 – $600 |
Phase 1: Excavation and Shelf Engineering
Digging a hole is not building a pond. You need a series of tiered shelves. The first shelf should be 8 to 12 inches deep for marginal plants. The second shelf, or the ‘deep zone,’ should be at least 24 to 36 inches deep. This depth is critical for overwintering and maintaining stable water temperatures during the heat of summer. Use a level across the entire excavation. If one side is lower, the water will spill out there, leaving the liner exposed on the high side. This looks amateur and degrades the rubber. Pack the soil on the shelves firmly. If the soil is loose, the weight of the rocks will cause the shelves to slump, tearing the liner. It must be solid.
How much modified gravel do I need for a pond base?
For a standard backyard pond, you do not use modified gravel inside the excavation; instead, use a 2-inch layer of washed masonry sand or a heavy-duty geotextile underlayment to protect the EPDM liner. Gravel is used only on the shelves as a substrate for beneficial bacteria and to anchor plants. Ensure all stones are ‘river washed’ to prevent sharp edges from puncturing the membrane. Avoid limestone as it will spike your pH levels and kill your fish.
Phase 2: Liner Placement and Edging
Once the hole is clean and the shelves are firm, lay your underlayment and then your EPDM liner. Do not stretch it. Let it drape naturally into the contours. As you fill the pond with water, the weight will pull the liner into the corners. This is when you make your final tucks and folds. The ‘edge’ is where most ponds fail aesthetically. You need a ‘shelf’ for your edging stone so the rocks sit half-in and half-out of the water. This hides the liner completely. If you just pile rocks on top of the ground, you will see the black rubber. It is ugly. Use waterfall foam (black expanding foam) to fill gaps between rocks. This forces water to flow over the stones rather than under them.
“Water features must incorporate a biological filter with sufficient surface area for Nitrosomonas and Nitrobacter bacteria to convert ammonia into nitrates.” – International Pond Association Standards
The Bio-Mechanical System: Keeping the Water Clear
You need two types of filtration: mechanical and biological. The mechanical filter (skimmer) removes leaves and debris before they sink and rot. The biological filter (waterfall box or pressure filter) houses the bacteria that process fish waste. Without this, your pond will turn into pea soup within a week. Oxygenation is the third pillar. A waterfall or air stone is mandatory. Stagnant water is a breeding ground for mosquitoes and anaerobic bacteria. Do not cut corners here. A cheap pump will burn out in months, and a small filter will require cleaning every two days. Buy for the long haul.
Can I run my pond pump on an existing irrigation circuit?
No. Pond pumps must run 24/7 to maintain the biological colony and oxygen levels. Most irrigation systems are on timers and do not provide the continuous amperage required. You must install a dedicated GFCI (Ground Fault Circuit Interrupter) outlet near the pond to ensure safety and consistent operation. Hiring an electrician for this step is non-negotiable to prevent electrocution risks in wet environments.
Weekend Installation Checklist
- Confirm 811 utility markings are complete.
- Calculate total pond volume (Length x Width x Average Depth x 7.48).
- Purchase 45-mil EPDM liner with 2 feet of overlap on all sides.
- Excavate tiered shelves with a slight inward slope for stability.
- Install non-woven geotextile underlayment.
- Position the skimmer and waterfall weir at opposite ends for maximum circulation.
- Wash all river rocks before placement to prevent turbidity.
- Treat tap water with a dechlorinator before adding any biological starters.
Maintaining the Ecosystem
After the weekend install, the work isn’t over. You need to establish the nitrogen cycle. Don’t throw 20 koi in on Monday. Start with a few hardy goldfish or just the plants. Monitor the pH, ammonia, and nitrite levels. Keep the skimmer basket clean. If you see algae, don’t reach for chemicals. Chemicals are a crutch for poor engineering. Instead, add more floating plants like lilies to shade the water and starve the algae of sunlight. A properly engineered pond is a self-sustaining system. It should require less work than the grass it replaced. Stop mowing and start managing your water chemistry.