
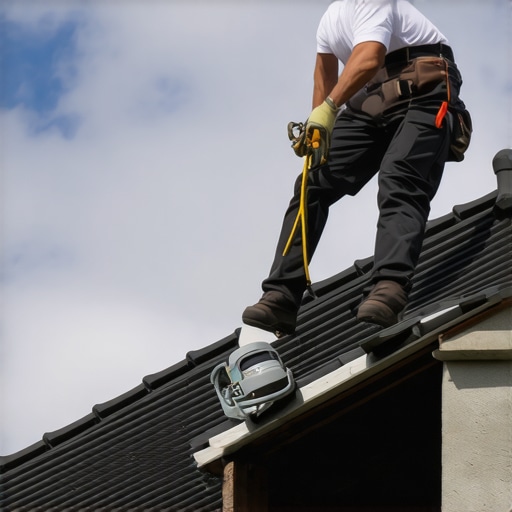
How to Patch an Emergency Office Roof Leak While Waiting for Pros
Discovering a commercial roof leak in the middle of a business day is more than a minor inconvenience; it is a high-stakes facility crisis. For business owners and property managers, the sight of water dripping onto expensive inventory, server racks, or office workstations triggers an immediate countdown. Research indicates that mishandled or ignored commercial leaks cause an average of $40,000 to $80,000 in total damage, a figure that accounts for structural repairs, inventory loss, and the devastating cost of business disruption.
As a roofing professional focused on high-performance operations, I always tell my clients that the first 60 minutes of a leak are the most critical. What you do in that first hour determines whether you’re facing a simple repair or a full-scale insurance claim. I am Chris Densmore, and in this guide, I will walk you through the strategic steps to contain the damage and apply a temporary patch that will hold your facility together until an Emergency Commercial Roofer can arrive on-site.
The First 5 Minutes: Immediate Containment Protocols
When a leak is active, your primary objective is interior mitigation. You cannot fix the roof if the building’s interior is being destroyed. The moment a leak is spotted, clear the “splash zone.” Move all electronics, sensitive documents, and inventory away from the area. If the equipment is too heavy to move, utilize heavy-duty plastic sheeting to create a protective canopy.
One of the most effective professional tricks for interior containment is the “bucket and rope” method. If you have a drop ceiling with acoustic tiles, the water often pools on top of the tile until it becomes heavy enough to collapse. This can be dangerous and messy. Instead, identify the wettest tile, carefully remove it, or – if the tile is already sagging – use a small tool to poke a controlled hole in the center. This directs the water into a single stream, which you can then catch in a bucket. To prevent splashing, tie a piece of twine or rope to the ceiling grid and let it hang down into the bucket; the water will follow the surface tension of the rope, eliminating the “splatter” that ruins carpets.
This focus on immediate water control is vital because moisture doesn’t just damage the surface; it compromises the structural integrity of the building. This is a principle we see across all construction disciplines. For instance, Building 2026 Retaining Walls: Why Drainage Matters emphasizes that uncontrolled water is the primary enemy of any structure. Whether it is a wall or a flat roof, if you don’t control where the water goes, the structure will eventually fail.
Identifying the Source on a Commercial Flat Roof
Finding the source of a commercial roof leak is notoriously difficult. On a residential sloped roof, water usually moves straight down. On a commercial flat roof, water can enter at one point, travel 50 feet along a metal deck or insulation gap, and finally emerge in an office far from the original puncture.
To find the entry point, head to the roof (only if it is safe to do so) and look for the following common culprits:
- TPO or EPDM Seams: Over time, the heat-welded or glued seams of your membrane can fail. Look for areas where the membrane is “smiling” (peeling back).
- HVAC Curbs: The units sitting on your roof are heavy and vibrate. This movement can crack the flashing or sealant around the base of the unit.
- Clogged Drains and Scuppers: If you see standing water (ponding), the leak might not be a hole at all, but rather water backing up over the top of the flashing because the drains are filled with debris.
- Punctures: Look for physical damage caused by fallen branches, tool drops from HVAC technicians, or bird peckings.
If the source isn’t immediately obvious, don’t waste hours searching. This is the point where you must call a professional Emergency Commercial Roofer to perform a thermal scan or a flood test once the weather clears. In the meantime, use the map below to find a local service hub that can provide rapid response times for your area.
Essential Supplies for a Temporary Patch
Every facility manager should have an “Emergency Roof Kit” ready in the maintenance closet. When a commercial roof leak strikes, you don’t have time to run to the hardware store. Your kit should include:
- Roofing Mastic (Wet/Dry): This is a thick, asphalt-based sealant. Ensure it is rated for “wet application,” meaning it will stick even while it’s raining.
- Heavy-Duty Tarps: Reinforced polyethylene tarps are best.
- Sandbags: These are the only safe way to hold a tarp down on a flat roof. Never use bricks or rocks, which can tear the membrane.
- TPO/EPDM Repair Tape: Brands like Eternabond are excellent for quick, peel-and-stick fixes on punctures.
- Utility Knife and Scrub Brush: To clean the area before applying sealants.
Choosing the right sealant is critical. Using a generic bathroom silicone on a TPO roof will fail almost instantly because the chemical compositions are incompatible. This specificity in materials is a common theme in high-stakes repairs; for example, Repairing 2026 Waterfall Leaks with Foam Sealant highlights how specific foam sealants are required to stop active water flow in landscaping features – commercial roofing requires that same level of material precision.
Step-by-Step: Applying a Temporary Emergency Patch
Once you have identified the likely source of the Commercial Roof Leak and gathered your supplies, follow these steps to secure the building. Remember: your goal is not a “pretty” fix; it is a “dry” fix.
Step 1: Clean the Area
Adhesion is the biggest challenge during a storm. Use a scrub brush to remove silt, algae, and loose debris from around the leak site. If there is standing water, use a squeegee or a push broom to move the water away from the repair zone. Even “wet-stick” mastics perform better when the surface isn’t submerged.
Step 2: The Mastic Method (For Seams and Small Punctures)
If you find a crack in a curb or a small tear in the membrane, apply the roofing mastic generously. Use a trowel or a putty knife to spread the mastic at least 3 inches beyond the edges of the damage. For larger cracks, you can “bridge” the gap by laying a piece of mesh or even a strip of scrap tarp over the first layer of mastic, then applying a second layer over the top. This creates a reinforced “bandage.”
Step 3: The Tarp Method (For Larger Damage)
If the damage is widespread or you cannot find the exact hole, a tarp is your best bet. Position the tarp so that it covers the suspected area and extends several feet toward the high side of the roof (the slope). On a commercial flat roof, you must “picture frame” the tarp. This means placing sandbags along all four edges of the tarp to prevent wind from getting underneath it. Crucial Warning: Never use nails, screws, or staples to secure a tarp to a commercial flat roof. You will create dozens of new leaks and potentially void your roof’s warranty.
It is important to manage expectations here: these are temporary measures. A mastic patch or a sandbagged tarp is a “band-aid.” They are not designed to withstand the thermal expansion and contraction of the next weather cycle or the high winds of a major storm. They are designed to give you 24 to 48 hours of protection until a professional crew can perform a permanent, warranted repair.
Documentation for Insurance and Professional Repairs
Before you apply any patch, and certainly after you finish, you must document everything. Insurance adjusters and professional Commercial Roofers for Leaks need to see the original state of the damage to accurately assess the repair scope.
Take high-resolution photos of the interior damage (ceiling tiles, carpets, equipment) and the exterior source. Take a video of the water entering the building if possible. When the roofing contractor arrives, this documentation allows them to see through your temporary patch to the underlying issue. Furthermore, having a clear “before and after” of your emergency efforts proves to your insurance company that you took reasonable steps to mitigate further loss, which is often a requirement for claim approval. Professional documentation speeds up the claims process and ensures you are reimbursed for both the emergency supplies and the eventual permanent repair.
When to Stop: Safety Risks and Professional Limits
In my career, I have seen too many “preventable” accidents occur during emergency repairs. Your safety and the safety of your staff are worth more than any office equipment. You must stop and wait for a professional if any of the following conditions exist:
- High Winds or Lightning: A tarp becomes a sail in 30 mph winds, and a flat roof is the last place you want to be during a lightning storm.
- Structural Sagging: If the roof deck looks “spongy” or you see the ceiling joists bowing inside, the roof may be at risk of collapse due to the weight of the water. Get out of the building immediately.
- Darkness: Never attempt a roof repair at night. Trip hazards like gas lines, conduits, and roof edges are invisible in the dark.
Just as you wouldn’t attempt certain dangerous tree removals without the right gear, as discussed in The Safe Way to Remove a Large Dead Limb Without a Pro, you must recognize when a commercial roofing situation has exceeded your DIY capabilities. If the roof is unsafe, focus on interior containment and wait for the experts.
Conclusion: Transitioning to a Permanent Solution
Managing an Emergency Roof Leak for Office Building operations is a test of leadership and preparation. By following the containment protocols, identifying the source, and applying a strategic temporary patch, you can save your business tens of thousands of dollars in avoidable damage. However, remember that the “patch” is only the beginning of the fix.
Once the storm has passed and the immediate crisis is contained, you need a solution that is backed by a warranty and professional engineering. Don’t let a temporary fix become a permanent liability. Contact Peak to Peak Roofing & Exteriors today for a comprehensive inspection and a permanent repair plan that will protect your investment for years to come. Our team is ready to transition your facility from “crisis mode” back to “business as usual.”