
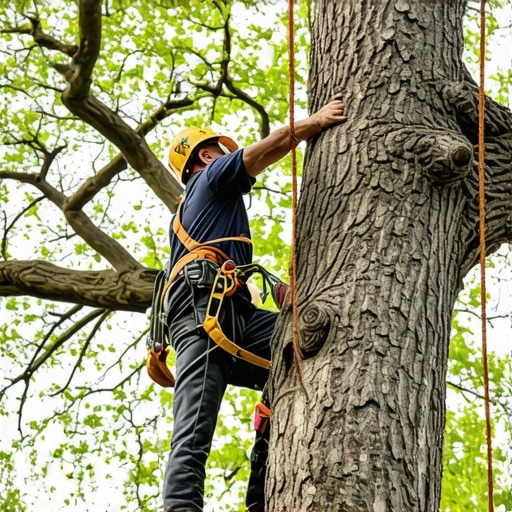
The Engineering Reality of Deadwood Management
Removing a large dead limb is not a task of brute force; it is an exercise in civil engineering and biological preservation. To remove a large dead limb safely, you must utilize the three-cut method to manage the gravitational load and prevent bark stripping that destroys the tree’s vascular system. This technical approach ensures that the weight of the limb is removed in sections, allowing the final cut to be made precisely at the branch collar without tearing the living tissue of the trunk. Physics dictates that a dead limb, often weighing hundreds of pounds, will not fall straight down but will pivot on its last remaining fibers, creating a lethal arc for anyone standing on a ladder. Respect the weight.
The Apprentice Lesson: Soil, Structure, and Survival
I always drill into my new crew members: if you don’t fix the soil grading first, every plant you put in the ground is just expensive compost. I remember a job three years ago where a homeowner tried to ‘save’ a massive White Oak by pruning it while standing on a ladder. He didn’t understand that the tree’s health started at the root flare. He had buried the flare under six inches of mulch—a classic mulch volcano—which led to root rot and eventual limb die-back. While he was up there, the ladder slipped on the loose, uncompacted soil he’d recently ‘landscaped.’ He survived, but the tree didn’t because his haphazard hacking left a three-foot tear down the trunk. We had to remove the whole specimen. Technical wisdom isn’t just about the saw; it’s about understanding how the xylem and phloem respond to every cut you make. If you don’t respect the branch bark ridge, you are just signing a death warrant for the entire canopy.
“A pruning cut that removes the branch collar will significantly inhibit the tree’s ability to compartmentalize decay, leading to long-term structural instability.” – ANSI A300 Pruning Standards
Identifying the Critical Anatomy: Branch Collars and Ridges
Before you even touch a saw, you must locate the branch collar—the swollen area of tissue at the base of the limb where it meets the trunk. This area is packed with chemically protective genes that allow the tree to seal itself. If you cut into this collar, you invite pathogenic fungi directly into the heartwood. Conversely, leaving a ‘stub’ is equally dangerous, as the deadwood will rot back into the trunk. You are looking for the branch bark ridge, a line of protruding bark that marks the intersection of the branch and trunk. Your final cut must be just outside this ridge. Do not use wound paint. Trees do not heal; they compartmentalize. Modern arboriculture has proven that paints actually trap moisture and accelerate rot. Let the tree do its job. It knows how to survive if you don’t butcher it.
The Three-Cut Method: Step-by-Step Execution
The three-cut method is the industry standard for preventing catastrophic bark failure. It is the only way to manage hydrostatic pressure within the living tissues while dealing with dead weight. Cut One (The Undercut): Move about 12 to 15 inches out from the trunk. Make an upward cut on the bottom of the limb about one-third of the way through. This prevents the bark from peeling down the tree when the limb falls. Cut Two (The Top Cut): Move one inch further out from the undercut. Cut from the top down. As you cut, the limb’s weight will cause it to snap cleanly between the two cuts. Cut Three (The Finish Cut): Now that the weight is gone, you are left with a small stub. Locate the branch collar and make a clean, vertical cut just outside it. Gravity is no longer your enemy here. Accuracy is.
| Tool Type | Limb Diameter Limit | Primary Use Case |
|---|---|---|
| Hand Pruning Saw | Under 3 inches | Precision cuts on small deadwood. |
| Pole Saw | 3-6 inches | High-reach limbs; keeps operator on the ground. |
| Chainsaw | Over 6 inches | Heavy wood removal; requires advanced PPE. |
| Bypass Loppers | Under 1.5 inches | Small twig cleanup only; not for large limbs. |
The Danger of Ladders and Chainsaws
Never, under any circumstances, operate a chainsaw while standing on a ladder. This is a non-negotiable safety rule in professional arboriculture. When a limb is severed, it releases stored tension. The branch may ‘kick back’ or ‘spring,’ knocking the ladder from beneath you. If the limb is too high to reach from the ground with a pole saw, you have reached the limit of DIY safety. Professional crews use aerial lifts or climbing harnesses with redundant tie-in points. Your life is worth more than the $500 you think you’re saving by not calling a pro. Furthermore, ensure your chain is sharp. A dull chain creates frictional heat, which can cauterize the cambium layer on the final cut, slowing down the tree’s natural sealing process. Use a high-quality bar and chain oil to ensure smooth operation.
How much does it cost to remove a large dead limb?
Homeowners often ask this because they fear the price tag of a certified arborist. Typically, professional limb removal costs between $200 and $800 per branch depending on height, proximity to power lines, and the degree of rigging required. If a limb is overhanging a roof, the engineering shifts from simple cutting to dynamic load management. We use pulleys and friction brakes to lower the wood. If you don’t have this equipment, don’t attempt the cut. A crushed roof costs significantly more than a professional service call. Consider this part of your yard cleanup budget. Properly maintained trees increase property value; butchered trees are a liability.
What happens if I cut the branch collar?
If you accidentally flush-cut the branch collar, you have removed the tree’s primary defense against internal decay. The wound will likely never close, leading to a hollow trunk over the next decade. In species like Maples or Oaks, this can invite canker diseases or borer insects that will eventually require the entire tree to be removed. If you’ve already made this mistake, the best course of action is to ensure the tree has proper irrigation and nutrient management to boost its overall vigor, but the structural damage is permanent. Check your sod install areas near the tree as well; over-watering the grass can suffocate the tree roots, further stressing a wounded specimen.
“Water doesn’t just sit on a tree wound; it enters the vascular system if the natural barriers are breached, leading to systemic fungal infection.” – Texas A&M Agrilife Extension
The Post-Cut Checklist for Yard Health
- Inspect for Pests: Check the cut surface for signs of borer exit holes or fungal mycelium.
- Monitor the Callus: In one year, you should see a ‘donut’ of new bark forming around the cut.
- Clean Your Tools: Use 70% isopropyl alcohol between trees to prevent the spread of Oak Wilt or Fire Blight.
- Waste Management: Chip the deadwood or haul it away; leaving dead limbs on the ground invites termites and carpenter ants.
- Hydration Check: Ensure the tree receives 1 inch of water per week during the first season after a major pruning.
Remember that tree work is cumulative. A bad cut today might not kill the tree for five years, but the decay is relentless once it starts. Be precise. Be safe. Stay on the ground.