
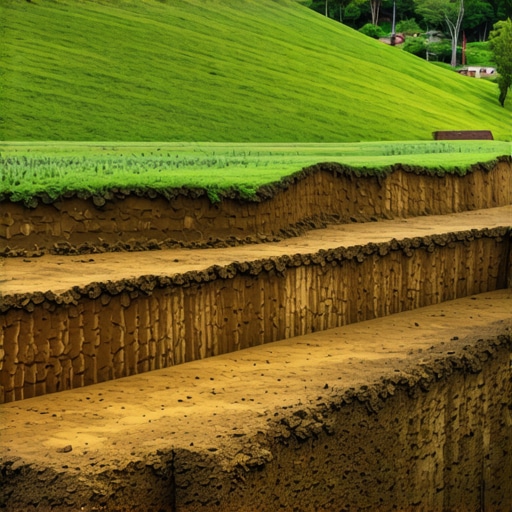
The Anatomy of a Hillside Collapse
I recently got called out to tear up a $30,000 patio that was sinking because the previous contractor thought he could fight gravity with just a few bags of Sakrete and a prayer. The hillside behind it was sloughing off in great chunks of mud every time the sky opened up. When we dug it out, I saw the crime: no 57 stone for drainage, no filter fabric, and the ‘retaining wall’ was just stacked blocks with native clay backfill. The hydrostatic pressure had turned that wall into a ticking time bomb. This is the reality of slope failure. It is not just a mud puddle. It is a structural emergency caused by water weight and soil saturation that defies the natural angle of repose. To stop a slide, you must control the physics of the water and the mechanics of the soil. It will fail if you do not.
Understanding Hydrostatic Pressure and Slope Failure
Hydrostatic pressure is the force exerted by stagnant water against the soil particles and any structural barriers like retaining walls. When heavy rain hits, the pore spaces in your soil fill with water, increasing the weight of the hillside by thousands of pounds while simultaneously lubricating the slip plane where the soil meets the bedrock or a harder clay layer. To stop a hill from sliding, you must provide a path for this water to escape through drainage systems and soil reinforcement.
“A retaining wall doesn’t fail because of the stone; it fails because of the water trapped behind it.” – Hardscape Engineering Axiom
How much modified gravel do I need for a patio base?
For a standard residential patio or a small tiered wall on a slope, you typically need a minimum of 6 inches of compacted 2A modified gravel. This base must be compacted in 2-inch lifts using a plate compactor to reach 95 percent Standard Proctor Density. If your base is soft, your hillside project is already over. Do not skip the tamper. The machine should literally bounce off the ground when the compaction is right.
The Multi-Layered Defense: Materials and Methods
Stabilizing a slope requires a tactical approach. You cannot just throw some landscaping at the problem and hope for the best. You need to manage the surface water, the subsurface water, and the structural integrity of the earth itself. We use a combination of sod install for immediate surface tension and deep-rooting plants for long-term anchors. But before any of that, we look at the irrigation. Many slides are actually caused by broken lines or over-saturated zones that never get a chance to dry out. Stop the water at the source.
| Method | Cost per Sq Ft | Best Use Case | Lifespan |
|---|---|---|---|
| Riprap (Rock Armor) | $6 to $12 | Steep slopes with high water flow | 30+ Years |
| Sod Install (Deep Root) | $1 to $4 | Moderate grades (3:1 or less) | Varies |
| Segmental Retaining Wall | $35 to $75 | Vertical grade changes | 50+ Years |
| Terracing (Timber/Stone) | $20 to $45 | Garden beds on hills | 15 to 25 Years |
What is the best way to divert water on a steep hill?
The most effective way to divert water on a steep hill is to install a catch basin at the top of the grade or a swale lined with heavy stone to guide runoff away from the vulnerable face of the slope. By the time water is running down the middle of your hill, you have already lost the battle. Use a 4-inch NDS pipe or similar to pipe that water to a safe discharge point at the bottom of the property. Check your local municipal codes before discharging water into a street or storm drain.
The Step-by-Step Remediation Process
- Step 1: Identify the Slip Plane. Look for where the soil is actually separating. This is usually where the topsoil meets a denser sub-layer.
- Step 2: Yard Cleanup and Excavation. Remove all dead organic matter and loose debris. Mulch will not stop a slide; it will just become part of the mud.
- Step 3: Install Subsurface Drainage. Use a French drain system with perforated pipe and 1-inch clean stone wrapped in non-woven geotextile fabric.
- Step 4: Mechanical Reinforcement. If the slope is steeper than 2:1, you need Geogrid. This high-tenacity polyester mesh locks the soil particles in place.
- Step 5: Surface Protection. This is where a professional sod install comes in. Choose a grass with a deep root structure, like certain fescues or Bermudas, depending on your USDA zone.
“Vegetative cover can reduce erosion by up to 95 percent compared to bare soil by intercepting raindrops and anchoring soil with root systems.” – USDA Soil Conservation Service Manual
Soil Biology and the Anchor System
Plants are not just decoration. They are biological rebar. When I talk about a sod install on a hill, I am not talking about the thin, plastic-wrapped stuff from a big-box store. I am talking about high-quality, nursery-grown turf that can handle the stress. On a hillside, you need plants with taproots and fibrous root systems. Think of them as thousands of tiny anchors holding the soil together. If you have irrigation on the hill, set it to deep, infrequent cycles. You want the roots to chase the water down deep into the soil. Shallow watering creates shallow roots. Shallow roots lead to slides. It is that simple.
Managing the Aftermath of Heavy Rain
After a major storm, you need to do a yard cleanup that goes beyond raking leaves. Inspect your retaining walls for ‘weeping.’ If water is not coming out of the weep holes, it is building up behind the wall. That is bad. Look for ‘tension cracks’ at the top of the hill. These are horizontal cracks in the soil that indicate the hill is preparing to move. If you see them, call a professional. You cannot fix a deep-seated slope failure with a shovel and a bag of grass seed. You need mass and drainage. Never ignore a crack. It will only get wider.