
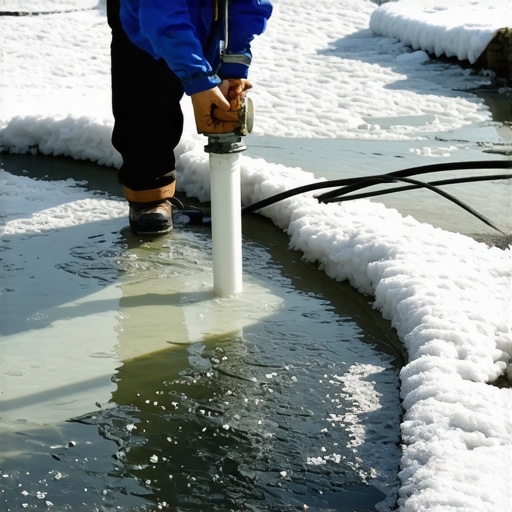
How to Winterize Your Pond Pump to Prevent Ice Damage
I recently got called out to tear up a $30,000 patio that was sinking because the previous contractor failed to account for the hydrostatic pressure of an improperly winterized pond and its associated drainage system. The pump had cracked, the line had burst, and all that water spent three months saturating the modified gravel base until the whole structure just gave up the ghost. This wasn’t just a maintenance oversight; it was a failure of basic civil engineering. If you treat your pond pump like a disposable toy from a big-box store, you deserve the repair bill. But if you want your system to survive the freeze-thaw cycles of a real winter, you need to understand the physics of ice and the mechanical limits of your equipment. Landscaping is about managing energy and water, and in winter, that means managing the expansion of H2O.
Why Ice Damage Destroys Pond Pumps
To prevent ice damage to your pond pump, you must address the 9 percent expansion rate of freezing water which creates massive hydrostatic pressure inside pump impellers and volutes, leading to cracked casings and seal failure. When water turns to ice, it does not just take up more space; it exerts force that can exceed the tensile strength of cast iron or high-density plastics.
“A retaining wall doesn’t fail because of the stone; it fails because of the water trapped behind it.” – Hardscape Engineering Axiom
This same principle applies to your pump. If water is trapped in a tight tolerance area, like the space between the impeller and the housing, the expansion will find the weakest point. It is usually the ceramic shaft or the rubber O-rings. Once those are compromised, your pump is essentially expensive scrap metal. During your fall yard cleanup, this should be your first priority before the ground freezes.
The Anatomy of Winter Pump Failure
The mechanical seals and internal gaskets of a submersible pond pump are designed for thermal stability within a specific range, usually 40 to 95 degrees Fahrenheit, and they fail when ice crystals pierce the elastomer components. Most homeowners think the pump is safe at the bottom of the pond. They are wrong. While water is most dense at 39.2 degrees Fahrenheit, a shallow pond (less than 3 feet deep) can experience total freezing in extreme polar vortex events. If the pump is left in place and the water column freezes solid, the internal pressure will pop the seals.
“Standard pond pumps are not designed for operation in water temperatures below 40 degrees Fahrenheit as the viscosity of the water changes and can cause motor strain.” – Agronomy Manual for Aquatic Systems
This is why we pull pumps in the Northeast and Midwest. We don’t guess; we mitigate risk. If you just finished a sod install near your pond, be even more careful. The loose soil from the install can wash into the pond during late fall rains, increasing the grit in your pump housing, which then freezes into an abrasive paste that destroys the impeller upon spring startup.
How do I keep my pond pump from freezing in the winter?
The most effective way to protect a pond pump from freezing is to disconnect the power, drain the plumbing lines, and submerge the pump in a bucket of water kept in a frost-free environment such as a basement or heated garage to keep the seals hydrated. You don’t just throw it on a shelf. If you let a pump dry out completely, the seals can become brittle and crack. Keep them wet, but keep them warm. This is a non-negotiable step in professional landscaping maintenance. While you are at it, check your irrigation backflow preventer. The same physics apply there. If there is water, and it freezes, it breaks.
Markdown Table: Winterization Comparison by Pump Type
| Pump Type | Winterization Strategy | Primary Risk | Required Tools |
|---|---|---|---|
| Submersible | Full removal and wet storage | Seal dessication or housing crack | Wrench, bucket, distilled water |
| External/Centrifugal | Drain volute, blow out lines | Impeller housing burst | Air compressor, antifreeze (RV grade) |
| Solar/Low Voltage | Complete removal and dry storage | Battery terminal corrosion | Screwdriver, dry cloth |
The Step-by-Step Remediation Process
To ensure longevity of your aquatic equipment, follow this maintenance schedule: First, disconnect the pump from the irrigation-style check valves. Second, perform a deep yard cleanup of the pond area to remove decaying organic matter that produces toxic gases under the ice. Third, scrub the pump intake screen. Fourth, place the pump in a five-gallon bucket filled with water. Fifth, store it where it won’t freeze. Don’t skip the cleaning. If you leave algae on the impeller, it will harden like concrete over the winter. You will burn out the motor in April trying to start it. It will rot. Don’t skip this. If your pond is deep enough to leave the pump in, you must keep the water moving or use a de-icer. But honestly, just pull the pump. It takes ten minutes and saves five hundred dollars.
- Disconnect Power: Always kill the breaker first. Safety is not optional.
- Purge Lines: Use an air compressor to blow out any flex-pipe or PVC lines.
- Inspect Impeller: Look for hairline cracks or mineral buildup.
- Check O-Rings: Apply a food-grade silicone lubricant to prevent sticking.
- Label Everything: Use waterproof tags so you know which line goes where in the spring.
- Monitor Pond Level: Even with the pump out, ice can shift your liner and cause leaks.
- Store Properly: Never store a pump near chemicals or fertilizers that off-gas.
The Biological Reality of Winter Ponds
The biological oxygen demand (BOD) in a pond increases when organic debris is trapped under surface ice, making a bubbler or aerator a superior choice to a high-volume waterfall pump for winter operation. Most people want to keep their waterfall running. Don’t do it. Waterfalls create massive surface area for heat loss, which super-cools the pond and can actually kill your fish faster than the ice itself. Use a small 10-watt aerator instead. It keeps a hole open for gas exchange without chilling the deep-water thermal layer where fish hibernate. If you have just invested in a high-end sod install, the runoff from late-season fertilizers can spike the nitrogen levels in your pond. This fuels winter algae blooms that die off and rob the water of oxygen. Clean your filters. Manage your runoff. Landscaping is a system, not a collection of parts.
How much modified gravel do I need for a patio base?
While this seems unrelated to ponds, it is critical for pond-side landscaping. You need at least 6 inches of compacted 21A or 3/4-inch minus gravel for a stable base, especially near water features where soil saturation is a constant threat. Without proper compaction, the freeze-thaw cycle will heave your pavers and potentially crush your buried pond lines. I see it every year. People skimp on the base, and by year three, their beautiful pond-side retreat looks like a staircase. Use a vibratory plate compactor. The tamper should literally bounce off the compacted base. That is how you know it is ready. It should feel like concrete before you ever lay a single paver.
{“@context”:”https://schema.org”,”@type”:”HowTo”,”name”:”How to Winterize Your Pond Pump”,”step”:[{“@type”:”HowToStep”,”text”:”Disconnect power and remove the pump from the pond.”},{“@type”:”HowToStep”,”text”:”Clean the pump intake and impeller of all algae and debris.”},{“@type”:”HowToStep”,”text”:”Place the pump in a bucket of distilled water.”},{“@type”:”HowToStep”,”text”:”Store the bucket in a frost-free environment like a basement.”}],”totalTime”:”PT30M”}