
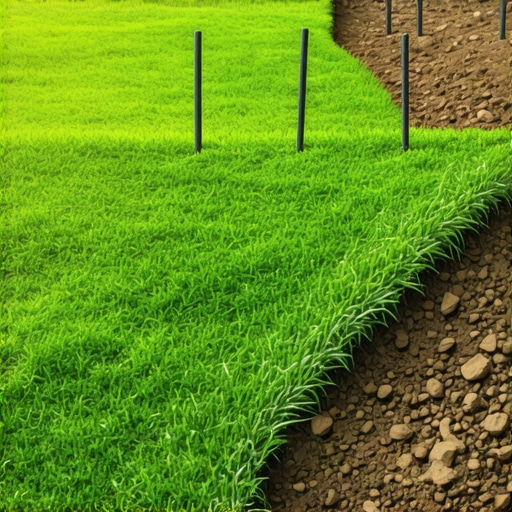
The Physics of Hillside Turf Stability
Installing sod on a slope is a battle against gravity where structural stability depends on perpendicular laying patterns, biodegradable pinning systems, and sub-grade preparation to prevent catastrophic sheet erosion and turf slippage during the rooting phase. When you lay grass on a grade, you are not just landscaping; you are performing surface-level civil engineering. Without mechanical anchors, the weight of water-saturated turf rolls will overcome the friction of the soil surface. This leads to buckling or entire sections sliding into the drainage swales. You must understand the shear strength of the soil and the tensile strength of the sod mat to succeed.
The Apprentice Lesson: Why Prep Beats Product
I always drill into my new crew members: if you don’t fix the soil grading first, every plant you put in the ground is just expensive compost. Ten years ago, I watched a rookie crew try to ‘save time’ by laying Kentucky Bluegrass rolls directly onto a hard-packed clay hill without roughing the surface. The first heavy rain turned that slope into a slip-and-slide. The entire $5,000 install ended up in a heap at the bottom of the driveway by 6:00 AM. They forgot the fundamental law of the landscape: if the roots can’t find a foothold in the first 48 hours because the sub-base is as hard as concrete, gravity will win every single time. We spent three days excavating the mess, re-grading the site, and doing it the right way. It was a 10,000 dollar lesson for a 5,000 dollar job. Don’t be that guy. Fix the soil first.
Phase 1: Precision Grading and Site Preparation
Slope stabilization via sodding requires grading to a 3:1 ratio, roughing the surface to 1/2 inch depth, and staggering joints like bricks to prevent water channels from forming between the rolls and undermining the root zone. You cannot lay sod on a smooth, compacted slope. It is like trying to glue two pieces of glass together. You need texture. We use a heavy-duty garden rake or a power harley rake to create horizontal micro-furrows. These furrows act as tiny ‘keys’ that lock the sod in place. This is the foundation of your erosion control strategy.
“The primary cause of sod failure on inclines is the lack of hydraulic conductivity between the sod mat and the underlying native soil profile.” – Agronomy Extension Manual
How do I stop sod from sliding down a hill?
To stop sod from sliding, you must install the rolls perpendicular to the direction of the slope and use mechanical fasteners like 6-inch wooden or biodegradable stakes. This orientation breaks the flow of water. If you lay sod parallel to the slope, the seams act as gutters. Water will accelerate down these seams, washing away the soil underneath and causing the sod to lift and eventually slide. Staggering the vertical seams in a ‘running bond’ pattern ensures that no single drainage channel runs the full length of the hill. It is the same logic used in masonry. It distributes the load and the environmental stress across the entire surface area.
The Engineering of Pinning Tactics
Pinning is the most misunderstood part of the process. Most DIYers use those flimsy 4-inch wire staples. They are useless. On a 2:1 or 3:1 slope, you need 6-inch biodegradable pins. We prefer ‘Bio-Stakes’ made from recycled polymers or wood. Why? Because as the sod roots, the stakes slowly break down. Metal staples remain in the ground forever, waiting to be sucked up by a lawnmower or to puncture a core aerator’s tine in three years. You need to drive the pins in at a slight uphill angle. This creates a counter-lever effect against the downward pull of gravity. One pin goes in each corner, and one or two go in the center depending on the steepness. For extreme grades, we use a ‘W’ pattern of five pins per roll.
Technical Pinning Frequency Table
| Slope Grade | Pinning Pattern | Pins Per Sq. Yard |
|---|---|---|
| 1:4 (Gentle) | Corners Only | 2 |
| 1:3 (Moderate) | Corners and Center | 4 |
| 1:2 (Steep) | W-Pattern | 6 |
| 1:1 (Critical) | Double-Pinned / Netting required | 8+ |
Phase 2: Soil Chemistry and Sub-Grade Biology
Before the first roll touches the ground, you need to manage the chemistry. We look for a soil pH between 6.0 and 7.0 for most cool-season grasses. If you are dealing with acidic clay, you need a pelletized lime application at least two weeks prior. But the real secret is the N-P-K ratio of the starter fertilizer. You want a high Phosphorus (the middle number) to stimulate immediate root elongation. We are talking 10-20-10. Nitrogen (the first number) gives you top growth, but on a slope, we don’t care about the green blades yet. We care about the anchors. We want the roots to dive deep into the sub-grade within the first seven days. If the roots stay in the sod mat because there is too much surface nitrogen, the sod remains a detached carpet. It will rot.
What is the best sod for steep hills?
The best sod for slopes is a deep-rooting fescue blend or a rhizomatous grass like Kentucky Bluegrass or Bermuda, which spreads via underground runners to create a unified mat. Creeping grasses are superior for erosion control because they heal their own wounds. If a small patch dies or washes out, the surrounding grass will naturally fill the void. Fescue is great for stability due to its deep vertical root system, but it doesn’t ‘self-repair’ as quickly. For high-traffic slopes or areas prone to heavy runoff, a hybrid approach of tall fescue for depth and bluegrass for lateral strength is the professional standard. Avoid ‘fine’ fescues for steep sun-drenched hills as they lack the structural rigidity to hold the soil during peak summer heat.
Irrigation Logic: Preventing the Washout
Watering sod on a hill is a delicate balancing act. If you over-water, the soil becomes liquefied and the whole hillside turns into a mudslide. If you under-water, the edges of the sod rolls shrink, the seams open up, and the sun bakes the roots. We use the ‘Pulse Irrigation’ method. Instead of one 60-minute soak, we run the zones for 10 minutes, wait 30 minutes for the water to soak in, and repeat this cycle four times a day. This prevents ‘sheet flow’ where water simply runs off the surface without penetrating the root zone. You need the water to move vertically, not horizontally. Gravity is already trying to pull the water down the hill; your goal is to force it into the dirt.
“Hydraulic pressure behind a newly laid sod surface can exceed the friction coefficient of the soil-to-root interface, leading to catastrophic failure if drainage is not managed.” – International Certified Professional Landscaper Standards
The Slope Sodding Checklist
- Verify 811 utility markings before any grading or pinning begins.
- Excavate the bottom of the slope to create a ‘toe-in’ trench where the first row of sod can sit securely.
- Apply a high-phosphorus starter fertilizer at a rate of 1 lb of P per 1,000 sq. ft.
- Lay sod perpendicular to the slope, starting from the bottom and working up.
- Stagger all joints and butt edges tightly without overlapping or leaving gaps.
- Drive 6-inch biodegradable pins at an uphill angle.
- Roll the sod with a half-filled water roller to ensure root-to-soil contact.
- Implement pulse irrigation to avoid surface runoff.
Maintenance and the Year One Horizon
The first year is the most critical. You cannot treat a slope like a flat lawn. You must avoid heavy foot traffic for the first six weeks. Mowing should be done with a lightweight push mower, never a heavy zero-turn, which can tear the developing root anchors out of the ground. Always mow across the slope, not up and down. This is for safety and to prevent the mower tires from creating ruts that will turn into erosion gullies. By month three, the pins should be starting to degrade, and the root system should be integrated at least 4 inches into the sub-base. At this point, the hill is no longer a collection of grass rolls; it is a stabilized living structure. Don’t skip the fall aeration, but ensure you use a spike aerator rather than a core aerator for the first 12 months to avoid lifting the young turf.