
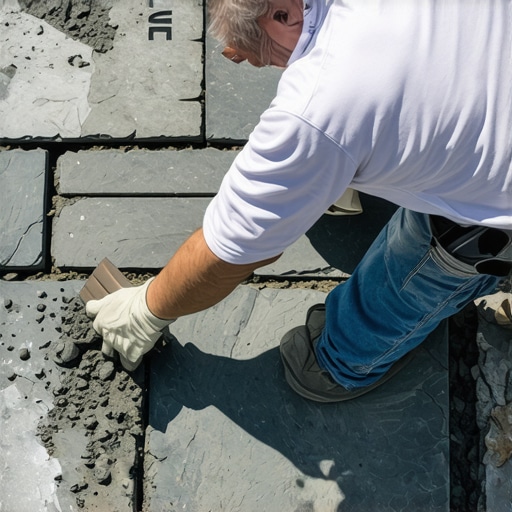
Why Your Natural Bluestone Patio Will Fail Without a Thin-Set Bed
To successfully install 2026 bluestone, you must use a wet-laid thin-set bed over a reinforced concrete slab rather than a dry-laid sand or stone dust base to prevent natural cleft stone from shifting, cracking, and water-logging. Natural bluestone exhibits variable thickness and natural clefts, meaning traditional dry-laid methods eventually lead to shifting pavers, pooled water, and structural failure under load.
I recently got called out to tear up a $30,000 patio that was sinking because the previous contractor tried to dry-lay premium thermal bluestone on a basic stone dust base with no concrete footprint. Within two freeze-thaw cycles, the unequal density of the stone dust allowed water to pool beneath the slabs, turning the entire high-end outdoor kitchen area into a dangerous, wobbly, unlevel mess. It was a complete hardscape autopsy. I had to jackhammer up the entire perimeter, haul away tons of ruined, shifting base, and start from the dirt up. This is what happens when you treat a high-end masonry installation like a cheap DIY backyard project. Don’t let a lazy contractor tell you that dry-laying is ‘just as good’ to save on labor. It is not.
“A retaining wall or paved terrace doesn’t fail because of the stone; it fails because of the water trapped behind or beneath it.” – Hardscape Engineering Axiom
When dealing with natural dimensional stone like bluestone, water is your primary enemy. Natural stone is porous. When water penetrates the stone and settles into a loose gravel or sand base beneath it, the winter freeze causes the ground to expand. This hydrostatic pressure pushes individual stones upward, a phenomenon known as frost heave. By utilizing a thin-set mortar bed over a properly sloped, steel-reinforced concrete slab, you seal out moisture and bond the stone to a monolithic structure. It becomes one single, unyielding unit.
What is the Difference Between Dry-Laid and Wet-Laid Bluestone?
The primary difference between these methods is that wet-laid bluestone uses a concrete slab and mortar thin-set to lock stones permanently in place, while dry-laid relies on compacted gravel and polymeric sand which naturally shifts over time. Dry-laying is cheaper upfront but invites weeds, ants, and eventual sinking. Wet-laying is an architectural-grade installation that lasts generations.
| Feature / Specification | Dry-Laid Bluestone Base | Wet-Laid Thin-Set Bed (Recommended) |
|---|---|---|
| Base Layer Material | Compacted Modified Gravel & Sand | Reinforced Concrete Slab (4,000 PSI) |
| Adhesive Layer | None (Friction Only) | Exterior-Grade Polymer-Modified Thin-Set |
| Weed & Pest Resistance | Low (Weeds penetrate sand joints) | 100% Impervious (Grouted Joints) |
| Lifespan & Durability | 5 to 10 Years (Requires re-sanding) | 50+ Years (Monolithic structure) |
| Frost Heave Protection | Poor (Individual stones shift) | Excellent (Slab moves as one unit) |
Let us look at the mechanics of the thin-set connection. Many old-school masons still use a standard thick butter coat of traditional type-S mortar. This is a mistake for 2026 bluestone. Modern polymer-modified thin-set mortar provides a chemical bond that traditional mortar cannot match. Bluestone has a low absorption rate; standard mortar relies purely on a mechanical grip, which easily shears off when water gets into the microscopic pores and freezes. Polymer-modified thin-sets actually flex slightly and grip the dense stone on a molecular level. It holds. No exceptions.
How Much Modified Gravel Do I Need for a Patio Base?
To calculate the modified gravel base for a wet-laid concrete patio slab, you need a minimum 6-inch compacted depth of ¾-inch crushed dense-grade aggregate beneath your 4-inch concrete slab. To find the volume, multiply your total square footage by 0.5 feet (6 inches) and divide by 27 to get the required cubic yardage, then add 15% for compaction loss.
Before you even mix a single bag of concrete or thin-set, you must address the native soil. If you have heavy clay, compaction is difficult and water retention is high. You must excavate deep enough to remove organic topsoil, backfill with clean aggregate, and compact it using a heavy vibratory plate compactor. Run the tamper until it literally bounces off the compacted stone base. If the base has any bounce, the concrete slab above will crack, and your expensive bluestone will follow suit.
“Rigid pavements and natural stone tiles laid on concrete bases require a minimum of 95% Standard Proctor density compaction of the subgrade to prevent localized shear failure.” – AASHTO Soil Mechanics Manual
Once your aggregate base is compacted, you pour your 4-inch, 4,000 PSI concrete slab reinforced with #3 rebar spaced 16 inches on center. Do not use cheap wire mesh; it always ends up sitting at the bottom of the pour where it does absolutely zero structural good. Pitch the slab exactly ¼ inch per linear foot away from any home foundation or retaining wall to guarantee drainage. If you skip the pitch, water will pool on your bluestone, eventually eroding the grout joints and popping the stones loose.
Step-by-Step Thin-Set Bluestone Installation Checklist
- Step 1: Excavation & Subgrade Compaction – Excavate to a depth of 11 inches to accommodate 6 inches of gravel base, 4 inches of reinforced concrete, and 1 inch of stone/thin-set.
- Step 2: Base Installation – Lay down geotextile fabric, spread ¾-inch dense-grade gravel in 2-inch lifts, and compact each lift thoroughly.
- Step 3: Concrete Slab Pour – Set forms, lay #3 rebar grid, pour 4,000 PSI concrete with a ¼-inch per foot slope, and apply a light broom finish to create a rough texture for thin-set adhesion.
- Step 4: Stone Layout & Prep – Dry-lay your bluestone pieces to organize your pattern, then clean the back of each stone with a stiff brush and water to remove quarry dust which ruins adhesion.
- Step 5: Thin-Set Application – Use a ½-inch notched trowel to apply polymer-modified thin-set to the concrete slab, and back-butter the entire reverse side of each bluestone slab with a thin flat layer of thin-set.
- Step 6: Setting the Stone – Beat the bluestone into the wet thin-set bed using a heavy white rubber mallet until it is fully bedded and level with your string lines.
- Step 7: Grouting the Joints – Fill the joint gaps with a high-performance architectural polymeric joint grout or a dedicated exterior sand-grout mix, wiping away residue immediately to prevent permanent staining.
Cleanliness is crucial during this process. Bluestone is highly sensitive to acid washes and cement staining. If you leave wet thin-set or grout on the face of the stone for more than an hour, it will cure and bond to the natural clefts. Removing it later requires aggressive grinding or harsh chemicals that can bleach or ruin the natural blue-gray hues of the stone. Clean as you go. Keep a clean bucket of water and a sponge handy at all times.
How Long Should Concrete Cure Before Laying Bluestone?
You must allow the concrete slab to cure for a minimum of 28 days before thin-setting bluestone to ensure the slab has achieved its full design strength and completed its primary shrinkage. Installing stone too early on green concrete will result in shrinkage cracks reflecting directly up through your new bluestone and grout joints.
Protect your investment. Bluestone is premium material. Do not let cheap contractors bypass the concrete slab and thin-set process. It will fail. Do it right the first time.