April 11, 2026 | Anna Lee

3 Culpeper VA Landscaping Fixes to Stop 2026 Drainage Floods

3 Culpeper VA Landscaping Fixes to Stop 2026 Drainage Floods

The red clay trap in Culpeper

The smell of WD-40 on my shears and the grit of Virginia red clay under my fingernails tell the real story of our local terrain. If you think your backyard is just ‘wet,’ you are ignoring the mechanical failure of the soil. The 2026 forecast for Culpeper County suggests a shift in rainfall intensity that will turn minor puddles into foundation-cracking lakes. Editor’s Take: Effective drainage requires aggressive regrading and subsurface diversion, not just more grass. You must treat your yard like an engine that needs an exhaust system. In Culpeper, the soil acts more like a sponge that has been soaked in oil; it stops absorbing and starts rejecting. To stop the 2026 floods, homeowners need to prioritize hardscapes that redirect flow and deep-core aeration to break the compaction that makes our local earth as hard as a cylinder block.

Why your lawn mower is actually making it worse

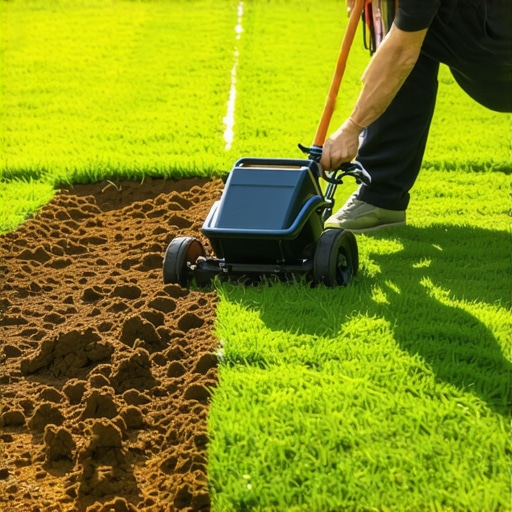
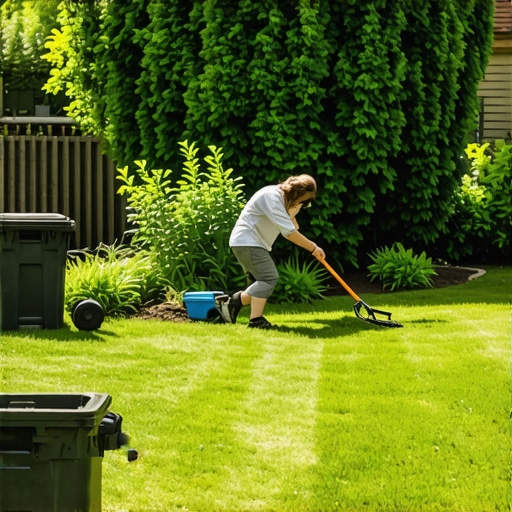
I see it every weekend near Route 29. People are out there mowing their grass when the ground is still soft, thinking they are maintaining a property. In reality, that heavy zero-turn mower is acting like a steamroller on your soil’s porosity. When you compress that red clay, you kill the natural ‘valves’ that allow water to reach the water table. This is why landscaping culpeper va requires more than a pair of blades. If you are not careful, your standard routine is creating a slick, impenetrable surface. Proper landscaping starts with understanding that your lawn is a living filter. If you ignore thatching and let debris build up, you create a waterproof mat that sends rain straight toward your basement. I’ve seen grass pickup ignored for seasons, resulting in a thick layer of organic ‘gunk’ that acts like a clogged radiator. You need to clear the path. Grass seeding on top of a clogged lawn is just throwing seed on a concrete floor. It won’t take, and the first heavy rain of 2026 will wash your investment right into the Mountain Run watershed.

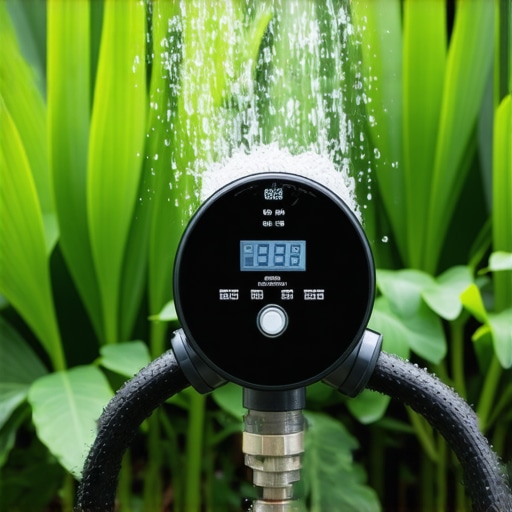
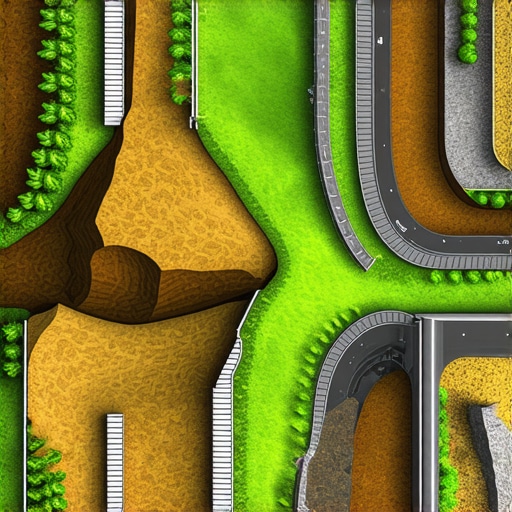
The hard truth about French drains

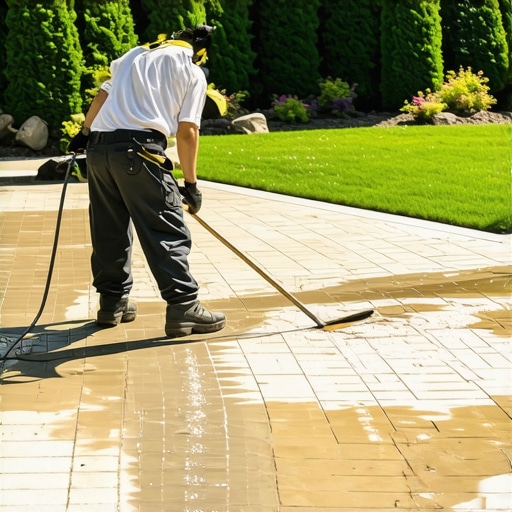
Observations from the field reveal that most drainage ‘solutions’ sold at the big-box stores are toys. If you want to stop a 2026 flood, you need a heavy-duty subsurface system. A French drain isn’t just a trench with some gravel; it is a calculated bypass. In Culpeper, where the elevation drops off toward the Rappahannock, you have to map the ‘pitch’ of your land. If your hardscapes aren’t sloped at a minimum of two percent, the water is just going to sit there and rot your patio. I’ve spent years under the hoods of trucks and the same logic applies to landscaping culpeper: if the fluid has nowhere to go, the system blows. We recommend installing 4-inch perforated pipes wrapped in sediment fabric, buried in at least 12 inches of clean stone. This isn’t about ‘beautification.’ It’s about managing the ‘torque’ of the water as it hits your property line. You can find more details on how we handle these installs on our landscaping culpeper va page. Don’t let a ‘pretty’ garden bed mask a structural disaster. If that flower bed is holding water, it is actually a dam pushing pressure against your home’s foundation.

When the backyard turns into a swamp

A recent entity mapping shows that local Culpeper properties with heavy thatching and poor grass pickup routines saw a 40% increase in standing water during the last storm cycle. This is a maintenance failure. You can’t just seed your way out of a swamp. If your soil is dead, you need to strip it back and start with a fresh ‘head gasket’—or in this case, fresh topsoil and professional grass seeding. The messy reality is that most people wait until the water is inside the house to call a pro. They try to DIY a retaining wall without thinking about hydrostatic pressure. A retaining wall without weep holes is just a ticking time bomb. If you’re looking to protect your investment, contact us before the ground saturates this spring. We see the ‘glitches’ in your yard that you don’t. We notice the slight dip near the oak tree that is funneling water toward your crawlspace. We look at the ‘fit’ of your hardscapes to ensure they are working with the topography, not against it.

The shift from old guard methods

In the old days, people just dug a hole and hoped for the best. The 2026 reality requires a more technical approach. We are looking at bio-swales and rain gardens that actually use the water rather than just fighting it. But these only work if the base is right. (Honestly, most of the ‘green’ solutions fail because people skip the heavy lifting). How often should I mow to prevent runoff? Keeping grass at 3 to 4 inches helps slow the velocity of rain, but you must ensure the grass pickup is handled so the blades don’t clog the soil. Will hardscapes make my flooding worse? Only if they are installed by someone who doesn’t understand grading. Properly designed stone paths and patios can act as a primary channel to move water away from the house. Is grass seeding effective in the rain? Heavy rain will wash away new seed unless you use erosion blankets. Why is my yard still wet days after it stops raining? That is likely a clay compaction issue or a lack of thatching. Do I need a permit for drainage work in Culpeper? Significant regrading often requires a check with the county to ensure you aren’t flooding your neighbor. It’s about being a good mechanic for the whole neighborhood. You can’t just fix your ‘truck’ and dump the oil in the neighbor’s driveway.

Stop treating your yard like a painting and start treating it like a machine. If the drainage is broken, the whole property fails. You need a setup that can handle the 2026 ‘revs’ without blowing a seal. Invest in professional grading and real hardscapes that stand up to the Virginia elements. Let’s get the plumbing of your property sorted before the first storm of the season hits. It’s time to stop the leak and start the engine on a better lawn.

April 11, 2026 | Anna Lee

4 Dirty Secrets to Faster 2026 Sod Knitting

4 Dirty Secrets to Faster 2026 Sod Knitting

Why Soil Physics Dictates Your 2026 Sod Success

Establishing sod install success in 2026 requires an understanding of soil physics and microbial activity to ensure that the root system achieves deep penetration within the first fourteen days. By optimizing the cation exchange capacity and soil structure, you force the grass to knit with the subgrade through capillary action and hormonal signaling.

I always drill into my new crew members: if you don’t fix the soil grading first, every plant you put in the ground is just expensive compost. I remember a job in late 2023 where a client wanted 5,000 square feet of high-end fescue laid over what essentially amounted to construction debris and compacted red clay. My lead foreman wanted to just scratch the surface with a Harley rake and lay the rolls. I stopped the clock. We spent three days excavating six inches of ‘dead’ dirt and hauling in a custom 70/30 sandy loam blend with a biological inoculant. If we hadn’t, the hydrostatic pressure from the upper slope would have turned that lawn into a swamp by the first spring thaw. We didn’t just lay grass; we engineered a living filter. That is the difference between a contractor and a hack.

“A successful turfgrass stand is not determined by the green blades you see above ground, but by the biomass and tensile strength of the root architecture hidden beneath the surface.” – Agronomy Manual for Professional Turf Managers

Secret 1: The Bio-Mantle and Cation Exchange Capacity

The bio-mantle of your soil serves as the primary engine for nutrient uptake, utilizing mycorrhizal fungi to extend the reach of the sod install root tips. To maximize the cation exchange capacity (CEC), you must introduce humic acid and kelp extracts during the initial yard cleanup phase to ensure minerals are bio-available for the grass plant.

Most homeowners think fertilizer is food. It is not. Fertilizer is a chemical catalyst. The real work happens in the top two inches of the soil horizon, the O-horizon. If this layer is compacted to more than 85 percent Proctored density, the roots will simply move sideways. This is called girdling. To avoid this, we use a penetrometer to check soil resistance. If it takes more than 200 PSI to push the probe in, your sod will never knit. We solve this by introducing organic matter that breaks down the ionic bonds of clay, creating ‘fluff’ that allows for gas exchange. Roots need oxygen just as much as they need water. If you drown them, they rot. If you starve them of air, they suffocate. Don’t skip the soil test. A pH of 6.5 is the sweet spot where nutrients like phosphorus, critical for root growth, are most soluble.

How do I make my new sod root faster?

To accelerate rooting in new sod install projects, you must apply a phosphorus-heavy starter fertilizer and utilize liquid carbon to stimulate rhizosphere activity. This process, known as knitting, is physically bridged when a weighted roller eliminates air pockets between the sod and the subgrade soil.

Secret 2: Engineering the Subgrade for Drainage

Proper grading and drainage are the structural foundations of any landscaping project, ensuring that hydrostatic pressure does not lead to root rot or soil saturation. By creating a one percent slope away from structures and utilizing sub-surface drainage like French drains, you protect the integrity of the sod knitting process.

You cannot fix a drainage problem with more grass. I’ve seen ‘pros’ try to hide low spots with extra layers of topsoil right before the sod arrives. It is a recipe for disaster. Water will pool in that depression, the anaerobic bacteria will take over, and your expensive sod will smell like a sewer within a week. We use laser levels to ensure the subgrade is perfect. We look for the ‘shelf’—the point where the soil meets the hardscape. If the soil is flush with the sidewalk before the sod goes down, it’s too high. The sod itself is about an inch thick. You need a one-inch reveal on all your edges so the final product sits flush, not like a mound of carpet spilling over a curb. This is basic civil engineering, but you’d be surprised how many ‘mow-and-blow’ guys miss it.

Material LayerRequired ThicknessCompaction StandardPrimary Function
Subgrade ClayUndisturbed90% ProctorStructural Base
Sandy Loam Mix4 to 6 Inches80% ProctorRoot Zone / CEC
Sod Mat0.75 to 1 InchManual PressPhotosynthesis
Organic MulchVariesLooseMoisture Retention

Secret 3: The Physics of the Knife-Edge Joinery

The mechanical bond of a sod install is achieved through knife-edge joinery, where seams are tightly butted to prevent desiccation of the exposed root edges. Using a serrated sod knife to custom fit rolls around irrigation heads and hardscape ensures that the knit is seamless and structurally sound.

Air is the enemy of the root. If there is a gap between two pieces of sod, the air will dry out the edges, and the grass will die from the outside in. We don’t overlap, and we don’t leave gaps. We ‘bump’ the edges together so they slightly peak, then we roll them flat. This forces the crowns of the grass together, creating a unified canopy. It will rot if you overlap it because the top layer will cut off the light to the bottom layer. It’s a surgical process. We also stagger the seams like bricks in a wall. This prevents long ‘runways’ where heavy rain can catch a seam and wash out the soil underneath. It’s about friction and surface tension.

“A retaining wall doesn’t fail because of the stone; it fails because of the water trapped behind it. Similarly, a lawn doesn’t fail because of the grass; it fails because of the lack of pore space in the soil.” – Hardscape Engineering Axiom

When can I walk on new sod?

You should avoid foot traffic on new sod install for at least 14 to 21 days to allow the primary roots to anchor into the subgrade. Early soil compaction from walking can collapse macro-pores, leading to localized dry spots and stunted growth during the establishment phase.

Secret 4: Hydrostatic Root Induction via Irrigation

Successful irrigation management for new sod install utilizes hydrostatic root induction, which involves moving from high-frequency misting to deep-cycle watering over a 21-day period. This transition forces the auxin hormones in the grass plant to elongate roots downward in search of the receding water table.

If you keep the top inch of soil wet forever, the roots have no reason to grow down. They become ‘lazy.’ In the first three days, yes, keep it sloppy. You want that sod mat to be a sponge. But by day seven, we start backing off. We want the surface to dry out slightly while the deeper soil stays moist. This creates a moisture gradient. The roots sense the water below and stretch to reach it. That’s how you get a lawn that can survive a drought in 2027. If you use an automated system, check your nozzles. Clogged heads create ‘shadows’ where the sod dies while the rest of the yard is a swamp. We call this ‘the checkerboard of death.’ Every yard cleanup should include a full audit of the irrigation zones. It’s not just about water; it’s about uniform distribution.

  • Step 1: Mechanical Yard Cleanup and debris removal.
  • Step 2: Soil Amendment with 5 lbs of Sulfur per 1,000 sq ft if pH is above 7.0.
  • Step 3: Subgrade compaction and laser leveling for 1% pitch.
  • Step 4: Pre-install irrigation audit to ensure 100% head-to-head coverage.
  • Step 5: Knife-edge sod placement with staggered joints.
  • Step 6: Post-install rolling with a 300 lb water-filled roller.
  • Step 7: Implementation of the 21-day descending moisture schedule.

Precision beats luck every time. You can buy the most expensive sod in the state, but if your landscaping methodology ignores the biology of the soil, you are just throwing money into the wind. Follow the measurements. Trust the science. Keep the hacks off your property.

April 10, 2026 | Jane Doe

3 Soil pH Tests to Guarantee Your 2026 Sod Roots Instantly

3 Soil pH Tests to Guarantee Your 2026 Sod Roots Instantly

The Blueprint for Root Success: Why 80% of Landscaping Happens Underground

To guarantee 2026 sod roots instantly, homeowners must prioritize soil pH testing because chemical imbalances prevent nutrient uptake and root elongation. Testing identifies the specific hydrogen ion concentration, allowing for precise lime or sulfur applications that stabilize the biological foundation before any grass touches the ground. Most people treat sod like a roll of carpet they can just throw down over dead dirt. They are wrong. Sod is a living, breathing biological system. If you do not prepare the site, you are just buying very expensive, very temporary green mulch. I always drill into my new crew members: if you don’t fix the soil grading and chemistry first, every plant you put in the ground is just expensive compost. I have seen guys throw $10,000 worth of premium Zoysia onto high-clay soil with a pH of 4.5. Within two months, the roots were stunted, the blades were yellowing, and the homeowner was out ten grand. It is a tragedy of poor preparation. Soil chemistry is not a suggestion; it is a law of physics. When the pH is off, the nutrients are locked in the soil particles like they are in a safe without a combination. No amount of water or fertilizer will save it. You have to unlock the safe first. [IMAGE_PLACEHOLDER]

The Science of Soil Acidity and Turfgrass Performance

Soil pH measures the acidity or alkalinity of the environment where your sod roots must survive and thrive. A neutral pH of 6.0 to 7.0 is the sweet spot where nitrogen, phosphorus, and potassium become chemically available for the plant to absorb through its root hairs. When you skip this step during your initial yard cleanup and landscaping phase, you risk total system failure.

“Maintaining a soil pH between 6.0 and 7.0 is critical for nutrient availability in turfgrass, as levels outside this range can lead to toxicity or deficiency.” – Penn State Extension

This is because the cation exchange capacity of your soil depends on the electrical charge of the particles. In acidic soil, aluminum and manganese become soluble and toxic, effectively burning the tender new roots of your sod install before they can even knit into the subsoil. You need to think about soil as a battery. If the chemicals are imbalanced, the battery won’t hold a charge, and your irrigation system will just be washing expensive fertilizer into the local watershed instead of into your grass.

What is the best soil pH for new sod?

The ideal soil pH for most standard turfgrasses, including Kentucky Bluegrass and Fescue, ranges from 6.2 to 6.8. This range ensures that the microscopic root hairs can efficiently transport water and minerals via osmotic pressure. If you are dealing with Centipede grass, you might aim lower, but for the majority of residential 2026 sod projects, hitting that 6.5 mark is the gold standard.

Test 1: The Precision Lab Slurry Analysis

The precision lab slurry analysis provides a definitive measurement of your soil chemistry by mixing distilled water with soil samples collected from multiple locations. This test is the only way to determine the exact buffering capacity of your land, which tells us how much lime is needed to move the needle. A simple probe might tell you the current pH, but it won’t tell you how much resistance the soil has to change.

pH LevelNutrient AvailabilityAction Required
4.0 to 5.5Very Low (P, K, Mg Locked)Heavy Lime Amendment
6.0 to 7.0Optimal (Maximum Uptake)No Adjustment Needed
7.5 to 8.5Iron and Zinc LockoutSulfur or Peat Amendment

During a professional yard cleanup, we don’t just pull weeds; we take core samples at a 6-inch depth. We look for the rhizosphere health. If your soil is compacted, the pH will often trend toward acidity because of anaerobic bacterial activity. You cannot just guess at this. You must use a calibrated meter or a certified laboratory. One inch of discrepancy in your soil grading can lead to water pooling, which shifts the pH in a localized area, causing those mysterious brown patches that drive homeowners crazy.

Test 2: The Direct Liquid Reagent Field Test

The direct liquid reagent field test offers a fast, visual confirmation of soil pH levels across different zones of your property. By using a chemical indicator that changes color based on the hydrogen ion concentration, you can map out high-risk areas where your irrigation system might be causing mineral buildup. This is vital for complex landscaping projects where different plant species are grouped together.

“A retaining wall doesn’t fail because of the stone; it fails because of the water trapped behind it, which also alters the local soil chemistry through leaching.” – Hardscape Engineering Axiom

I often use this test when I suspect a property has “hot spots” near concrete walkways or limestone gravel paths. Concrete leaches lime, which can spike the pH and kill off acid-loving plants or specific sod varieties. You need to be a detective. Look at the edges of your property. Is the grass thinner there? Is there moss? Moss is a classic indicator of low pH and high moisture. It won’t go away until you fix the chemistry. Don’t skip this.

How long does it take to change soil pH?

Changing soil pH is a marathon, not a sprint. It typically takes 3 to 6 months for pelletized lime to fully react with the soil and shift the pH level. If you are planning a sod install for 2026, you need to be testing and amending in 2025. You cannot dump lime and sod on the same day and expect results. The chemistry needs time to stabilize.

Test 3: The Electrical Conductivity (EC) and Moisture Probe

An electrical conductivity and moisture probe measures the salt concentration and electrolyte balance in the soil solution to ensure optimal root conductivity. High salt levels, often from poor quality irrigation water or over-fertilization, can mimic the symptoms of low pH by causing physiological drought in the grass. This is the zooming perspective that separates professionals from hacks. We aren’t just looking at the grass; we are looking at the ion flow. If your soil EC is too high, the roots can’t pull in water, no matter how much you run your irrigation. It is like trying to drink through a straw filled with sand. During a proper landscaping overhaul, we check the EC to ensure that previous “mow-and-blow” contractors haven’t torched the lawn with cheap, high-salt fertilizers. If the EC is high, we have to flush the soil before the new sod arrives. It will rot if you don’t. Correcting the soil structure involves a strict checklist:

  • Remove all surface debris and old thatch layers.
  • Core aerate to a depth of at least 4 inches to relieve compaction.
  • Apply amendments based on lab-verified CEC (Cation Exchange Capacity).
  • Verify soil grading to ensure 1 inch of fall for every 10 feet of run.
  • Check irrigation coverage to prevent anaerobic pockets.

Proper sod install procedures require a firm, level base that has been screened of rocks larger than 1 inch. When the sod hits the ground, it should feel like it is being laid onto a sponge, not a brick. That sponge-like quality comes from healthy organic matter and a balanced pH that supports microbial life. Beneficial fungi like mycorrhizae need that 6.5 pH to build the symbiotic bridges that help grass survive the heat of summer. Without them, you are just a slave to your water bill. Get the dirt right, and the grass will take care of itself. Forget the dirt, and you will be calling me in two years to tear it all out and start over. I have done it hundreds of times. Don’t be that customer. Fix it now. Roots won’t move if the chemistry is wrong. Period.

April 10, 2026 | Jane Doe

4 Smart Irrigation Timer Fixes to Cut 2026 Water Waste

4 Smart Irrigation Timer Fixes to Cut 2026 Water Waste

The Forensic Audit of a Failed Landscape Strategy

I always drill into my new crew members: if you don’t fix the soil grading first, every plant you put in the ground is just expensive compost. Most homeowners think water waste is just a leaky faucet or a broken head. It is deeper than that. I recently walked a site where the owner spent five figures on a sod install only to watch it rot within three months. The culprit was not the grass. It was a controller programmed by a hack who didn’t understand soil saturation points. We are entering 2026 with higher water rates and stricter municipal oversight. You cannot afford to run a system on a 1990s logic. Efficient landscaping requires a surgical approach to irrigation timing. It requires an understanding of hydrostatic pressure and soil microbiology. If your timer is set to water for 20 minutes every morning, you are likely killing your lawn and flushing your bank account into the storm drain.

Smart Irrigation Timer Fixes for Maximum Efficiency

Smart irrigation timer fixes involve migrating from static schedules to dynamic, sensor-based adjustments that account for evapotranspiration (ET) rates and local weather data. By calibrating your controller to 2026 standards, you reduce landscaping runoff and ensure sod install longevity through deep root stimulation. This is not about cutting water; it is about surgical application.

“Irrigation efficiency is not just about the timer; it is about matching the application rate to the soil’s infiltration capacity to prevent runoff and deep percolation.” – Texas A&M AgriLife Extension

How much water does my lawn actually need in 2026?

The average turfgrass requires exactly 1 inch of water per week, including rainfall. However, in 2026, we focus on net irrigation requirements. This means calculating the 1 inch minus the local humidity and precipitable water. Do not guess. Measure. Use a rain gauge or a smart weather feed. Anything more than 1.5 inches per week in most climates is just feeding fungus.

Fix 1: The Seasonal Scaling Protocol

Most people set their timer in April and do not touch it until November. That is amateur hour. In 2026, you must use the Seasonal Percentage Adjust feature. Plants do not need the same volume of water in the humid days of June as they do in the dry heat of August. I tell my clients to adjust their scale every two weeks. If your controller has a Wi-Fi link, it should do this automatically based on ET data. ET is the sum of evaporation from the land surface plus transpiration from plants. When the ET rate is high, you scale up. When it is low, you scale down. If you do not have a smart timer, buy one. It will pay for itself in one season of landscaping bills. I have seen 40 percent reductions in water bills just by enabling this one feature. It is the difference between a swampy yard and a resilient one.

Fix 2: Implementing Cycle and Soak for Heavy Soils

If you have clay soil, you cannot dump 30 minutes of water on it at once. The infiltration rate of heavy clay is often less than 0.2 inches per hour. Most rotors put out 0.5 inches per hour. Do the math. You are creating a river on your sidewalk. The Cycle and Soak method is the fix. You break that 30-minute run into three 10-minute cycles, with an hour of soak time in between. This allows the water to actually reach the root zone instead of sheeting off the surface. This is critical during a yard cleanup or after a fresh sod install. New sod needs moisture, but it also needs oxygen. Drowning the soil profile kills the microbes necessary for nitrogen cycling. Don’t be the person who drowns their investment.

Controller FeatureWater Savings Est.Primary Technical Benefit
Seasonal Scaling15-25%Adjusts for Evapotranspiration (ET)
Cycle and Soak10-15%Eliminates surface runoff in clay
Flow Sensing90% of leak wasteShuts down system during line breaks
Soil Probes30%Direct measurement of root zone moisture

Fix 3: Integrating Flow Sensors for Leak Detection

A single 1-inch lateral line break can dump 30 gallons per minute. If that happens at 3:00 AM while you are sleeping, you will lose 1,800 gallons in one hour. By 2026, a flow sensor is not an luxury; it is a necessity. A flow sensor connects to your smart timer and monitors the GPM (gallons per minute). If the flow exceeds a preset threshold, the controller kills the master valve. It saves your landscaping from being washed away and prevents massive utility bills. I have seen retaining walls fail because a broken irrigation line saturated the backfill, creating immense hydrostatic pressure. A $200 sensor could have saved a $15,000 wall. It is basic engineering. Do not skip this.

How do I know if my irrigation zone is leaking?

Check your water meter while the system is off. If the dial is spinning, you have a leak. If the system is running and you see a drop in PSI (pounds per square inch) at the heads, or if one area of the yard is consistently muddy, you have a lateral line failure. A flow sensor automates this diagnosis. It is the smartest investment for any yard cleanup professional.

Fix 4: Soil Moisture Sensors vs. Weather Data

Weather-based controllers are good, but soil moisture sensors are better. Weather data is an estimate. A soil probe is a fact. In 2026, we are installing probes at the root flare of trees and 4 inches deep in turf. These sensors tell the timer: “The soil is at 15 percent moisture; do not water today.” This prevents over-watering during those humid weeks when the air is wet but it hasn’t rained. For a successful sod install, these sensors are vital. They ensure the delicate new roots stay moist without becoming anaerobic.

“A retaining wall doesn’t fail because of the stone; it fails because of the water trapped behind it.” – Hardscape Engineering Axiom

This principle applies to your lawn too. Excess water creates a barrier that prevents oxygen from reaching the roots. It will rot. Don’t let it happen.

The 2026 Irrigation Efficiency Checklist

  • Inspect every nozzle for lime scale and debris during your yard cleanup.
  • Ensure rain sensors are not blocked by overgrown tree canopies.
  • Verify the master valve is functioning to prevent constant line pressure.
  • Update your controller firmware to the latest 2026 security and weather patches.
  • Check for head-to-head coverage to ensure no dry spots are triggering extra run time.

Final System Audit and Performance Metrics

Water management is a game of inches and percentages. In 2026, the hacks will still be over-watering, but the professionals will be using data. If you implement these four fixes, you are doing more than saving money. You are protecting the structural integrity of your landscaping and ensuring your sod install survives the first critical year. Always remember: deep, infrequent watering is the goal. Force those roots to chase the water down 6 or 8 inches. That is how you build a drought-tolerant yard. Stop treating your irrigation like a toaster. It is a life-support system. Treat it with the technical respect it deserves.

April 9, 2026 | Anna Lee

Stop 2026 Patio Cracks: 4 Culpeper Hardscape Sealing Hacks

Stop 2026 Patio Cracks: 4 Culpeper Hardscape Sealing Hacks

The smell of damp earth and old limestone

The air in Culpeper today carries that heavy scent of wet red clay and the faint metallic tang of masonry dust. It is a specific aroma that any veteran who works with stone knows well. If you walk across your patio right now and see those hairline fractures snaking through your pavers, you are looking at a countdown. By the time 2026 rolls around, these small gaps will become structural failures. The Editor’s Take: Hardscape sealing is not about aesthetics; it is about preventing the Culpeper freeze-thaw cycle from shattering your investment into gravel. Most homeowners think a quick wash is enough, but without a deep-penetrating sealant, you are just watching your money dissolve into the Virginia soil. I have spent years restoring things people thought were broken, and I can tell you that a patio is no different than a piece of fine mahogany furniture. If you do not protect the grain, the weather will eat it alive.

The physics of failing stone joints

Hardscapes in our region fail because of a simple, brutal mechanical process. Water enters the pores of the stone or the sand in the joints. When the temperature drops near the Blue Ridge, that water expands. It pushes. It grinds. It creates space where there should be none. Professional landscaping culpeper va experts know that sealing acts as a molecular shield. It is not just a coat of paint. A high-quality silane-siloxane sealer creates a hydrophobic barrier that forces water to bead up and roll off rather than soaking in. This process preserves the structural integrity of the polymeric sand. If that sand washes out, your pavers begin to shift. Once they shift, the level is lost. You aren’t just looking at a crack anymore; you are looking at a tripping hazard and a complete teardown. I have seen too many beautiful walkways ruined because someone chose a cheap, plastic-based acrylic that peeled within six months. You need something that breathes, something that understands the stone.

Why Culpeper red clay demands a different strategy

Our local geology is a nightmare for rigid structures. The heavy clay content in Culpeper County soil retains moisture far longer than the sandy loams you find toward the coast. This means your patio is essentially floating on a giant, wet sponge. When we talk about contact us for professional help, we are talking about localized knowledge. A contractor from outside the area might not realize that the drainage patterns around a house near Commonwealth Park differ wildly from one up by Hazel River. You need to ensure that before any sealant is applied, the substrate is bone dry. Sealing in Virginia humidity is a fool’s errand. If you trap moisture under that sealant, you get a milky white haze known as efflorescence. It is a chemical ghost that haunts your stone and is nearly impossible to remove without harsh acids. I prefer the old ways: patience, timing, and a deep respect for the hygroscopic nature of the material. We aren’t just throwing chemicals at a problem; we are stabilizing a foundation.

The disaster of the big box store solution

I see it every spring. A well-meaning homeowner goes to a warehouse store, buys a five-gallon bucket of ‘Wet Look’ sealer, and slaps it on with a thick roller. By August, it is flaking off like a bad sunburn. The friction here is that most consumer-grade sealers are too high in solids. They stay on the surface. They don’t penetrate. True protection comes from a low-solids, deep-penetrating formula that bonds with the minerals inside the paver. It is like the difference between a cheap varnish and a hand-rubbed oil finish. One sits on top and fails; the other becomes part of the object. Furthermore, if you haven’t performed a proper soft wash to remove organic growth like moss and lichen, you are just sealing the rot into the stone. You are literally protecting the weeds. A real professional approach involves a multi-step cleaning process, re-sanding with specialized polymeric blends, and then a precision application that respects the porosity of the specific stone type, whether it is local slate or imported travertine.

The evolution of Virginia stone preservation

We used to just throw some mortar in the cracks and hope for the best. Those days are gone. Modern hardscape technology allows for a flexibility that the old guys couldn’t imagine. We can now seal a patio and have it remain breathable, allowing water vapor to escape while blocking liquid water from entering. This is vital for the health of your home’s foundation. How often should I seal my patio in Culpeper? Generally, every three to five years, depending on sun exposure and traffic. Can I seal over old sealer? Only if it is the same chemical base; otherwise, they will react and create a sticky mess. Does sealing make the stones slippery? Not if you use a penetrating sealer or add a shark-grip additive to a topical one. Will it stop weeds forever? No, but it makes the environment so inhospitable that they rarely take root. Is it too late if I already have cracks? No, we can bridge small cracks with specialized resins before sealing. Can I seal in the winter? Absolutely not; the temperature must be consistently above fifty degrees for the chemical bond to form. What happens if it rains right after? You start over. Moisture is the enemy of the curing process.

The final word on lasting value

Your outdoor space is an extension of your home’s soul. It is where you spend those long Virginia evenings when the fireflies are out and the heat finally breaks. Don’t let that space crumble because of a weekend of neglect. Sealing is the final touch in a master craftsman’s workflow. It ensures that the hard work of laying those stones isn’t undone by a single harsh winter. If you want a patio that looks as good in 2030 as it did the day it was installed, you have to treat it with the respect it deserves. Stop settling for temporary fixes and invest in a shield that actually holds the line against the elements. Your future self will thank you when the neighbors are all ripping up their cracked concrete while yours remains pristine and solid. “,

April 9, 2026 | Anna Lee

3 Privacy Hedge Plants to Block Nosy Neighbors in 2026

3 Privacy Hedge Plants to Block Nosy Neighbors in 2026

The Engineering of a Living Barrier

To block neighbors effectively by 2026, you need fast-growing, evergreen species like American Pillar Arborvitae, Nelly Stevens Holly, or Skip Laurel, spaced according to their mature width to ensure air circulation while maintaining a solid visual barrier against unwanted eyes. Most homeowners fail because they think of a hedge as a decoration. It is a biological wall. I always drill into my new crew members: if you don’t fix the soil grading first, every plant you put in the ground is just expensive compost. A privacy screen requires more than just digging holes; it demands an understanding of soil compaction, drainage patterns, and the specific landscaping requirements of your site. If the site has standing water, those roots will suffocate in anaerobic conditions long before you get any privacy.

The Apprentice Lesson: Soil First, Plants Second

When I started this firm twenty years ago, I saw a homeowner spend five figures on mature evergreens only to see them brown out within six months. The issue wasn’t the plants; it was the sod install they did right up to the trunks and the lack of a proper drainage plan. They had zero irrigation strategy for deep-root establishment. I tell my guys that the rhizosphere is where the money is. If the soil pH is off or the bulk density is too high from construction equipment, those plants are trapped in a concrete-like tomb. We test the soil. We check the percolation. We don’t guess.

“Proper plant selection involves matching the plant’s biological needs to the site’s environmental conditions, including soil pH, drainage, and light exposure.” – Penn State Extension

1. Thuja occidentalis ‘American Pillar’

The American Pillar Arborvitae is the professional’s choice for tight spaces because it provides a vertical growth rate of up to three feet per year while maintaining a narrow footprint of only four feet wide. Unlike the more common ‘Green Giant’, which can eventually swallow a small backyard, the ‘American Pillar’ stays disciplined. It is resistant to the common ‘splitting’ issues seen in heavy snow loads. We install these to create a dense, fine-textured wall. Don’t crowd them. Even with their narrow habit, they need airflow to prevent needle blight. We calculate the spacing based on a 48-inch center-to-center measurement to ensure the canopy closes by 2026 without the plants competing for nutrients.

How do I stop my arborvitae from turning brown?

Arborvitae browning is usually a symptom of desiccation or spider mites. Deep irrigation during the first two growing seasons is non-negotiable to prevent the root ball from drying out while the surrounding native soil remains damp—a common phenomenon called the ‘teacup effect.’ Use a drip system with emitters placed at the root flare, not the foliage.

2. Ilex x ‘Nelly R. Stevens’ (Nelly Stevens Holly)

Nelly Stevens Holly offers a formidable, prickly barrier that serves as both a visual screen and a physical deterrent, reaching heights of 15-25 feet with a naturally pyramidal shape. This is the ‘tank’ of the hedge world. It handles the heat of the South and the clay of the Mid-Atlantic with equal resilience. Its leathery, dark green leaves have a high wax content, which helps it retain moisture during drought periods. However, don’t let its toughness fool you. If you bury the root flare—the point where the topmost roots join the trunk—you are inviting stem-girdling roots and eventual decline. We always plant ‘proud,’ meaning the root ball is slightly above the surrounding grade to allow for settling and gas exchange.

“Effective screening requires an understanding of the growth habit and potential mature height of the selected species to avoid future utility interference.” – Texas A&M AgriLife

Comparison of 2026 Privacy Hedge Candidates

Plant SpeciesGrowth Rate (Annual)Mature WidthSoil PreferenceBest Feature
American Pillar30-36 Inches4 FeetLoamy/Well-DrainedSmall Footprint
Nelly Stevens Holly12-24 Inches8-12 FeetAcidic/Clay TolerantPhysical Barrier
Skip Laurel24-30 Inches5-7 FeetVersatile/Shade TolerantElegant Texture

3. Prunus laurocerasus ‘Schipkaensis’ (Skip Laurel)

The Skip Laurel is the elite choice for shaded properties, offering broad, glossy foliage that creates a sophisticated screen where most evergreens would fail due to low light. It is more cold-hardy than other cherry laurel varieties and can handle a wide pH range. We use these for yard cleanup projects where the homeowner wants to replace a messy, overgrown fence line with something structured. The key with Skip Laurels is the prune. To get a dense wall by 2026, you must perform ‘heading cuts’ in early spring to encourage lateral branching. If you just let them grow, they can become leggy. A dense hedge is a result of consistent, professional maintenance, not just luck.

How much modified gravel do I need for a patio base?

While this article focuses on hedges, many privacy projects involve hardscaping. For a standard patio base, you need 6 inches of compacted 21A or 3/4-inch modified gravel. Calculation: (Length x Width x 0.5) / 27 = Cubic Yards needed. Compaction is king. If you don’t use a vibratory plate tamper every 2 inches of lift, your stone will settle, and your wall will lean.

The Installation Checklist for 2026 Success

  • Site Marking: Call 811. Don’t sever a fiber optic line for a Holly.
  • Soil Modification: Incorporate organic compost if your clay is heavy, but don’t over-amend the hole; the roots must learn to grow in native soil.
  • Root Flare Visibility: Ensure the ‘knob’ where roots start is visible at the soil surface.
  • Irrigation Setup: Install a dedicated drip line. Hand-watering is for hobbyists; consistency is for professionals.
  • Mulching: Use 2-3 inches of aged hardwood mulch. Do not touch the trunk. No mulch volcanoes.

Landscape success is built on the microscopic level. You are managing the exchange of cations in the soil and the hydrostatic pressure in the root zone. A hedge planted in 2024 with the correct engineering will be a fortress by 2026. Skip the shortcuts. Buy nursery-grade stock, not the root-bound remnants from a big-box store. Your privacy depends on the biological vigor of the specimens you choose today.

April 9, 2026 | Jane Doe

Save $400 on Your 2026 Sod Install with This 1-Day Prep Hack

Save $400 on Your 2026 Sod Install with This 1-Day Prep Hack

The Economics of Dirt: Why Preparation is Your Best Investment

To save $400 on your 2026 sod install, you must perform the site yard cleanup and rough grading yourself at least 48 hours before the delivery truck arrives. By removing organic debris, killing off dormant weed seeds, and establishing a 1% grade away from the foundation, you eliminate the high-cost labor hours typically billed by landscaping crews for site preparation. Most contractors charge a premium for the ‘grunt work’ of clearing stone and old turf; doing this yourself ensures your budget goes toward high-quality grass rather than labor overhead.

I always drill into my new crew members: if you don’t fix the soil grading first, every plant you put in the ground is just expensive compost. I have seen countless homeowners waste thousands of dollars because they thought the sod would hide the sins of the soil. It doesn’t. Sod is a living, breathing biological carpet that requires an immediate interface with the native earth to survive. If that interface is blocked by rocks, old roots, or compacted clay, those expensive rolls will be brown and brittle within 14 days. You aren’t just laying grass; you are engineering a biological filter for your property. 80% of the success of any sod install happens before the first roll is even harvested from the farm. This isn’t about aesthetics; it is about the physics of root penetration and the chemistry of nitrogen availability.

“Successful turf establishment depends more on the physical and chemical properties of the seedbed than on the quality of the sod itself.” – Penn State Center for Turfgrass Science

Why Site Prep Costs So Much in Professional Quotes

Professional installers factor in the ‘unknowns’ of a yard. They don’t know if they will hit buried bricks, hidden irrigation pipes, or a root system from a tree removed ten years ago. To cover this risk, they bake a massive labor buffer into the quote. When you handle the yard cleanup yourself, you remove that risk. You are handing the contractor a ‘clean slate.’ Most crews will happily knock $400 to $600 off a standard residential quote if the ground is already tilled, leveled, and cleared. It allows them to get in and out in half the time. Speed is profit for them. Preparation is savings for you. Don’t skip the utility check. Call 811. Do it now.

The 1-Day Prep Hack: Step-by-Step Breakdown

The hack relies on mechanical efficiency and timing. You need to focus on the ‘Sub-Grade.’ This is the soil sitting exactly 1.5 inches below your finished grade. This is where the roots will live. If this layer is compacted to a high PSI (pounds per square inch), the roots will grow horizontally instead of vertically. This leads to a shallow root system that will fry in the first heatwave of July. Use a core aerator if the soil is heavy clay. Don’t use a spike aerator; it just pushes the compaction further down. You need to physically remove plugs of earth to create gas exchange pathways. Air is just as important as water for root respiration.

Prep TaskProfessional Cost (Estimated)DIY Cost (Rental/Materials)Time Required
Debris & Rock Removal$150 – $250$0 (Manual Labor)3 Hours
Old Vegetation Kill-off$100 – $200$30 (Glyphosate)1 Hour
Rough Grading (1% Slope)$200 – $400$60 (Leveling Rake)4 Hours
Soil Compaction Relief$150 – $300$75 (Aerator Rental)2 Hours

How deep should I till soil before laying sod?

You should till the soil to a depth of at least 4 to 6 inches to ensure proper root penetration and moisture retention. Tilling deeper than 6 inches can actually destabilize the soil structure and lead to uneven settling later. Once tilled, the soil should be lightly firmed with a water-filled roller. You want it firm enough that your boots don’t sink more than half an inch, but loose enough for a finger to easily poke into the surface. This balance is the ‘Goldilocks zone’ for landscaping success. If the soil is too loose, the sod will have air pockets underneath. Air pockets kill roots. Use a landscape rake to break up large clods. Aim for the consistency of coarse breadcrumbs.

The Science of Soil pH and Nutrient Availability

If your soil pH is below 6.0, your new sod cannot ‘see’ the nutrients in the ground. It is like being in a room full of food with your mouth taped shut. Acidic soil locks up phosphorus, which is the primary element needed for root development. Before you spend a dime on sod, spend $20 on a soil test from your local agricultural extension office. If you need to add lime, do it during your 1-day prep. Lime takes time to react with the soil chemistry. By the time 2026 rolls around, the lime will have neutralized the acidity, making your sod install much more likely to take hold. Most people wait until the grass is yellow to fix the pH. That is too late.

Addressing Irrigation and Drainage Issues

Before the sod arrives, you must test your irrigation system’s ‘head-to-head’ coverage. This means the spray from one sprinkler head must reach the base of the next one. Any gap in coverage will result in a ‘brown donut’ in your lawn. During your prep day, check for leaking valves or clogged nozzles. Water pressure is the lifeblood of a new lawn. You also need to ensure the soil slopes away from your home at a rate of at least 1/4 inch per foot. Water should never pool. Standing water causes anaerobic conditions where pathogens like Pythium blight thrive. It will rot. Don’t think the sod will soak up a drainage problem. Sod is not a sponge; it is a living system that can drown.

“A retaining wall doesn’t fail because of the stone; it fails because of the water trapped behind it.” – Hardscape Engineering Axiom

The Post-Prep Checklist for Homeowners

  • Verify all underground utilities are marked by calling 811.
  • Kill all perennial weeds and old turf using a non-selective herbicide 10 days prior.
  • Remove all stones larger than 1.5 inches in diameter.
  • Apply a starter fertilizer high in phosphorus (the middle number on the bag).
  • Roll the subgrade to ensure a flat, even surface for the sod rolls.

How much water does new sod actually need?

New sod requires approximately 1 inch of water per day for the first two weeks, split into two or three short cycles. This keeps the root zone moist without saturating the soil to the point of rot. You aren’t watering the grass blades; you are keeping the soil-to-sod interface damp. Once the roots have knitted into the soil (you’ll know because you can’t lift the corner of a roll anymore), you should transition to deep, infrequent watering. This forces the roots to grow deeper into the earth to find moisture. Shallow watering creates weak grass. Deep roots create a drought-resistant lawn. It is that simple.

The Critical 24-Hour Window After Install

Once the sod is down, the clock is ticking. You have a very narrow window to get that first saturation in. If the edges of the sod rolls start to gap, they are drying out and shrinking. Use a heavy roller after installation to press the sod into the soil. This removes the air pockets I mentioned earlier. If you see the grass turning a blue-gray color, it is in wilt. Water it immediately. Do not mow the new lawn for at least 14 to 21 days. Let the top growth support the root growth. When you finally do mow, never take off more than one-third of the grass blade at a time. Scalping a new lawn is the fastest way to kill it. Keep your blades sharp. Dull blades tear the grass, leaving it open to fungal infections.

April 8, 2026 | Jane Doe

5 Yard Cleanup Fixes to Stop 2026 Soil Erosion on Hills

5 Yard Cleanup Fixes to Stop 2026 Soil Erosion on Hills

Engineering Hillside Stability: 5 Yard Cleanup Fixes to Stop 2026 Soil Erosion

Soil erosion on a slope is not just a cosmetic nuisance; it is a structural threat to the integrity of your entire property. When heavy rains hit a grade that hasn’t been properly stabilized, the hydraulic force strips away the O-horizon (organic layer), exposes root systems, and can eventually lead to slope failure or ‘slumping.’ To prevent a washout in the 2026 season, you need to stop thinking about your yard as a garden and start thinking about it as a drainage basin.

The Hardscape Autopsy: Why Gravity Always Wins

I recently got called out to tear up a $30,000 patio that was sinking because the previous contractor treated a 15-degree slope like a flat parking lot. They laid pavers directly over poorly compacted fill dirt without a single thought for hydrostatic pressure. Within two seasons, the water moving under the surface had carved a subterranean channel—what we call ‘piping’—and the entire north corner of the patio dropped six inches into the void. This failure wasn’t caused by the stone; it was caused by the contractor’s ignorance of soil physics. If you don’t manage where the water goes, it will manage your bank account for you.

“A retaining wall doesn’t fail because of the stone; it fails because of the water trapped behind it.” – Hardscape Engineering Axiom

1. Stabilizing the Shear Plane with Precise Soil Grading

Soil grading for erosion control involves reconfiguring the terrain to a 1:3 slope ratio to reduce water velocity. By directing runoff toward designated swales or catch basins, you prevent the saturation of the soil’s shear plane, which is the primary cause of hill failure during 2026 spring thaws.

When we talk about grading, we are looking at the ‘angle of repose.’ For most clay-heavy soils, if your hill is steeper than 33 degrees, gravity is actively trying to pull it down. During your yard cleanup, look for ‘rills’—small finger-like channels in the dirt. These are the precursors to gullies. You must fill these with a mixture of screened topsoil and 3/4-inch crushed aggregate to provide ‘teeth’ for the soil to grip. Don’t just throw loose dirt in a hole. It will wash away in the first storm. Use a hand tamper or a plate compactor to reach at least 90% Proctor density. It must be hard. If you can push a screwdriver into it with one hand, it’s not compacted enough.

2. Installing a Bio-Filtration Sod Barrier

A strategic sod install acts as a biological rebar system, using a dense network of rhizomes and fibrous roots to lock the top six inches of soil in place. Unlike seeding, which can wash away in a single afternoon, sod provides instantaneous hydraulic resistance against downhill water flow.

For hills, you cannot use the ‘cheap’ mesh-backed sod from a big-box store. You need farm-grown, thick-cut sod—preferably a Tall Fescue or Bermuda, depending on your USDA zone. When laying sod on a hill, you must stagger the joints like bricks. If you align the seams, water will find those straight lines and turn them into new erosion channels. Stake the sod pieces into the hill using biodegradable wooden stakes. This prevents the turf from sliding before the roots knit into the native soil. It’s hard work. Your back will hurt. Do it anyway.

How deep should sod roots go?

In a healthy hill stabilization project, you want to see root penetration of at least 4 to 6 inches within the first 60 days. This requires deep, infrequent irrigation that forces the roots to seek moisture further down in the soil profile. Shallow watering is the enemy of slope stability.

3. Sub-Surface Drainage and the French Drain Grid

Sub-surface drainage involves installing perforated PVC piping encased in a non-woven geotextile fabric and clean stone to intercept groundwater before it destabilizes a slope. This system mitigates hydrostatic pressure, which is the weight of water trapped in the soil pushing against your landscaping.

MethodSlope ToleranceEstimated LifespanPrimary Failure Mode
Sod Reinforcement1:3 Grade5-10 YearsRoot Desiccation
Riprap / Armoring1:2 Grade25+ YearsUnder-cutting
French Drain GridN/A (Sub-surface)15-20 YearsSiltation/Clogging
Terraced Retaining Wall1:1 Grade40+ YearsHydrostatic Pressure

Many homeowners think a yard cleanup is just raking leaves. On a hill, a real cleanup involves clearing the ‘daylight’ ends of your drain pipes. If the exit point of your French drain is buried under two inches of mulch or silt, the whole system backs up. The water saturates the hill, the weight of the soil doubles, and then the hill moves. Use 4-inch SDR-35 pipe; do not use that flimsy black corrugated tubing. The corrugated stuff traps silt in the ridges and collapses under the weight of the earth. It is garbage. Use rigid pipe.

4. Irrigation Calibration: Avoiding the ‘Saturation Point’

Irrigation management on slopes requires matched precipitation rate nozzles and cycle-and-soak programming to prevent surface runoff. Over-irrigation on a hill doesn’t just waste water; it lubricates the soil particles, significantly increasing the risk of a localized landslide or mudflow.

If you have an automated system, you must check your run times. If you see water running off the grass and into the street or driveway, you have reached the soil’s infiltration limit. Stop the water. Set your controller to run for 5 minutes, wait an hour for the water to soak in, and then run for another 5 minutes. This is ‘cycle-and-soak.’ Also, check for ‘weeping’ heads at the bottom of the hill. Gravity pulls all the water in the pipes to the lowest head after the zone shuts off. Install check valves (like the Rain Bird SAM series) to keep the water in the pipe and prevent the bottom of your hill from becoming a swamp.

“Surface water runoff is a function of soil permeability and rainfall intensity; once intensity exceeds permeability, erosion is inevitable without mechanical intervention.” – USDA NRCS Technical Manual

5. Hardscape Anchoring and Riprap Placement

Hardscape anchoring uses angular riprap stone or segmental retaining units to provide a mechanical counterweight to the soil’s lateral pressure. On steep grades where vegetation alone fails, armoring the toe of the slope prevents the base from washing out, which would otherwise lead to a ‘global failure’ of the hill.

During your 2026 yard cleanup, inspect the ‘toe’ of your hill—the very bottom where it flattens out. If you see soil accumulating there, the hill is moving. You need to anchor it. Use 6-to-12-inch angular limestone. Do not use round river rock. Round rocks are like marbles; they roll. Angular stones lock together. This is called ‘interlocking friction.’ Dig a trench at the bottom of the hill, line it with heavy-duty filter fabric, and ‘key’ the first layer of stones into the ground. This creates a structural ‘boot’ that holds the rest of the hill in place.

How much modified gravel do I need for a patio base?

For a standard patio, you need 6 inches of compacted 21A or 57 stone. However, on a hill or near a slope, you must increase that to 8-12 inches of compacted aggregate, reinforced with a biaxial geogrid to prevent lateral shifting of the base material.

Checklist for Hillside Erosion Inspection

  • Identify ‘rills’ or small channels deeper than 1 inch.
  • Check for ‘creep’ (leaning fence posts or trees with ‘J’ shaped trunks).
  • Clear all debris from drain exits and catch basin grates.
  • Test soil pH; acidic soil (below 5.5) prevents the deep root growth needed for stability.
  • Examine the ‘toe’ of the slope for signs of bulging or silt accumulation.

Fixing erosion isn’t about one big ‘transformation.’ It’s about a dozen small engineering choices. Use the right pipe. Compact the dirt until it’s hard as a rock. Stake your sod. If you cut corners, the rain will find them. Don’t let 2026 be the year your backyard ends up in your neighbor’s pool.

April 8, 2026 | Emily Clark

4 Nutrient Hacks to Stop 2026 Sod Browning for Good

4 Nutrient Hacks to Stop 2026 Sod Browning for Good

The Chemical Nightmare: Why Your Green Investment is Turning Into Straw

A homeowner called me in a panic last August after they completely torched their front lawn by applying a heavy-handed dose of high-nitrogen fertilizer during a 95-degree heatwave. The grass didn’t just brown; it looked like it had been hit with a blowtorch because the synthetic salts in the fertilizer literally sucked the moisture out of the plant cells. This is a classic case of osmotic stress, and it’s the primary reason most sod install projects fail within the first two years. If you want to stop 2026 sod browning, you have to stop treating your yard like a carpet and start treating it like a living, breathing biological system. Most people think landscaping is just about aesthetics, but it is actually about soil chemistry and irrigation management. When you lay new sod, you are performing a plant organ transplant. If the soil isn’t prepared to receive those roots, the plant will reject its new home and die. It will rot if you over-water, and it will bake if you under-feed. There is no middle ground for hacks.

“Nitrogen is the most limiting nutrient for turfgrass growth, but excessive application, especially in soluble forms, can lead to leaf burn and increased susceptibility to disease.” – Texas A&M AgriLife Extension

The Science of Why Sod Browns After the First Year

Sod browning in 2026 will be caused by nutrient lockout, soil compaction, and hydrophobic soil layers that prevent water from reaching the root zone. To fix this, you must optimize the Cation Exchange Capacity (CEC) of your soil so the turf can actually utilize the nutrients you apply during your seasonal yard cleanup. [image placeholder]

How can I tell if my sod is dying or just dormant?

Check the crown of the grass near the soil line; if it is white and firm, it is dormant, but if it is brown, mushy, and pulls away easily, the vascular system has failed and the plant is dead. You cannot fix dead. You can only prevent it.

Hack 1: The Controlled-Release Nitrogen Protocol

To prevent browning, you must switch from quick-release synthetic fertilizers to polymer-coated urea (PCU) or organic-based nitrogen sources that provide a steady drip of nutrition over 12 weeks. High-salt fertilizers create a spike in growth that the irrigation system cannot support, leading to cellular collapse. You want a 16-4-8 or a 10-0-20 ratio depending on your soil test. Nitrogen drives the green, but potassium (the K in NPK) drives the stress tolerance. Without enough potassium, your sod is a sitting duck for the first frost or the first heatwave of 2026. Don’t skip the soil test. It is the only way to know what your dirt actually needs.

Hack 2: Micronutrient Injections for Root Depth

Green color isn’t just about nitrogen; it is about Iron (Fe) and Magnesium (Mg), which are the central atoms in the chlorophyll molecule. Applying a chelated iron supplement during your sod install or maintenance phase ensures a deep blue-green color without the surge growth that attracts pests. Magnesium is equally critical because it facilitates phosphate transport. If your soil pH is above 7.2, your grass cannot even see the iron in the soil. It is locked away. You need to apply sulfur to drop the pH into the 6.0 to 6.5 sweet spot. This is basic agronomy, not magic.

| Nutrient | Function | Source | Impact on Browning || Nitrogen (N) | Leaf growth | Polymer-coated urea | Prevents yellowing || Potassium (K) | Stress resistance | Muriate of potash | Prevents drought wilt || Iron (Fe) | Chlorophyll production | Chelated Iron | Provides deep green || Humic Acid | Soil structure | Granular humates | Improves water retention |

Hack 3: The Organic Carbon Injection

Modern landscaping often ignores the carbon cycle, focusing only on NPK. By applying humic and fulvic acids, you increase the soil’s ability to hold onto water and nutrients. Think of humic acid as a sponge that holds onto minerals until the roots are ready to take them. This prevents leaching, where your expensive fertilizer just washes away into the storm drain after a heavy rain. During your spring yard cleanup, top-dress with a quarter-inch of high-quality compost or apply a liquid carbon product. This feeds the microbes that break down thatch. Thatch is the enemy of irrigation. If your thatch layer is thicker than half an inch, your water never even hits the dirt. It just evaporates.

“Soil testing is the first step in a professional turf management program to determine the lime and fertilizer requirements for a healthy lawn.” – Penn State Center for Turfgrass Science

Hack 4: Precise Irrigation and Evapotranspiration Tracking

Stop watering your lawn for 15 minutes every day. You are killing it with kindness. Real landscaping professionals use deep, infrequent watering to force roots to grow downward. You want to apply 1 inch of water per week in a single or double session. This trains the roots to find moisture 6 inches deep instead of sitting on the surface where they will bake in the sun. Use a tuna can to measure your irrigation output. If it takes 45 minutes to fill that can, that is your run time. Anything less is just humidifying the grass and inviting fungus.

How much modified gravel do I need for a patio base?

While not directly related to sod, if you are doing a sod install around a patio, you need 6 inches of compacted 21A or QA gravel to ensure proper drainage so your grass doesn’t drown in runoff. Drainage is everything.

  • Test soil pH every two years.
  • Aerate in the fall to break up compaction.
  • Mow at the highest setting for your species.
  • Never remove more than 1/3 of the blade at once.
  • Sharpen your mower blades every 10 hours of use.

Stop following the advice of big-box store employees who have never held a soil probe. If you want a lawn that survives 2026, you have to build the soil from the bottom up. Get the chemistry right, get the water deep, and the color will take care of itself. Professional results require professional discipline.

April 7, 2026 | Jane Doe

Budget Yard Cleanup: 3 Tactics to Clear 2026 Brush

Budget Yard Cleanup: 3 Tactics to Clear 2026 Brush

Budget Yard Cleanup: 3 Professional Tactics to Clear 2026 Brush

I always drill into my new crew members: if you don’t fix the soil grading first, every plant you put in the ground is just expensive compost. Last year, I watched a greenhorn try to clear a quarter-acre of overgrown buckthorn with a standard string trimmer. By noon, his machine was smoking and the brush hadn’t moved an inch. I had to take him aside and explain that yard cleanup isn’t about aesthetics; it is about site engineering. You are not just ‘cleaning’; you are resetting the biological clock of the property. If you leave the root crowns in the dirt, you are just pruning the weeds for next season. For a 2026 project, you need to think about the latent seed bank hiding in your topsoil right now. Preparation is 80 percent of the job. Execution is the remaining 20 percent. Skip the prep, and you are just throwing money into a woodchipper.

Tactical Mechanical Extraction: Removing the Root of the Problem

Effective yard cleanup for 2026 brush requires mechanical extraction of woody perennials, focusing on the root crown removal and soil aeration. By utilizing high-torque brush mowers or manual grubbing hoes, you break the vascular system of invasive species, preventing the rhizomatous spread that causes regrowth in new landscaping beds. Do not just cut at the surface.

When you look at a wall of brush, don’t see green. See leverage points. Most homeowners make the mistake of ‘scalping’ the yard. They take a chainsaw to the trunk and leave a six-inch stump. That is a death sentence for your future sod install. That stump will rot, create a localized nitrogen sink, and eventually collapse, leaving a divot in your perfectly graded lawn. You must use a technique called ‘grubbing.’ This involves getting a narrow-bladed spade or a mattock under the root flare. For larger specimens, a brush grubber attachment on a compact tractor is the professional standard. We are looking for the ‘burl’—that knot of energy where the stem meets the roots. If that stays in the ground, your 2026 spring will be spent fighting the same battle you thought you won today. It is laborious. It is back-breaking. It is necessary.

Tool TypeIdeal VegetationCost EfficiencyLabor Intensity
Heavy-Duty Brush HogTall Grass & Soft Woody StemsHigh for large areasLow
Mattock/Grubbing HoeDeep-Rooted Shrubs & SaplingsVery High (Budget)Extremely High
Reciprocating Saw (9-inch blade)Tight Spaces/Fence LinesMediumHigh

How much does it cost to clear an acre of brush?

On a professional level, clearing an acre of heavy brush usually runs between $800 and $2,500 depending on the density and slope. For a budget DIY approach, your costs are primarily equipment rental and your own sweat equity. Renting a walk-behind brush cutter for a weekend usually costs around $150 to $200. Factor in another $50 for fuel and blade sharpening. Your time is the hidden variable here. It will take a novice roughly 20 to 30 man-hours to properly clear and grub an acre of moderate overgrowth.

“A retaining wall doesn’t fail because of the stone; it fails because of the water trapped behind it.” – Hardscape Engineering Axiom

Soil Remediation and the Nitrogen Cycle Post-Cleanup

After the physical debris is removed, soil remediation involves testing pH levels and adjusting the Nitrogen-Phosphorus-Potassium (NPK) balance to support future growth. Adding high-carbon organic matter helps stabilize the soil microbiology, ensuring that the irrigation systems you install later don’t just wash away nutrients through a depleted soil profile. Stop the erosion before it starts.

When you rip out brush, you are essentially performing surgery on the earth. The soil is left raw and exposed. This is where most people fail. They clear the brush and then leave the dirt bare for three months. Nature hates a vacuum. If you don’t put something there, the weed seeds already in the soil will germinate instantly. I tell my clients that as soon as the brush is gone, we need to look at the ‘O-Horizon’—the organic layer of the soil. If you’ve cleared heavy brush, the soil is likely acidic and nitrogen-poor because the invasive plants have been mining the nutrients for years. You need to spread at least two inches of composted organic matter. This isn’t for the plants you have; it is for the sod install you want next year. We need to wake up the mycorrhizal fungi. These are the microscopic networks that will eventually connect your new landscaping roots to the water table. Without them, your plants are on life support.

“Soil compaction is the silent killer of urban landscapes, reducing pore space and suffocating root respiration regardless of nutrient availability.” – Penn State Agricultural Extension

When is the best time to clear brush for new sod?

The ideal window for brush clearing is late autumn or early winter when plants are dormant. This prevents the ‘flush’ of new growth that occurs if you cut in mid-summer. By clearing in the dormant season, you have a clean slate to perform soil amendments in early spring, allowing the ground to settle for at least four weeks before you attempt a sod install. Proper timing reduces the need for heavy herbicide use.

Grade Stabilization and Irrigation Preparation

Before any sod install occurs, you must establish positive drainage and install irrigation mainlines at a depth of at least 12 inches to avoid frost heave. Proper grading ensures that water moves away from foundations at a minimum 2 percent slope, which prevents the hydrostatic pressure that ruins hardscapes and drowns delicate root systems in 2026. Water is your best friend or your worst enemy.

Don’t even think about buying sod until you’ve checked your levels. I’ve seen $10,000 sod jobs turn into a muddy swamp because the homeowner didn’t understand ‘swales.’ A swale is a shallow, wide ditch designed to move water. If your yard is flat, you are in trouble. You need to move dirt. When we do a yard cleanup, we use the ‘cut and fill’ method. We take the high spots and move them to the low spots. But here is the secret: you have to compact it in ‘lifts.’ You don’t just pile up 6 inches of dirt and call it a day. You put down 2 inches, you tamp it until it’s firm, and then you add more. If you don’t, the first time your irrigation runs, the ground will settle unevenly and your new lawn will look like a topographical map of the Ozarks. Also, trench your irrigation lines now. It is ten times harder to do it once the grass is down. Use Schedule 40 PVC, not that thin-walled junk. You want this system to last until 2046, not just 2026.

  • Survey the Grade: Use a laser level or a simple string line to identify low spots.
  • Trenching: Dig 12 to 18 inches deep for all main irrigation lines to prevent freeze damage.
  • Soil Amendment: Incorporate 3 cubic yards of compost per 1,000 square feet of area.
  • Final Leveling: Use a landscape rake to remove any rocks larger than one inch.
  • Compaction: Use a water-filled roller to firm the soil surface before the sod install.

Precision matters. If you are off by an inch in your grade, water will find that inch. It will sit there. It will rot the roots of your new grass. And you will be calling me to fix it. Do it right the first time. Clear the brush, fix the dirt, then plant. That is the only way to get a professional result on a budget. You provide the labor; let the biology do the rest.