April 7, 2026 | Michael Smith

Grass Pickup: 4 Tactics to Stop Mower Clogs in 2026 Culpeper

Grass Pickup: 4 Tactics to Stop Mower Clogs in 2026 Culpeper

The swampy reality of Virginia fescue

I have spent twenty years smelling like WD-40 and transmission fluid, and if there is one thing that makes me want to throw a wrench across the shop, it is a mower deck packed tighter than a Culpeper tobacco barn with wet grass. You want to know how to stop the clogs? Stop cutting when it is wet, sharpen your blades until they can shave, and keep the deck clean of that sticky red clay. It isn’t rocket science, but most folks treat their equipment like it is magic. EDITOR’S TAKE: Real-world mower maintenance in Culpeper requires moisture control and high-lift blade geometry to fight local humidity. Ignore the all-weather marketing and focus on deck airflow. To stop mower clogs in 2026, you must increase deck RPM, use high-lift blades, and wait until the Culpeper morning dew has evaporated completely before starting your engine. If you are struggling with a yard that grows faster than you can cut, you might want to look into landscaping culpeper va professionals who have the heavy-duty gear to handle the thick stuff.

Airflow is the only thing that matters

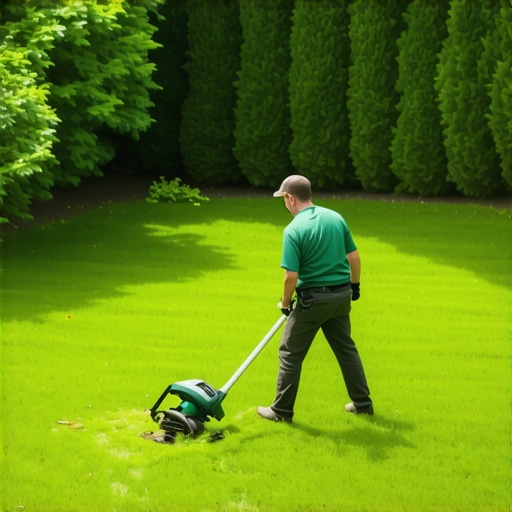
A mower is essentially a high-speed fan with a knife attached to the bottom. When you hit a patch of thick fescue, that fan needs to move a massive volume of air to throw the clippings out of the chute. If the air cannot move, the grass stays in the deck, gets hit a second time, turns into a green paste, and sticks to everything. It is a mechanical failure of physics, not just bad luck. In the shop, I see spindles snapped because people try to power through a clog. The torque required to spin through three inches of wet pulp is enough to twist steel. You need to check your discharge chute for any plastic burrs or rough edges that catch those first few blades of grass. Once a single blade sticks, it acts as an anchor for the rest. We often recommend contact us for a consultation if your yard layout makes standard mowing a constant battle against clogs.

[IMAGE_PLACEHOLDER]

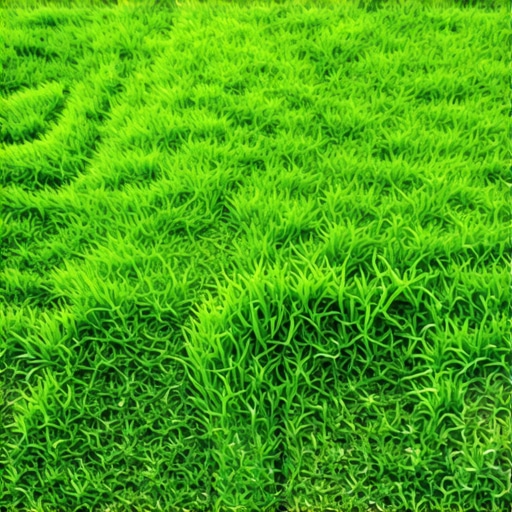
The Culpeper morning dew trap

If you live near the foothills of the Blue Ridge, you know the humidity doesn’t just sit in the air; it lives in the soil. Culpeper grass is heavy. It is not that light, wispy stuff you see in the Midwest. Our red clay keeps the root systems soaked, and that moisture travels straight up the blade. If you start your mower at 8 AM, you are essentially trying to mulch a bucket of water. I tell every customer to wait until 10 AM or even noon. Let the Virginia sun do the hard work for you. Even a professional-grade deck will struggle with the 2026 climate patterns we are seeing, where sudden afternoon downpours follow humid mornings. This is why local knowledge beats a generic manual every time. Our regional grass pickup needs are different because our grass is physically heavier. If you find your lawn is constantly thatched over because you can’t bag it fast enough, professional thatching and grass seeding might be the only way to reset the health of your turf.

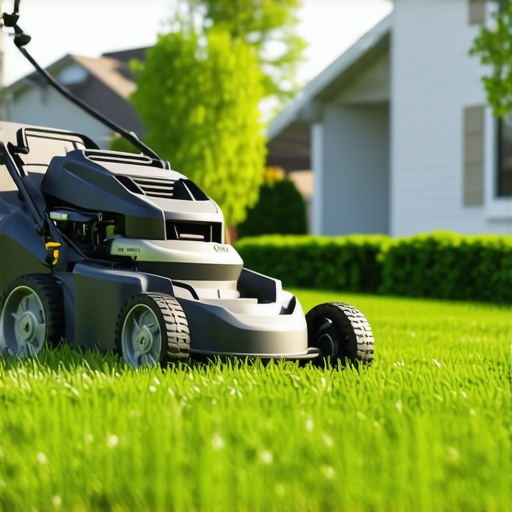
Why your neighbor’s fancy mulcher keeps dying

I see these expensive zero-turns come in with burned-out belts and smoking clutches. The owners usually blame the machine, but the problem is the mulching kit. Mulching requires the grass to stay under the deck for multiple rotations. In Culpeper, that is a recipe for a heart attack. Unless you are cutting every three days, a mulching kit is just a clog-generator. For a clean yard without the headache, you are better off with a side discharge or a high-vacuum bagging system. The friction of the grass against the underside of the deck creates heat, and that heat turns the grass juice into a literal glue. If you are dealing with hardscapes or tight corners, the problem gets worse because you lose the forward momentum that helps clear the chute. You have to keep the blade speed up even when the ground speed is low. It is a balancing act that most homeowners get wrong until they have to pay for a new belt.

The 2026 reality for local lawns

As we move into the 2026 season, the technology is getting better, but the physics of grass haven’t changed. Old-school methods like scraping the deck with a putty knife after every third mow still beat any high-tech coating. I have seen guys spray their decks with cooking oil or graphite, and it lasts about ten minutes before the grit from the Culpeper soil wears it off. The real fix is mechanical: high-lift blades, proper RPM, and timing. FAQ: Does deck washing help? Only if you dry it. Water left under the deck leads to rust and a rough surface that grass loves to grab onto. FAQ: Should I sharpen my own blades? If you have a steady hand and a grinder, sure, but an unbalanced blade will vibrate your deck into a heap of junk. FAQ: Is 2026 gear better for wet grass? Slightly, but the volume of growth we get in Virginia still exceeds the capacity of most consumer chutes. FAQ: How often should I scrape the deck? Every time you see clumps left on the lawn. That is the machine telling you it is choking. FAQ: Can I mow in the rain? Only if you want to spend the next four hours cleaning the mower and the next week fixing the ruts in your yard.

The final word on mechanical health

Don’t let a clogged deck ruin your weekend or your engine. Take care of the steel, and the steel will take care of the grass. If you are tired of the grease under your nails and the constant battle with the humidity, there is no shame in calling in the experts. A well-maintained yard is a reflection of the tools used to create it. Keep your blades sharp and your discharge clear.

April 7, 2026 | Emily Clark

Stop Drowning Your Roots with 4 Smart Valve Fixes [2026]

Stop Drowning Your Roots with 4 Smart Valve Fixes [2026]

The Forensic Autopsy of a Drowned Root System

Root drowning occurs when excessive irrigation replaces soil oxygen with water, triggering anaerobic respiration and pathogenic fungal growth. By integrating smart valves and soil moisture sensors, you regulate the hydrostatic pressure and water volume to match the specific infiltration rate of your soil type. I see it every June. A homeowner spends $8,000 on a fresh sod install only to have it turn into a gray, mushy mess by July. They blame the sod farm. They blame the heat. I walk onto the site, shove a soil probe six inches down, and pull up a sample that smells like a swamp. That is anaerobic decay. That is the smell of money rotting. I always drill into my new crew members: if you don’t fix the soil grading and the irrigation timing first, every plant you put in the ground is just expensive compost. You cannot out-fertilize a drowning root system. When soil pores are 100% saturated, the gas exchange stops. The roots stop breathing. Then the Pythium moves in. It is a biological execution. It will rot.

“Irrigation frequency should be based on the water-holding capacity of the soil and the evapotranspiration rates of the plant material.” – Texas A&M AgriLife Extension

How do I know if my irrigation valve is leaking?

If you notice a perpetual wet spot near a sprinkler head or a “squish” in the turf even when the system is off, you likely have a weeping valve caused by debris in the diaphragm. This constant seepage keeps the soil at field capacity, preventing the dry-down period required for root strength.

1. Pressure Regulation at the Solenoid

Pressure regulation involves installing valves with built-in regulators to ensure that sprinkler heads operate at their optimal PSI, usually between 30 and 45 for rotors. High pressure causes misting and over-saturation in localized areas, leading to shallow root systems and turf disease. When the pressure is too high, water doesn’t drop in heavy droplets; it becomes a fog that drifts away or creates a swamp right at the head. Don’t skip the pressure check. We use a Pitot tube and a gauge to find the exact PSI. If your system is running at 70 PSI, you are atomizing the water. It’s useless. Smart valves with integrated regulators allow us to dial in the exact output regardless of municipal spikes. This is critical for landscaping projects involving delicate perennials or new sod install sections where consistency is the difference between life and death.

2. Weather-Responsive Flow Control and ET Logic

Weather-responsive flow control utilizes on-site weather stations and evapotranspiration (ET) data to automatically adjust irrigation run times based on solar radiation, humidity, and wind speed. This prevents the system from running during rain events or when the soil already contains sufficient moisture levels. Most people set a timer and forget it. That is a crime against agronomy. A smart valve system connects to a controller that looks at the 24-hour forecast. If the ET rate is low, the valve stays shut. We are looking for the ‘Goldilocks’ zone of soil moisture. Too much water flushes the nitrogen right past the root zone and into the water table. You are literally washing your fertilizer budget down the drain. We aim for deep, infrequent cycles that force roots to chase moisture into the subsoil.

Soil TypeInfiltration Rate (Inches/Hour)Smart Valve Setting Strategy
Heavy Clay0.05 – 0.20Cycle & Soak (Multiple short starts)
Sandy Loam0.50 – 1.00Single deep application
Silty Clay0.10 – 0.30Low-flow nozzles, long intervals

3. Multi-Zone Calibration for Topography

Multi-zone calibration addresses topographical variations by grouping sprinkler heads into specific hydrozones that account for slope, aspect, and drainage patterns. This prevent runoff at the top of a hill and ponding at the base, ensuring uniform distribution of water. You cannot treat a south-facing slope the same way you treat a shaded depression. If you do, one will burn and the other will drown. During a yard cleanup, we often find that zones are mixed. You have a high-flow rotor on the same zone as a low-flow spray head. It’s a mess. We separate these using smart valves that can handle different flow rates. This allows for ‘cycle and soak’ programming. We run the water for 5 minutes, let it soak for 30, and then run it again. This breaks the surface tension of the soil and gets the water to the root flare where it belongs.

“A retaining wall doesn’t fail because of the stone; it fails because of the water trapped behind it.” – Hardscape Engineering Axiom

Are smart irrigation controllers worth the money?

Yes, because a smart irrigation controller can reduce water waste by up to 50% while improving turf health through precision scheduling. By preventing over-watering, these systems mitigate the risk of fungal pathogens and soil compaction. High-end models also provide leak detection alerts, potentially saving thousands in water bills and structural repairs.

4. Master Valve Safety Integration

A master valve is a normally closed valve installed at the point of connection that only opens when a zone valve is activated, providing a fail-safe mechanism against mainline leaks. This is the single most important piece of insurance for your landscaping investment. If a lateral pipe cracks under a patio or a sod install, a master valve prevents the system from geysering all night. I’ve seen irrigation leaks wash out the entire base of a $40,000 paver driveway. The homeowner didn’t know until they saw the 4-foot sinkhole. A smart master valve monitors the flow rate. If it sees 20 gallons per minute when the program only calls for 10, it shuts the whole thing down and pings your phone. That is engineering, not just gardening.

The Yard Cleanup and Irrigation Audit Checklist

  • Test every solenoid for electrical resistance (Ohms).
  • Check for 811 markings before any deep aeration or excavation.
  • Clear mulch volcanoes away from tree root flares to prevent crown rot.
  • Verify that all valve boxes are clear of silt and debris for easy access.
  • Calibrate soil moisture sensors in three distinct yard locations.
  • Ensure rain sensors are not obstructed by overhanging tree limbs.

Precision matters. If you are still using a mechanical dial clock from 1995, you are not managing a landscape; you are managing a slow-motion flood. Get the data. Fix the valves. Let the roots breathe.

April 6, 2026 | Michael Smith

4 Reasons Your 2026 Paver Patio is Growing Moss [Fixes]

4 Reasons Your 2026 Paver Patio is Growing Moss [Fixes]

The Hardscape Autopsy: Why Your Premium Patio is Failing

I recently got called out to tear up a $30,000 patio that was sinking because the previous contractor failed to account for hydrostatic pressure and used a standard play sand instead of a stabilized jointing material. Within two years, that patio was less of a backyard feature and more of a moss farm. When I dug it up, the modified gravel base was saturated, looking more like a swamp than a structural foundation. This is the reality of many modern installs: contractors prioritize the aesthetics of the pavers while ignoring the civil engineering required beneath the surface. If your 2026 paver patio is showing green between the joints, you are not looking at a cleaning issue; you are looking at a structural red flag.

Why is my 2026 paver patio growing moss?

Moss grows on your 2026 paver patio because of excessive moisture retention, poor drainage grading, organic debris accumulation, and failed joint stabilization. These factors create a micro-environment where spores thrive in high-humidity crevices, signaling that your sub-base or joint sand has reached its saturation limit and is no longer shedding water effectively.

“A retaining wall doesn’t fail because of the stone; it fails because of the water trapped behind it.” – Hardscape Engineering Axiom

Reason 1: Sub-Base Saturation and Poor Grading

The primary driver of moss in 2026 patios is the failure of the 1/4 inch per foot slope rule. In my 20 years of landscaping, I have seen hundreds of patios that look level but are actually concave. When a patio is flat, water sits in the pores of the stone and the joint sand. Moss, being a bryophyte, does not have roots; it absorbs water through its leaves. If your base consists of 21A or 57 stone that hasn’t been properly compacted to 95% Proctor density, it will hold water like a sponge. This moisture wicks upward through capillary action, keeping the joints damp even in the sun. If you did not install a French drain or an NDS catch basin during your landscaping phase, that water has nowhere to go. It sits. It rots. It grows moss.

Reason 2: Polymeric Sand Degradation

Polymeric sand is supposed to be a hardened barrier, but if it was over-watered during installation or if the joints were too narrow (less than 1/8 inch), the polymers never properly cross-linked. In 2026, we see many patios where the ‘mow-and-blow’ crews have blasted out the joint sand with high-pressure blowers or power washers, leaving gaps. These gaps collect dust, skin cells, and organic matter. This becomes the perfect ‘potting soil’ for moss spores. Once the seal is broken, the joint becomes a moisture trap. You need a minimum of 1 inch of depth for polymeric sand to have structural integrity. Anything less is just a dust layer that will wash away during a heavy spring rain.

Reason 3: Improper Irrigation Overlap from Sod Installs

Many homeowners perform a sod install shortly after a patio project. If your irrigation contractor did not recalibrate the spray patterns, your patio is likely getting hit by the ‘overspray’ from the lawn rotors. Turf grass requires deep, infrequent watering—roughly 1 inch per week. However, if your rotors are spraying the edges of your pavers every morning at 5:00 AM, those joints never have the chance to dry out. Moss loves a consistent, light misting. It thrives in the 40 to 60 degree temperature range common in early spring. If your patio stays wet for more than 4 hours after the sun comes up, you have an irrigation alignment problem that is feeding the moss at a microscopic level.

Reason 4: Organic Load and the Nutrient Cycle

A yard cleanup isn’t just about making things look tidy; it’s about removing the fuel for moss. Moss does not need high-nitrogen fertilizer, but it does need a slightly acidic environment. When leaves from oak or maple trees sit on your pavers, they decompose and release tannins. These tannins lower the pH of the surface moisture. Furthermore, the decomposing organic matter provides a substrate for the moss to latch onto. If you have shade-providing trees nearby, the lack of UV light prevents the natural desiccation of the joints. Without 6 hours of direct sunlight, the joint sand remains at a high humidity level, inviting spores to germinate.

Moss FactorImpact LevelEngineering Fix
Poor GradingCriticalRegrade to 2.5% slope
Sand ErosionHighRe-sand with ASTM C144 compliant polymer
Irrigation OversprayMediumAdjust rotor arcs or install drip lines
Organic DebrisLowQuarterly power sweeping and pH balancing

How much modified gravel do I need for a patio base?

For a standard residential paver patio, you need a minimum of 6 inches of compacted modified gravel (21A or 3/4-inch minus). To calculate this, multiply the total square footage by 0.5 (for 6 inches of depth) and divide by 27 to get the cubic yardage. Then, multiply by 1.5 to account for the compaction factor. Do not skip the plate compactor. If you don’t hit it with 4,000 lbs of centrifugal force, it will settle. Period.

Can I power wash moss out of pavers?

Yes, but you must be surgical. Using a 4,000 PSI tip will destroy the surface tension of the pavers and blast out the necessary joint sand. Use a wide fan tip at a 45-degree angle. Once the moss is removed, you MUST wait 24 hours for the joints to dry completely before sweeping in new polymeric sand. If you trap moisture under the new sand, you are just sealing in the next crop of moss.

“Soil microbiology doesn’t care about your weekend plans; if you provide water and shade, the spores will find a home.” – Agronomy Manual Vol. 4

The Step-by-Step Remediation Process

  • Excavate the Joints: Use a pressure washer or a stiff brush to remove all moss and compromised sand to a depth of at least 1 inch.
  • Treat with Antimicrobial: Apply a solution of 10% bleach or a specialized zinc-based moss killer to kill remaining spores.
  • Check the Grade: Use a string line and a line level to ensure the patio still slopes away from the foundation.
  • Re-Sand: Sweep in high-quality polymeric sand, vibrating the pavers with a plate compactor (with a protective mat) to ensure the sand settles to the bottom of the joint.
  • Seal: Apply a breathable, film-forming sealer to reduce the porosity of the stone and the sand.

It will rot. If you ignore the drainage, no amount of chemical treatment will save that patio. Landscaping is a game of physics. You are fighting gravity and water every single day. If you want a moss-free patio in 2026, you have to stop thinking like a gardener and start thinking like a hydraulic engineer. Fix the water, and you fix the moss.

April 6, 2026 | Jane Doe

Stop 2026 Drip Line Clogs: 3 Vinegar Cleaning Hacks

Stop 2026 Drip Line Clogs: 3 Vinegar Cleaning Hacks

Why Your Drip Irrigation System is Failing From Within

Mineral accumulation and salt buildup in drip lines occur when hard water minerals like calcium and magnesium solidify inside the emitters. This restricts water flow, causes hydrostatic pressure imbalances, and ultimately kills expensive plant stock through invisible drought stress. Don’t ignore the white crust. It is the signature of a dying system.

The Apprentice Lesson: Soil Grading and System Integrity

I always drill into my new crew members: if you don’t fix the soil grading first, every plant you put in the ground is just expensive compost. I learned this the hard way twenty years ago on a job site in high-density clay soil. We did a massive sod install, but the client refused to pay for a high-grade filtration system on their well-water source. They figured if the water was clear, it was clean. Three months later, I got the call. Half the yard was brown, and the other half was a swamp. I had to go back and perform a forensic audit of the lines. Every single emitter was choked with calcium carbonate. The water was still pumping at 40 PSI at the valve, but nothing was reaching the root zones. The lesson: ignore your water chemistry, and your landscaping will rot from the roots up. It is a mathematical certainty.

“A drip irrigation system is only as good as its filtration and its maintenance schedule; without flushing, the emitters become micro-dams for mineral scale.” – Irrigation Efficiency Manual (ASABE Standards)

Hack 1: The Pressure Flush and Acetic Acid Shock

The acetic acid shock treatment involves injecting a high concentration of white vinegar into the main irrigation lateral to dissolve calcium bonds through a rapid chemical reaction. By isolating the zone and introducing the vinegar, you convert solid calcium carbonate into soluble calcium acetate, which can then be flushed out. This is not a gentle rinse; it is a chemical purge.

To perform this, you need to shut off the main water supply and drain the zone. Use a venturi injector or a simple hand-pump sprayer adapted to the line. Inject pure, 5% acidity white vinegar. Let it sit in the lines for exactly six hours. Do not leave it overnight. Prolonged exposure can degrade lower-quality rubber gaskets in your valves. Once the time is up, open the end-caps of your drip lines. This is crucial. If you don’t open the flush valves, you are just pushing the loosened scale further into the emitters. Flush with clean water at maximum operating pressure until the water runs clear. Check the PSI. It should be steady.

Hack 2: The Emitter Submersion Soak for Localized Clogs

The localized submersion soak is the most effective method for cleaning individual emitters or drip stakes that show signs of severe calcification or bio-film growth. By submerging the physical orifice in a 50/50 vinegar solution, you allow the acid to penetrate the internal labyrinth of the emitter, restoring the factory-rated flow rate. This prevents the need for total line replacement during a yard cleanup.

You will need a bucket, white vinegar, and a stiff nylon brush. If you have button emitters, pop them off the line. If you have integrated dripline, you will have to lift the line out of the mulch. Submerge the affected sections in the solution. You will see bubbling; that is the carbon dioxide being released as the acid eats the scale. It is simple chemistry. After two hours, use the brush to clear the surface debris. Reinstall and test. If the drip pattern isn’t a perfect bead, the emitter is toast. Throw it away. Don’t waste time on dead components.

Hack 3: The Gravity-Fed System Purge

A gravity-fed vinegar purge utilizes the natural elevation gradients of your property to distribute de-scaling agents through the entire irrigation network without the need for high-pressure pumps. This method is ideal for low-pressure systems where mineral deposits have significantly reduced the volumetric flow rate to less than 50% of the design capacity.

Place a large reservoir at the highest point of the irrigation zone. Fill it with a solution of one gallon of vinegar for every five gallons of water. Gravity will pull the solution through the lines, following the path of least resistance. Because the pressure is low, the vinegar has more contact time with the internal walls of the tubing. This is particularly effective for removing the ‘slime’ or bio-film created by iron-oxidizing bacteria. Leave it for 4 hours. Close the reservoir and switch back to the main line. Flush the lines immediately to prevent the dissolved sludge from resettling. It works. Every time.

How much vinegar should I use for irrigation cleaning?

For a standard 100-foot run of half-inch drip tubing, you need approximately 1.5 to 2 gallons of white vinegar to ensure the line is fully primed. This volume accounts for the internal capacity of the pipe and allows for some concentration loss as it reacts with the mineral scale. Always use 5% or 6% acidity white vinegar; industrial 30% vinegar is too corrosive for most plastic fittings and can kill your sod install if not neutralized properly.

MethodEffectivenessRisk LevelTime Required
Pressure FlushHighModerate6 Hours
Emitter SoakVery HighLow2 Hours
Gravity PurgeModerateLow4 Hours

Will vinegar kill my plants if I use it in the drip lines?

Vinegar can act as a contact herbicide, but when used as a system cleaner and followed by a thorough water flush, the risk to landscaping is minimal. The key is dilution and flushing. Never run the irrigation system with vinegar in the lines directly onto the foliage. The acetic acid must be flushed out through the end-caps, not the emitters, to ensure no concentrated acid reaches the root zone or the leaf surface of your plants. If you are worried, water the area deeply with fresh water after the cleaning process to further dilute any residual acid in the soil.

“Water quality is the silent variable in landscape longevity; 80% of irrigation failures in well-watered regions are due to chemical precipitates rather than mechanical wear.” – Agronomy Extension Circular

Maintenance Checklist for 2026 Irrigation Health

  • Check the 200-mesh filter screen every 14 days during peak season.
  • Perform a manual line flush through the end-caps once a month.
  • Test your water pH; if it is above 7.5, you will have chronic scaling.
  • Inspect the ‘last emitter’ on every run to ensure it hasn’t lost pressure.
  • Replace any emitters that show a salt ‘crust’ immediately.

Landscape maintenance is not about reacting to problems; it is about preventing them through engineering logic. If you treat your irrigation like a precision machine, it will last twenty years. If you treat it like a garden hose, you will be replacing it in two. The choice is yours. Don’t skip the maintenance. It’s cheaper than new plants. It’s that simple.

April 5, 2026 | Michael Smith

Fix 2026 Sprinkler Dry Spots: 4 Zone Adjustment Hacks

Fix 2026 Sprinkler Dry Spots: 4 Zone Adjustment Hacks

The Forensic Autopsy of a Dying Lawn

You see a brown patch and your first instinct is to dump more water on it. That is the mark of an amateur. When I walk onto a site with ‘dry spots,’ I do not see a thirsting lawn; I see a mechanical failure or a structural deficiency in the soil profile. I always drill into my new crew members: if you don’t fix the soil grading and irrigation coverage first, every plant you put in the ground is just expensive compost. Most homeowners are currently fighting a losing battle against 2026 drought restrictions because their systems were installed by ‘mow-and-blow’ crews who do not understand the physics of hydraulics. If your turf feels crunchy while the area three feet away is a swamp, you are dealing with poor distribution uniformity (DU). We are going to strip back the topsoil and look at the engineering reality of why your irrigation is failing.

“Distribution uniformity is the single most important factor in irrigation efficiency; without it, you are merely creating pockets of salt accumulation and anaerobic soil conditions.” – Irrigation Association Standards

H1: Nozzle Matching for Matched Precipitation Rates

To eliminate 2026 sprinkler dry spots, you must ensure matched precipitation rates (MPR) across the entire zone by replacing mismatched nozzles that deliver different volumes of water. If you have a full-circle head and a quarter-circle head on the same line, the quarter-circle area is getting four times the water. This is basic math that most installers ignore.

The Science of GPM and Arc

Every nozzle has a Gallons Per Minute (GPM) rating. In a standard zone, a 360-degree head must have a nozzle with four times the GPM of a 90-degree head. If they both have ‘2.0’ nozzles, the 90-degree corner will be flooded, and the 360-degree center will be a dust bowl. Look at the top of your heads. If you see the same nozzle color in every head regardless of the arc, your system was built by a hack. You need to pull the manufacturer’s spec sheet (Hunter, Rain Bird, or Toro) and match the nozzle to the degrees of rotation. This ensures every square inch of turf receives the same depth of water in a given timeframe.

How do I choose the right irrigation nozzle?

Selecting the right nozzle requires calculating the square footage of the coverage area and matching it to the manufacturer’s PSI-to-GPM chart to ensure head-to-head coverage. Do not guess. Use a pressure gauge at the head to confirm you have at least 30-40 PSI for rotors; otherwise, the spray pattern will collapse before reaching the next head, creating a ‘donut’ dry spot around the base of the sprinkler.

H2: Pressure Regulation and Friction Loss Hacks

Irrigation system pressure regulation is critical because high PSI causes misting and wind drift, while low PSI leads to poor head-to-head coverage and localized dry spots. Managing the friction loss in your lateral lines ensures every head performs at its engineered capacity without wasting water to evaporation.

Nozzle TypeOptimal PSITypical Radius (ft)GPM Range
MP Rotator40-45 PSI8-350.20 – 4.0
Standard Spray30 PSI5-151.0 – 5.0
Gear-Driven Rotor45-55 PSI25-502.0 – 10.0

If your heads are ‘fogging’—meaning the water looks like a fine mist—you are losing 30% of your water to the wind. This is usually caused by excessive pressure. Conversely, if the stream is weak and doesn’t reach the next head, you have too many heads on one zone or a leak. Install pressure-regulating stems (like the Rain Bird 1800-SAM-P45) to lock in the PSI at the head. This single adjustment can fix dry spots by forcing the water into heavy droplets that actually hit the ground.

“Evapotranspiration rates dictate the metabolic demand of turfgrass, yet most homeowners overwater by 30% while leaving spots dry due to pressure-related spray pattern collapse.” – Texas A&M Agrilife Extension

H3: Soil Compaction and the Hydrophobic Barrier

Hydrophobic soil remediation involves breaking through compacted clay layers or heavy thatch that prevents water from reaching the root zone. Even a perfectly adjusted sprinkler head cannot fix a dry spot if the soil surface tension is so high that water beads up and runs off onto the sidewalk.

The Screwdriver Test

Take a 6-inch screwdriver and try to push it into a dry spot. If it stops at 2 inches, your soil is compacted. This is common in high-traffic areas or where ‘sod install’ was done over un-tilled construction grade clay. To fix this, you need a core aerator. Not the spikes—those just compress the soil further. You need a machine that pulls 3-inch plugs out of the ground. Once aerated, apply a surfactant or ‘wetting agent.’ This chemical breaks the surface tension of the water, allowing it to penetrate the soil particles rather than sitting on top. This is the ‘secret sauce’ we use on golf courses to keep greens alive during 100-degree heat waves.

Checklist for Irrigation Zone Audits

  • Confirm head-to-head coverage (water from one head should hit the next head).
  • Inspect for ‘leaking seals’ that bleed pressure from the zone.
  • Clear grass tall enough to block the spray trajectory (a common ‘yard cleanup’ oversight).
  • Check for clogged nozzle filters (unscrew the head and rinse the screen).
  • Verify the controller’s ‘Cycle and Soak’ settings to prevent runoff on slopes.

H3: How much water does my lawn actually need in 2026?

Your lawn needs exactly 1 to 1.5 inches of water per week, delivered in two deep sessions rather than daily light mists. Daily watering encourages shallow roots that fry the moment the sun comes out. By watering deeply (30-45 minutes per zone, depending on nozzle type), you force the roots to chase the moisture down into the cooler sub-layers of the soil. This creates a drought-tolerant turf that survives while your neighbor’s lawn turns to straw.

Long-Term System Resilience

Fixing dry spots is not about buying a bigger pump; it is about the surgical adjustment of the hardware you already have. Check your GPM, match your nozzles, and kill the compaction. If you ignore the physics of your yard, you are just throwing money down the storm drain. Dig deep. Check your pressure. Fix the soil. That is how you maintain a professional-grade landscape.

April 5, 2026 | Michael Smith

4 Thatching Fixes for a Thicker Culpeper VA Lawn in 2026

4 Thatching Fixes for a Thicker Culpeper VA Lawn in 2026

The engine room beneath your feet

The smell of burnt grease and WD-40 usually stays in the garage, but if you want a lawn that actually survives a Culpeper summer, you have to treat your dirt like a high-compression engine. Most people see a yellowing yard and throw more nitrogen at it, which is exactly like dumping premium gas into a truck with a seized fuel pump. The problem isn’t the fuel. The problem is the blockage. In Culpeper, that blockage is typically a thick, matted layer of dead organic matter known as thatch. By 2026, the heat cycles in the Piedmont region are projected to be even more erratic, meaning if your grass cannot reach the water table, it will die. Thatching is the mechanical fix that restores flow. You strip away the debris, open the pores of the earth, and let the system breathe again. It is gritty work, and it makes your yard look like a disaster zone for a week, but you cannot fix a broken transmission without getting your hands dirty.

The suffocation of Culpeper turf

Thatch is not just a bunch of dead grass. It is a biological gasket. When this layer exceeds half an inch, it creates a hydrophobic barrier. Water hits the surface and rolls off like rain on a waxed hood. In Culpeper VA, where we deal with that heavy, red clay, this is a death sentence. The roots stop diving deep because they are waiting for moisture that never arrives. Instead, they start growing horizontally into the thatch itself. This makes your lawn incredibly fragile. If you want a thicker lawn, you have to break that gasket. This is where landscaping culpeper va experts focus their energy. Mechanical power raking or vertical mowing slices through that lignin-heavy layer. It creates the necessary friction to pull up the dead weight. Once that debris is gone, the soil is exposed. This is the only way to ensure your 2026 seeding efforts actually hit the dirt. Without seed-to-soil contact, you are just throwing money into the wind.

The Piedmont clay reality check

Culpeper is not the Midwest. We have soil that behaves like concrete when it is dry and soup when it is wet. Local ordinances in Virginia are increasingly strict about runoff, and a thatched-up lawn is a major contributor to nutrient leaching. When you apply fertilizer to a clogged lawn, the chemicals just wash away into the storm drains because they cannot penetrate the surface. Observations from the field reveal that the most successful yards in 22701 and surrounding areas are those that treat thatching as a biennial necessity. You have to time it right. Do it when the grass is actively growing so it can recover. If you tear it up during a mid-August heatwave, you are just finishing what the sun started. You want that grass pickup to be thorough. Leaving the pulled-up thatch on the surface just creates a new layer of rot. It has to be hauled away. Think of it as an oil change for your property. You do not leave the old oil sitting in the pan.

Why most experts are lying to you about raking

Industry fluff tells you that a light raking in the spring is enough. That is a lie. A plastic rake is a toy. To get a thicker lawn by 2026, you need vertical blades that score the earth. The friction of the machine is what stimulates the tillering of the grass. When you cut those horizontal runners, the plant panics and produces more vertical shoots. That is how you get density. The messy reality is that your yard will look like it was attacked by a bear for about ten days. This scares off the amateurs. They want the results without the process. They want the hardscapes and the pretty flowers without doing the heavy lifting in the dirt. But if you ignore the thatch, your grass seeding will fail every single time. The seeds will get caught in the mat, germinate in the air, and wither within forty-eight hours. It is a waste of a paycheck.

The 2026 blueprint for soil recovery

Looking ahead, the shift is toward precision aeration and heavy-duty thatching. The old guard used to just mow high and hope for the best. The new reality demands more aggression. Is thatching better than aeration? Not necessarily, they are two different tools in the chest. Thatching clears the surface; aeration punches holes in the block. How do I know if I have a thatch problem? Take a shovel and cut a three-inch deep wedge. If you see more brown mat than green blade, you are in trouble. Can I thatch a new lawn? No, you will rip it out by the roots. Wait at least two seasons. What about grass pickup? It is mandatory. If you do not remove the debris, you are just composting your lawn to death. Should I seed immediately after? Yes, the soil is never more ready than it is right after a deep thatch. Does mowing height matter? Absolutely. Scalping the lawn before a thatch makes the machine more efficient. It is all about the mechanics of the plant.

The final inspection

You can spend your weekends looking at a patchy, starving lawn, or you can take the machine to it and force a reset. The dirt in Culpeper does not give anything away for free. You have to earn that thick, green carpet by removing the debris that is choking the life out of it. It is about flow, pressure, and maintenance. Get the thatch out, get the seed in, and keep the grass pickup clean. If you want a yard that people actually notice by 2026, stop treating it like a painting and start treating it like the living, breathing machine it is. If you are ready to stop guessing and start fixing, reach out and get a professional eyes on your soil.

April 5, 2026 | Emily Clark

7 Pro Hacks to Clear 2026 Yard Overgrowth in One Day

7 Pro Hacks to Clear 2026 Yard Overgrowth in One Day

The Engineering Reality of Site Reclamation

To clear a 2026 yard overgrowth in one day, you must deploy industrial flail mowers to reduce biological mass, apply Triclopyr-based herbicides to woody stems, and use a power rake to extract thatch layers, ensuring the soil grade is preserved for immediate sod installation. Clearing land is not a weekend hobby; it is a mechanical and chemical battle against ecological succession. I always drill into my new crew members: if you don’t fix the soil grading first, every plant you put in the ground is just expensive compost. I remember an apprentice who thought he could skip the compaction check on a 4,000 square foot yard. He threw down high-end Tall Fescue sod directly onto loose, aerated soil that hadn’t been leveled. After the first heavy rain, the yard looked like a topographic map of the Himalayas. The drainage failed because the micro-depressions held water, rotting the root system within forty-eight hours. We had to rip it all out. Don’t be that guy. Yard cleanup requires an understanding of soil horizons and mechanical advantage.

The Physics of Vegetation Removal

When you walk into a yard that has been neglected for two seasons, you aren’t just looking at tall grass. You are looking at a dense matrix of cellulose and lignin that has locked up the nitrogen cycle. To clear this in twenty-four hours, you need to think in terms of tonnage. A standard residential lawn mower will choke on six-inch overgrowth because the deck height cannot clear the discharge. You need a brush hog or a heavy-duty flail mower. These machines use high-mass blades to pulverize woody material into a fine mulch that won’t smother the soil surface. If you leave clumps of green waste, you create an anaerobic environment that kills the beneficial microbes needed for the next phase of your landscaping.

“The success of any turfgrass establishment depends entirely on the physical and chemical state of the upper six inches of the root zone.” – Penn State Center for Turfgrass Science

1. The Mechanical Knockdown Protocol

Start with a high-torque brush cutter to scalp the area to a height of two inches. This exposes the root flares and any hidden irrigation components. Most 2026 yard overgrowth hides broken sprinkler heads or valve boxes that have been heaved by frost. Use a systematic grid pattern. Do not jump around the yard. Work from the perimeter toward the center to force any local fauna out of the work zone. This is about efficiency. If your blade speed drops, you are moving too fast. Keep the RPMs high to ensure a clean structural cut rather than a tear. Tearing the plant tissue leads to slower decomposition of the remaining stalks.

2. Chemical Suppression of Woody Invasive Species

Once the canopy is removed, you will find the real enemies: woody vines and stump sprouts. Standard glyphosate won’t cut it for 2026 yard overgrowth. You need a concentrated Triclopyr ester. This chemical mimics plant hormones and causes rapid, uncontrolled growth that essentially ‘burns’ the plant out from the inside. Use a surfactant to ensure the chemical sticks to the waxy cuticles of the leaves. For larger stumps, use the ‘cut-stump’ method. Cut the stem flush to the ground and paint the cambium layer with a 25 percent concentration within five minutes. If you wait longer, the plant will seal its vascular system and the chemical will not reach the root ball. It will grow back. Don’t let it.

3. Managing Nitrogen Immobilization

A common mistake is tilling green debris directly into the soil. This triggers nitrogen immobilization. Bacteria require nitrogen to break down the carbon in the dead grass. If you bury the debris, the bacteria will steal all the available nitrogen from the soil, leaving none for your new sod or plants. Your yard will turn yellow and stay yellow. Instead, use a power rake to pull the debris to the surface and haul it off-site. Your soil chemistry depends on this balance. If you must till, you have to compensate by adding a high-nitrogen starter fertilizer, such as a 21-0-0 ammonium sulfate, to feed the decomposition process and the new plants simultaneously.

How do I kill woody brush without hurting my trees?

To kill woody brush without damaging established trees, you must use selective basal bark treatments or targeted foliar applications during the late growing season when the brush is drawing nutrients down to its roots. Avoid using soil-active herbicides like Bromacil or Prometon near the drip line of desirable trees, as their root systems extend far beyond the canopy and will readily uptake the poison. Precision is your only protection. Use a handheld sprayer with a cone nozzle to minimize drift.

Material TypeRecommended ToolLabor Hours (per 1k sq ft)Disposal Method
Tall GrassZero-Turn Mower0.5Compost
Woody BrushFlail Mower1.5Mulch/Haul
Invasive VinesBrush Cutter2.0Incineration/Landfill
Old Sod/ThatchPower Rake1.0Green Waste Facility

4. The Irrigation Integrity Audit

Before you even think about new sod install, you must pressure test the irrigation lines. Overgrowth often conceals leaks that have turned the subsoil into a slurry. Check the static pressure at the main valve. If you see a drop of more than 5 PSI when the zones are off, you have a subterranean leak. Digging up a new lawn because you didn’t check a $10 fitting is a professional sin. Ensure your spray heads are set at the correct grade. They should be flush with the soil surface so the mower blades don’t shear them off, but high enough to clear the grass height when pressurized. Don’t guess. Use a level.

5. Soil Compaction and Grading

After the cleanup, the soil is likely disturbed. You need a 500-pound water-filled roller to reset the base. Loose soil settles unevenly, creating hazardous holes and poor drainage patterns. You want the soil to be firm enough that a 200-pound man leaves a footprint no deeper than a quarter-inch. This density is critical for capillary action. If the soil is too loose, the water will drain through too quickly, and the roots of your new sod will desiccate. If it is too tight, you get runoff. Aim for a 1 percent to 2 percent slope away from the house foundation to manage hydrostatic pressure.

“A retaining wall doesn’t fail because of the stone; it fails because of the water trapped behind it.” – Hardscape Engineering Axiom

6. Rapid Sod Installation Protocol

If you are clearing a yard in one day, you need the sod delivered as soon as the grading is finished. Sod is a living, breathing organism. Once it is cut at the farm, the ‘shelf life’ is about 24 hours, especially in the heat. Lay the sod in a staggered brick pattern. This prevents long seams where water can channel and erode the soil. Use a sharp linoleum knife for the edges. Don’t overlap the pieces. Overlapping creates air pockets that kill the roots. After laying the sod, roll it again. This ensures ‘root-to-soil’ contact. Without that contact, the grass is dead on arrival. It will rot.

Is it cheaper to clear land or buy sod?

Clearing land is significantly cheaper in terms of material costs, but sod installation provides an immediate erosion control and weed suppression layer that saves thousands in long-term maintenance. When you clear land and leave it bare, you are inviting every weed seed in the county to germinate in your newly disturbed soil. The cost of herbicides and labor to manage a seeded lawn over two years often exceeds the upfront cost of high-quality sod. Professionals choose sod for the instant structural integrity it provides to the topsoil.

  • Check soil pH: Aim for 6.5 to 7.0 for optimal nutrient uptake.
  • Clear all surface stones larger than 1 inch.
  • Apply a pre-emergent herbicide if you are not sodding immediately.
  • Mark all utility lines by calling 811 before any deep excavation.
  • Verify that your irrigation timer is programmed for short, frequent cycles during the first 14 days of new sod.

7. The Post-Cleanup Moisture Management

Once the yard is cleared and the sod is down, the job isn’t over. The soil is in shock. For the first week, you need to keep the top two inches of soil saturated. This isn’t about deep watering yet; it’s about cooling the root zone. After day ten, shift the schedule. Deep, infrequent watering is the goal. You want to force the roots to chase the moisture down into the deeper soil horizons. If you water every day for five minutes, you get a lazy root system that will die during the first heat wave. One inch of water per week, delivered in two sessions, is the industry standard for established turf. Don’t skip this. The first year is the settling-in period where the engineering of your cleanup is truly tested. Watch the grade. Check the drainage. Keep the blades sharp. Proper yard cleanup is a science, not a chore. Follow these steps and you won’t just clear a yard; you’ll build a foundation that lasts for decades. Don’t take shortcuts. The dirt always tells the truth.

April 3, 2026 | Jane Doe

Fix Thin Turf: 4 Culpeper VA Seeding Tactics for 2026

Fix Thin Turf: 4 Culpeper VA Seeding Tactics for 2026

The rhythm of the damp Piedmont earth

I can still smell the damp, cool earth rising from the flower beds near Lake Pelham when the spring fog rolls in. It is a thick, honest scent that tells you exactly how much moisture the clay is holding. Most folks in Culpeper are too rushed. They want a green carpet yesterday, ignoring the slow pulse of the soil. They buy the brightest bag of seed at the big-box store and wonder why their yard looks like a mangy dog by August. The truth is quieter than that. To fix a thin lawn here, you have to work with the land, not against it. Editor’s Take: Effective turf restoration in the 22701 zip code requires aggressive thatch management and high-end fescue blends designed for Virginia’s heat cycles. Skip the generic mixes if you want the roots to actually survive the humidity.

The hidden layer choking your grass

Thatching is the first hurdle. People think that layer of brown debris is helping, but it acts like a sponge, soaking up the light rain before it ever touches the roots. If you have more than a half-inch of buildup, your new seed is basically being thrown onto a bed of dead straw. It will sprout, sure, but the roots will never find the dirt. You need to pull that material up. We call it power raking or verticutting, but really, it is just giving the ground room to breathe again. Once that debris is loose, a thorough grass pickup is mandatory. Leaving that clutter behind is like trying to paint a house without sanding the old, peeling chips first. It is messy work. Your hands will get stained with that fine, gray dust that smells like old hay, but it is the only way to clear the path for the future. You can find more about professional landscaping culpeper va services to handle this heavy lifting if the manual labor feels too daunting for a Saturday morning.

Why Culpeper clay hates your new seed

The Piedmont region is famous for its red clay. It is stubborn stuff. In the heat of a Virginia summer, it bakes into something resembling a brick. If you just toss seed on top, you are feed the birds, not the lawn. You have to create contact. This is where the mechanics of seeding get technical. For 2026, we are looking at specific tall fescue cultivars that have been bred for drought resistance. You want the seed tucked about a quarter-inch deep. Not too deep, or the sprout will exhaust its energy before it sees the sun. Not too shallow, or it will dry out before the first dew. It is a delicate balance of pressure and timing. When we talk about landscaping, we are really talking about soil science masked by aesthetics. Hardscapes also play a role here; the way your patio or walkway sheds water dictates where the seed will likely wash away during those sudden afternoon thunderstorms we get off the mountains. You have to plan for the runoff.

The messy reality of mowing high

Most homeowners are their own worst enemies when it comes to mowing. They want that golf course look, so they drop the blade low. In Culpeper, that is a death sentence. Short grass means the sun hits the soil directly, evaporating every drop of moisture and cooking the tender new roots of your fescue. You need to keep it at four inches. It might feel “shaggy” to some, but that extra height shades the ground and keeps the microbial life happy. It is a cycle. A taller blade grows a deeper root. A deeper root survives the July bake. If you are doing your own mowing, make sure your blades are sharp. Dull blades tear the grass instead of cutting it, leaving a jagged edge that turns brown and invites disease. It is the little things that most people miss because they are looking for a miracle in a bottle instead of just doing the basic chores correctly. Grass seeding is only half the battle; the other half is leaving it alone long enough to actually establish itself.

What the neighbors wont tell you about local soil

There is a lot of talk about “black gold” soil, but here, we deal with acidity. If you have pine trees nearby or you are close to the older parts of town near the train tracks, your soil pH is likely off. You can throw all the nitrogen you want at a lawn, but if the pH is too low, the grass cannot eat. It is like trying to swallow a meal while someone is pinching your throat shut. You need lime. Not just a handful, but a calculated application based on a real soil test. Don’t guess. The Cooperative Extension over on Main Street can help, or a local pro can pull the samples for you. 2026 is going to be about precision. We are seeing more erratic weather patterns in the Commonwealth, with longer dry spells followed by washouts. Your seeding tactics have to account for this. Use a starter fertilizer with a high phosphorus count to get those roots moving fast. If you wait for nature to provide everything, you will be looking at bare patches again by next Christmas. These are the nuances of grass seeding that the big national blogs miss because they aren’t standing in the Culpeper mud in March.

The future of your green space

We are moving into an era where the old Kentucky Bluegrass just doesn’t cut it in Virginia anymore. It is too thirsty and too fragile for our humidity. The shift toward specialized Turf-Type Tall Fescues is not just a trend; it is a necessity for survival. As you look at your yard, don’t just see the weeds. See the potential for a resilient, deep-rooted ecosystem that can handle a Culpeper summer without breaking the bank on the water bill. It takes patience. It takes getting your boots dirty. But there is nothing quite like the feeling of that first thick, dark green growth pushing through the soil you worked so hard to prepare. It is a slow win, but those are always the best kinds. If the work seems like too much, reaching out for a professional hand ensures the job is done right the first time, saving you from a second round of repairs next year. Let the earth work for you, not against you.

March 31, 2026 | Jane Doe

4 Grass Seeding Tactics to Fix Thin Culpeper VA Lawns in 2026

4 Grass Seeding Tactics to Fix Thin Culpeper VA Lawns in 2026

The smell of linseed oil and the weight of red clay

Restoring a lawn in Culpeper is not unlike refinishing a cherry sideboard from the 1800s. It requires patience and an eye for the grain. I sit here with the scent of varnish on my hands, looking out at the patchy yards near Yowell Meadow Park. You want a thick carpet of green by 2026. To fix a thin lawn in Culpeper, you must prioritize soil contact through power seeding, choose drought-resistant Tall Fescue blends, time your germination with the specific Piedmont frost cycles, and clear the thatch layer that acts like a layer of old, cracked polyurethane on fine wood. Editor’s Take: Modern lawns fail because they lack the structural foundation of healthy soil; restoration starts with the dirt, not the seed. Most homeowners treat their grass like cheap plastic—something to be replaced when it fades. But a lawn is a living antique. In Culpeper, our soil is heavy, stubborn, and requires a craftsman’s touch to breathe again.

The structural integrity of your dirt

When I look at a piece of furniture, I check the joints. When I look at a yard, I check the thatch. Thatching is the buildup of organic matter that prevents water from reaching the roots. It is the dust in the gears of your ecosystem. If your yard feels spongy, you are suffocating the growth. Using a power seeder is the only way to ensure the seed actually meets the earth. Think of it as a dovetail joint; the connection must be precise. High-quality landscaping culpeper va professionals know that simply throwing seed on top of dead grass is a waste of good materials. Research from the Virginia Cooperative Extension suggests that soil temperature must hit a consistent 55 degrees before the biological clock of the seed begins to tick. We are looking for a structural bond between the mineral and the sprout.

The Piedmont weather tax

Culpeper exists in a peculiar pocket of Virginia. We get the runoff from the Blue Ridge and the humidity of the basin. This means 2026 will likely bring a wet March followed by a brutal, dry July. Grass seeding here is a battle against the elements. You cannot use a generic ‘one size fits all’ bag from a big-box store. Those are the particle board of the plant world. You need a mix that can handle the clay-heavy soil near the Davis Street historic district. The local micro-climate demands a deep-rooted Tall Fescue. Most people wait until it is too hot, then wonder why their investment withered. If you aren’t watching the frost dates at the Culpeper Regional Airport, you are guessing. We need to time the restoration when the ground is soft enough to work but firm enough to hold the new life.

Why the standard mowing routine fails the restoration

I see it every Saturday morning. People take their mowers and shave their lawns down to the scalp. It is like taking a belt sander to a delicate veneer. You are stripping the protection. If you want your seeding efforts to take hold, you must leave the blades high. Tall grass shades the soil, keeping the moisture where the seeds can find it. Hardscapes like stone paths and retaining walls also change how water moves across your property. If your grass pickup routine involves leaving clumps of wet clippings, you are inviting fungus to the party. A clean finish requires a sharp blade and a steady hand. Mowing is not just about height; it is about the health of the crown. When we integrate hardscapes into the design, we create natural boundaries that help manage the flow of nutrients and stop erosion before it starts.

The reality of long-term lawn care in Virginia

The old ways worked for a reason. Before the chemicals, people understood the rhythm of the seasons. Does the type of seed really matter? Yes, because Kentucky Bluegrass will bake in a Culpeper summer like a finish under a heat lamp. Is aeration better than tilling? Tilling destroys the soil’s existing network; aeration preserves the history while adding fresh air. How much water is too much? If you see puddles near your stone walkways, you’ve gone too far. Can I plant in the shade of an old oak? Only if you find a specific shade-tolerant fescue that doesn’t mind the competition for nutrients. Will 2026 be different? The weather patterns suggest more extreme shifts, making soil preparation the most vital step in the process. We are building a legacy, not a temporary patch.

A finish that lasts through the seasons

A well-restored lawn is a mark of a home that is cared for. It tells the neighbors that you value quality over convenience. Don’t settle for a thin, dusty yard when you can have a deep, resilient green that stands up to the Virginia sun. It is time to put down the cheap solutions and pick up the tools of a craftsman. Whether you are looking for expert landscaping culpeper advice or a full restoration, the goal is the same: a finish that gets better with age. Reach out to someone who understands the local dirt and knows how to make it sing again.

March 30, 2026 | Anna Lee

3 Warrenton VA Sod Installation Fixes to Stop 2026 Gaps

3 Warrenton VA Sod Installation Fixes to Stop 2026 Gaps

The heavy scent of WD-40 and failure

You stop 2026 sod gaps in Warrenton by fixing the subsoil compaction, selecting drought-resistant tall fescue blends, and ensuring a deep-soak watering schedule immediately after installation. I spent my morning cleaning grease off a wrench, but I spent my afternoon looking at a dead yard on Culpeper Street that cost five figures and looked like a moth-eaten rug. The air smelled of WD-40 and the metallic tang of a failed irrigation pump. Most people think sod is like a carpet you just roll out and forget. They are wrong. It is a biological engine. If the pistons are seized, the machine won’t turn. Editor’s Take: Stop treating your grass like a decoration and start treating it like a mechanical system that requires specific inputs to avoid total failure by 2026.

The hidden gears of a root system

Sod fails because of air pockets and poor root-to-soil contact, which are solved by heavy rolling and proper grading techniques. Think of the root system as the fuel line. When you have a gap between the sod and the earth, you have an air lock in the line. The fuel stops. The engine dies. Sod installation Warrenton VA requires more than just a strong back; it requires an understanding of how Retaining wall builders Warrenton VA and Patio installation Warrenton VA affect the local water table. You need to ensure the soil is tilled to at least six inches. If you slap grass on top of concrete-hard dirt, the roots will just circle around like a trapped animal until they wither. A proper Landscaping services in Warrenton VA provider knows that the preparation is 90% of the job. The roll-out is just the final assembly.

Fauquier County clay is a cold mistress

Warrenton’s Piedmont soil requires specific aeration and pH balancing with lime to ensure sod survives the erratic Virginia winters and the baking summer heat. We aren’t dealing with soft loam here. We are dealing with red clay that has the consistency of a brick when it dries. If you do not adjust the pH before the first roll hits the ground, you are basically trying to run a diesel engine on low-grade 87 octane. It will knock. It will ping. Eventually, it will blow up. Anyone doing Lawn care services Warrenton VA will tell you that the 2026 gaps are already being formed by the lack of lime in the 2024 prep. You have to look at the Warrenton VA landscape design from a chemical perspective. We see a lot of success with Tree and shrub planting Warrenton VA when the soil is broken down with organic matter first. The same applies to your turf.

The lie of the instant yard

Most gaps appear because installers skip the tilling process, leaving the grass to starve on top of hard-packed earth and expecting Mulching services Warrenton VA to hide the crime. I have seen contractors in the Vint Hill area just scrape the weeds and drop the sod. That is a scam. It looks great for three weeks. Then the gaps start. The edges brown. By 2026, you have more weeds than grass because the sod never actually fused with the planet. This is where Hardscaping contractors Warrenton VA often clash with the green-side guys. One wants it flat and hard; the other needs it loose and airy. If you are hiring for Landscape maintenance Warrenton VA, ask them about their compaction testing. If they look at you like you are speaking Greek, find a new mechanic for your yard. You want a 1,000-pound water-filled roller on that site, or you are just wasting money.

Burning the old playbook for 2026

The difference between a dead lawn and a 2026 success story is the use of local cultivars instead of generic big-box store rolls that weren’t grown for the Virginia humidity.

Why does my sod feel like a sponge?

It is likely over-hydrated on the surface but bone dry at the root. You need to water for thirty minutes at dawn, not five minutes every hour.

Can I lay sod over existing grass?

No. You are just stacking failure on top of failure. Strip it to the dirt.

What about the brown lines between rolls?

Those are heat-shrink gaps. You didn’t tuck the edges. Sod shrinks when it dries. You have to overlap slightly or butt the joints so tight they bulge.

Is fall better than spring?

Yes. In Warrenton, the fall gives the roots a chance to wake up before the sun tries to kill them.

Should I fertilize immediately?

Only with a high-phosphorus starter. Avoid heavy nitrogen or you will burn the tender new growth before it has a chance to breathe.

The green machine finally works

Fixing a yard is exactly like fixing a transmission. You can’t just throw parts at it and hope. You need a process. You need the right tools. You need to understand the environment of Fauquier County. If you follow the three fixes (soil prep, cultivar selection, and deep irrigation), your yard will be the one the neighbors stare at with envy while their own turf turns into a desert. Don’t be the guy with the seized engine. Get the foundation right. If you need a team that treats your soil like a precision machine, it is time to call in the experts who don’t mind getting their hands dirty. Keep the engine running. Make the call.“,