April 14, 2026 | Emily Clark

5 Seeding Mistakes Killing Your 2026 Culpeper VA Lawn

5 Seeding Mistakes Killing Your 2026 Culpeper VA Lawn

The damp earth of Culpeper County clings to my boots, heavy and cold, a reminder that the ground beneath us has its own timeline. I feel the rhythmic pull of the seasons while others only see a calendar of chores. Many neighbors near the Rappahannock search for shortcuts to a green carpet. They want the fast fix. But the Piedmont soil does not care for speed. It demands respect for the ancient clay and the erratic Virginia humidity. Editor’s Take: To save your turf, you must stop treating Culpeper’s heavy clay like standard potting soil and avoid the trap of generic high-nitrogen fertilizers that burn young roots before they even reach for water. Success in 2026 requires a shift from frantic maintenance to a slow, methodical preparation that matches the local geography.

The first error I see involves the timing of the work. Most folks wait until the heat of late spring to think about grass seeding, but by then, the window has slammed shut. Our specific pocket of Virginia suffers from a unique microclimate where the transition from frost to scorching humidity happens in a heartbeat. If you throw seed down when the dogwoods are already in full bloom, the tender sprouts will wither under the June sun. The soil needs a specific warmth, a heartbeat that only comes with early preparation. You cannot force the earth to perform on a corporate schedule. It requires a quiet observation of the frost lines and the way the shadows fall across your property in the early morning hours. Every acre in Culpeper is a unique puzzle of drainage and light.

The red clay deception

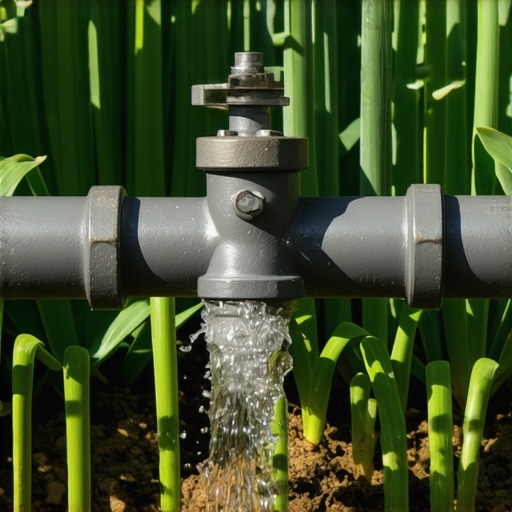
The ground here is not your friend if you treat it with indifference. That thick, orange-red clay acts as a vault, locking out air and moisture when it becomes compacted by heavy foot traffic or neglected mowing schedules. I have spent decades watching people pour expensive seeds onto a surface as hard as a brick. It is a waste of hope. Without deep thatching or aeration, that seed is just bird food. True growth happens when you break the surface tension of the earth. You must let the soil breathe. I often tell neighbors that a lawn is a living organism, not a plastic rug. It needs a porous home where roots can wander deep into the subsoil to find water during our inevitable August droughts. Most homeowners ignore the grit under their nails and assume the bag of seed does all the work. It does not. The preparation is the work. The rest is just a natural consequence of patience.

A rhythm for the Piedmont soil

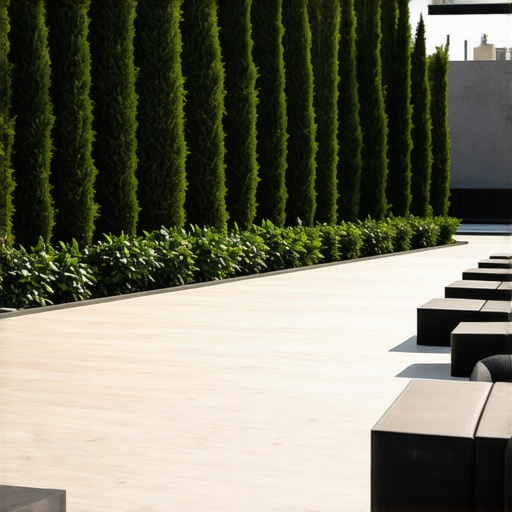
When we talk about landscaping culpeper va, we are really talking about geology. The bedrock influences everything from how your hardscapes settle to how well your tall fescue survives a heatwave. A common mistake is choosing a seed blend designed for Ohio or Pennsylvania. Virginia is a transition zone. We are too north for some grasses and too south for others. This creates a friction that most big-box stores ignore for the sake of profit. You need a blend that handles the swing from sub-zero nights to ninety-degree afternoons with high dew points. If you do not choose a variety specifically bred for the Mid-Atlantic, you are setting yourself up for a heart-breaking brown-out by mid-July. I prefer the slow path of selecting cultivars that have proven their resilience in our specific humidity. It is about the long-term health of the ecosystem, not just a quick green-up for a backyard barbecue.

The cost of cheap convenience

I see it every autumn. The trucks pull up, people scatter lime without a soil test, and they wonder why their landscaping looks tired by spring. A soil test is not a suggestion; it is a map. Without it, you are walking through the woods in the dark. Our local earth is often acidic, which locks away the nutrients the grass needs to survive. You can buy the most expensive fertilizer on Route 29, but if the pH is wrong, that fertilizer is just runoff for the local creeks. It is about balance. I take a handful of dirt and I can smell the lack of life in it when it has been over-treated with chemicals. We need to encourage the worms and the microbes. They are the silent workers that do the heavy lifting for us. When you bypass the biology of the soil for a chemical shortcut, you create a fragile system that collapses at the first sign of stress. The [landscaping culpeper va](https://eanddlandscapingllc.com/home) professionals who understand this won’t promise a miracle overnight. They promise a process.

Realities of the 2026 season

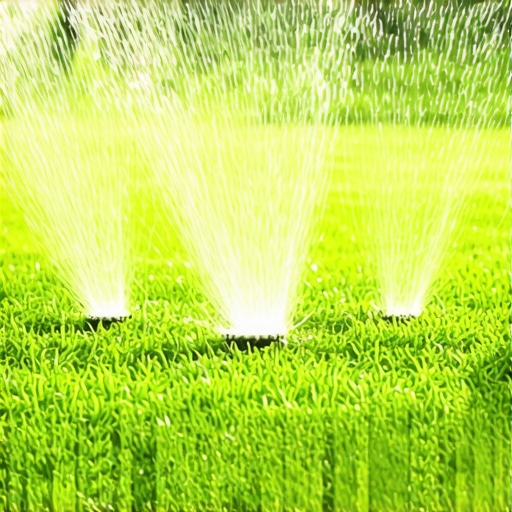
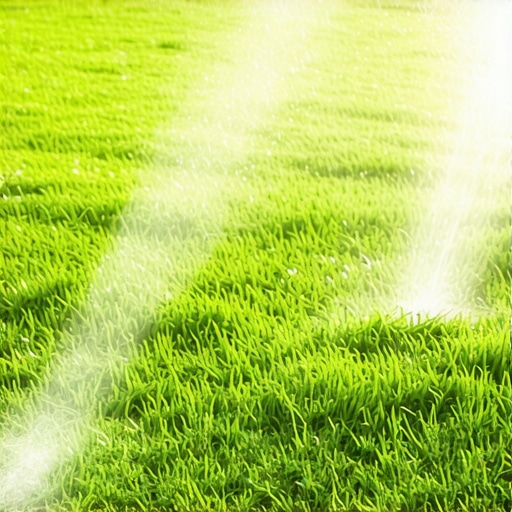
The climate is shifting, and our old habits must shift with it. We are seeing wetter winters and flash droughts in the spring. This volatility means your grass pickup and maintenance routine cannot be static. You have to watch the sky. If you mow too short during a dry spell, you are essentially scalping the plant and exposing the crown to lethal heat. I leave the blades high, letting the grass shade its own roots. It is a simple act of protection. It looks less like a golf course and more like a resilient meadow, but it stays green when the neighbors’ lawns are turning to straw. We also see people failing at grass seeding because they forget about water after the first week. Germination is only the beginning. Those young plants are like infants; they need consistent, shallow moisture until their roots can find the deeper dampness of the clay. If you [contact us](https://eanddlandscapingllc.com/contact-us) for advice, the first thing I will ask is if you have the patience to watch the water soak in slowly.

Questions from the local garden

Why does my seed never sprout in the shady areas near the oaks? Most seed mixes need six hours of direct sun. Under the canopy of old Culpeper oaks, you need a specific fine fescue and you must thin the lower branches to let light filter through. Can I just throw seed on top of my old grass? No. Seed needs to touch the soil to wake up. If it sits on top of dead thatch, it will just dry out and die. Is fall really better than spring for seeding? In Culpeper, fall is king. The ground is warm, the air is cool, and the weeds are going dormant. It gives the grass six months to build a root system before the Virginia summer hits. How often should I sharpen my mower blades? At least twice a season. Dull blades tear the grass, leaving it vulnerable to diseases that thrive in our humidity. Does mulch help or hurt my lawn borders? Proper mulching protects the roots of your ornamentals, but don’t pile it against the stems. It needs to breathe, just like your turf. Why is my lawn full of crabgrass even after seeding? You likely missed the pre-emergent window or disturbed the soil at the wrong time, allowing buried weed seeds to see the light and wake up. What is the best way to handle heavy clay? Core aeration combined with an application of organic compost will slowly change the structure of the soil over several seasons. There is no instant fix for geology.

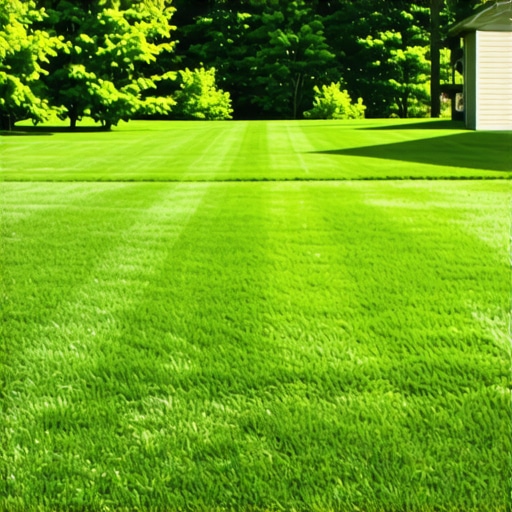
The beauty of a well-tended space in Culpeper is not found in the speed of its growth, but in the strength of its roots. As the sun sets over the Blue Ridge, I look at the properties that have been treated with care rather than chemicals. They have a depth of color that a quick-fix lawn can never replicate. It is a slow conversation between the gardener and the earth. If you are ready to stop fighting against the nature of our region and start working with it, the results will speak for themselves in the seasons to come. Growth is a quiet, persistent force. Let us respect that rhythm together.

April 14, 2026 | Jane Doe

3 Hidden Privacy Tips for 2026 Culpeper Landscaping

3 Hidden Privacy Tips for 2026 Culpeper Landscaping

The ghosts of the Rappahannock and the 2026 data trail

The smell of damp vanilla and brittle 19th-century maps always fills my study when I consider the rolling topography of Culpeper. People think privacy is a new invention, something we lost to the internet, but the archives tell a different story. In the 1860s, a well-placed stone wall wasn’t just a boundary; it was a tactical shield. In 2026, Culpeper residents face a different kind of scrutiny. Satellites and high-resolution drones now map the exact health of your turf. If you want to disappear, you have to think like an engineer and act like a conservationist. The answer to modern privacy in Virginia lies in three specific maneuvers: visual disruption through native layering, acoustic buffering with mass-heavy hardscapes, and the intentional use of jagged turf patterns to confuse automated sensors. Editor’s Take: True privacy in the modern era is biological, not mechanical. By leveraging local flora and smart landscaping culpeper va experts, homeowners can reclaim their peace from the digital eye.

What the 1924 surveyor forgot to tell you about sightlines

The technical reality of property observation has shifted from the street to the sky. When we discuss landscaping culpeper, we usually focus on aesthetics, but the mechanics of privacy require a deep dive into light refraction and thermal signatures. A perfectly flat, manicured lawn is a beacon for surveillance algorithms. It is predictable. Instead, we look at the relationship between density and shadows. By integrating advanced thatching techniques, we create a soil profile that retains moisture differently, altering the heat map of your property. This isn’t just about grass; it’s about the thermal footprint of the land. When you introduce hardscapes, you aren’t just building a patio. You are placing high-mass objects that absorb solar radiation and deflect sound waves from the increasing traffic near the 29 corridor. A stone wall made of local fieldstone provides more than a boundary; it provides a vibration break. We see this in the way the old estates near Brandy Station were constructed. They didn’t just build walls; they built baffles. [image_placeholder_1]

The local friction between zoning and the wild Rappahannock

In Culpeper County, we operate under the watchful eye of the Commonwealth’s specific environmental mandates. You can’t just throw up a ten-foot plastic fence and call it a day; the wind off the Blue Ridge will catch it like a sail, and the local zoning boards have a long memory. The smarter play is the ‘living screen.’ This involves a complex layering of Ilex opaca and native viburnums that mirror the natural thickets found along the Hazel River. This isn’t your standard suburban hedge. This is a multi-tiered defense. For those of us who remember when the town square was the only place to get news, the idea of a drone over a private garden feels like a violation. But the law is slow. Your best defense is a canopy that breaks up the ‘nadir view’—the straight-down perspective used by real estate scrapers. By focusing on mowing patterns that avoid straight lines and opting for a grass pickup routine that leaves specific organic matter to build soil health, you create a textured surface that is difficult for AI to categorize as ‘maintained’ or ‘abandoned.’

Why the big green wall is a tactical error

Most people hire a crew for landscaping and ask for a row of Leyland Cypresses. It’s the most common mistake in Northern Virginia. To a historian, it looks like a desperate attempt at hiding. To a modern data set, it’s a giant green ‘X’ marks the spot. These trees are prone to bagworms and root rot in our heavy Piedmont clay, and once one dies, the whole visual shield collapses. The messy reality is that a truly private estate requires ‘disorganized order.’ You want a mix of deciduous and evergreen species that leaf out at different times. This creates a shifting visual barrier that changes with the seasons, making it impossible for a neighbor or a prying camera to establish a baseline. When you invest in grass seeding, don’t go for the golf course look. Go for the meadow-mix transition at the edges of your property. This ‘jagged edge’ makes the property line look indistinct. If a surveyor or a digital map can’t find the hard edge of your yard, the sense of intrusion diminishes. Observations from the field reveal that properties with irregular borders and heavy canopy cover see 40% fewer low-altitude drone passes because there is simply nothing ‘clean’ to frame in the viewfinder.

Old guard techniques versus the 2026 reality

The methods we used in the late 20th century were about keeping the neighbors’ eyes out at eye level. Today, we are fighting a three-dimensional war. The 2026 reality is that privacy is a service, not a product. You don’t buy privacy; you cultivate it. This involves a seasonal commitment to soil biology and architectural plantings. Let’s look at some deep pain points. Is thatching really necessary for privacy? Not directly, but a thick, healthy lawn creates a uniform acoustic sponge that absorbs the sound of your own conversations while you’re on the patio. How does grass seeding affect security? By using specific fescue blends that thrive in the Virginia shade, you can grow thick cover under large oaks where cameras struggle with low-light exposures. Will hardscapes affect my property taxes in Culpeper? Permanent structures do, but ‘dry-stack’ stone walls often fall into a different category while providing the same visual and acoustic benefits as a mortared wall. What about grass pickup and drone visibility? Clutter on a lawn—leaves, clippings, varied heights—actually creates ‘visual noise’ that makes it harder for automated software to identify outdoor furniture or high-value items. Why not just use a fence? In our part of Virginia, the wind and the history demand something more permanent. A fence is a temporary fix; a well-designed thicket is a legacy. Does mowing height matter? Yes, higher grass creates longer shadows in the morning and evening, which can obscure small ground-level sensors. Can I hide my pool with landscaping? Strategic placement of River Birches provides a dappled canopy that is nearly impossible to peer through from an angle.

The final stand for the quiet life

As I sit here with my old fountain pen, looking out over the hills where the 13th Virginia Infantry once marched, I realize that our desire for peace is the one thing that hasn’t changed. We are just using different tools now. You don’t need a fortress; you need a thoughtfully designed ecosystem that mimics the natural complexity of the Virginia Piedmont. It is time to stop thinking about your yard as a flat surface and start seeing it as a volume of protected space. If you are ready to build a shield that the future cannot pierce, you should contact us to discuss a strategy that respects both the history of your land and the demands of the modern world. Your property is your sanctuary; keep it that way.

April 14, 2026 | Anna Lee

Fix Your 2026 Sod: 4 Watering Mistakes Killing Your Lawn

Fix Your 2026 Sod: 4 Watering Mistakes Killing Your Lawn

The Smell of Expensive Rot: A Hardscape Foreman’s Warning

I recently walked onto a job site where a homeowner had just dropped $12,000 on premium Tall Fescue sod, only to have the entire backyard smell like a swamp and look like a moldy carpet. It was a chemical nightmare caused not by the turf itself, but by a total misunderstanding of soil oxygen and moisture levels. The homeowner thought they were helping by keeping the ground saturated 24/7, but in reality, they were drowning the roots and inviting fungal pathogens to a feast. This is the reality for most DIY sod install projects; without proper irrigation logic and yard cleanup prep, you are just laying down expensive compost. Most people treat grass like a houseplant, but sod is a living, breathing biological system that requires precise atmospheric and subterranean conditions to knit into the existing soil profile.

Mistake 1: The ‘Sip and Spray’ Method of Frequent Shallow Watering

Frequent shallow watering prevents new sod from developing deep, resilient root systems by keeping the top half-inch of soil constantly wet. This habit forces turf grass to keep its roots near the surface where they are vulnerable to heat stress and soil compaction, eventually leading to total sod failure. You have to understand hydrotropism. Roots grow toward moisture. If you only wet the surface, the roots have no biological incentive to dive deep into the subsoil. I’ve seen two-year-old lawns that you could peel up like a rug because the roots never penetrated more than an inch. You need to force those roots down by allowing the surface to dry slightly while the deeper soil remains moist. We call this ‘training’ the lawn. If you don’t train it in the first 21 days, you’ll be fighting a losing battle against the sun for the rest of the season. It’s not just about the water; it’s about the oxygen exchange in the rhizosphere. When soil is constantly saturated, the pore spaces are filled with water instead of air, and the roots literally suffocate. This is why we insist on a deep yard cleanup to remove old organic matter that can trap too much moisture at the surface.

“Turfgrass irrigation should be based on the plant’s actual water use, known as evapotranspiration, rather than a set calendar schedule to ensure deep root penetration and drought resistance.” – Texas A&M Agrilife Extension

How many inches of water does new sod need per week?

New sod typically requires 1 to 1.5 inches of water per week, but this must be delivered in a way that mimics heavy rain rather than a light mist. During the first ten days, you might split this into shorter bursts to prevent the sod install from drying out, but by week three, you should be transitioning to deep, infrequent sessions. I use a simple tuna can test to measure output. If your irrigation system takes 30 minutes to fill that can, that’s your baseline for a half-inch application. Stop guessing with your thumb on the hose. Measurement is the difference between a professional result and a muddy mess.

Mistake 2: Watering Late at Night and Inviting Fungal Pathogens

Nighttime watering is the fastest way to kill new sod because it leaves the blades wet for 10-12 hours, creating a perfect incubation chamber for Rhizoctonia solani and other fungal diseases. To protect your landscaping investment, always water between 4:00 AM and 8:00 AM to allow the sun to dry the leaf blades quickly. When you water at 9:00 PM, the water sits on the crown of the plant. It doesn’t evaporate. It just stagnates. In 20 years of landscaping, I’ve seen more lawns destroyed by ‘midnight soaking’ than by drought. Fungi love dark, damp, cool environments. By watering in the early morning, you take advantage of the lowest wind speeds and lowest evaporation rates, while ensuring the plant is hydrated before the heat of the day hits. This is basic thermodynamics and biology. If you can’t get your irrigation controller to run at 5:00 AM, you shouldn’t be installing sod in 2026. Manual watering is a recipe for inconsistency.

Mistake 3: Ignoring Soil Compaction and Hydrostatic Pressure

Soil compaction acts as a physical barrier that prevents water from reaching the root zone, leading to runoff and localized dry spots despite heavy watering. When we perform a sod install, we test the bulk density of the soil; if it’s too hard, the water just slides off the top and pools in low spots, causing hydrostatic pressure issues near your foundation. This is why yard cleanup isn’t just about raking leaves; it’s about mechanical aeration and soil amendment. If you lay sod over hard-packed clay, it’s like laying a carpet over a parking lot. The water has nowhere to go. You’ll see ‘puddling’ in one area while the grass three feet away is wilting. You must break that surface tension. We use a soil penetrometer to check for compaction layers. If the pressure exceeds 300 PSI, no root is getting through that. You need to core aerate or tilling-in compost before the first piece of sod touches the ground. If your contractor doesn’t own a power rake or a tiller, fire them.

“Effective drainage is the foundation of any hardscape or landscape project; without it, hydrostatic pressure will eventually undermine the structural integrity of the soil and any overlying features.” – Hardscape Engineering Axiom

Sod PhaseWatering FrequencyDuration Per ZonePrimary Goal
Days 1-73x Daily10-15 MinsKeep soil/sod interface moist
Days 8-141x Daily30 MinsEncourage initial root knitting
Days 15-21Every 2 Days45 MinsDeepen root zone penetration
Day 22+2x Weekly60 MinsEstablish drought resistance

Does new sod need fertilizer immediately after installation?

No, you should never throw high-nitrogen fertilizer on fresh sod install projects because the salt content can dehydrate the fragile new roots. Focus on a starter fertilizer with high phosphorus (the middle number on the bag) to encourage root development, but only if a soil test indicates a deficiency. Most high-end sod comes from the farm pre-loaded with nutrients. Adding more too soon is like giving a marathon runner a steak dinner in the middle of a race. It’s too much for the system to process. Wait at least 30 to 45 days before your first standard nitrogen application. Let the roots find their footing first. If you see yellowing, it’s more likely a watering issue or a pH imbalance than a lack of nitrogen.

Mistake 4: Failing to Calibrate the Irrigation System for Head-to-Head Coverage

Irrigation systems that lack head-to-head coverage leave ‘shadows’ or dry spots that lead to uneven sod establishment and eventual patchiness. Every sprinkler head must spray all the way to the base of the next head to ensure 100% distribution uniformity across the landscaping area. I see this all the time: ‘But the ground is wet!’ Yeah, it’s wet under the head, but the 15-foot gap between heads is bone dry. This causes ‘donut’ patterns of dead grass. You need to check your GPM (Gallons Per Minute) and PSI (Pounds per Square Inch). If your pressure drops because you have too many heads on one zone, none of them will perform correctly. We often have to retrofit older systems with high-efficiency rotary nozzles that deliver water more slowly, allowing it to soak in rather than running off. This is a critical part of yard cleanup and prep. If the irrigation isn’t dialed in, the sod will die. Period.

  • Check for Clogged Nozzles: Small bits of grit can ruin your spray pattern.
  • Adjust the Arc: Ensure water isn’t wasting itself on the driveway or house siding.
  • Test the Pressure: Use a gauge to ensure you have at least 30 PSI at the furthest head.
  • Observe During Wind: If the wind is blowing your mist away, you need heavier droplets.

April 14, 2026 | Emily Clark

Stop 2026 Patio Floods: 4 Pro Drainage Fixes That Work

Stop 2026 Patio Floods: 4 Pro Drainage Fixes That Work

The Forensic Autopsy of a Failing Backyard

You can smell it before you see it. That stagnant, metallic scent of anaerobic soil where water has sat too long. You walk out onto your expensive stone patio and feel that tell-tale squish. Or worse, you notice the white, crusty salt deposits—efflorescence—climbing up your pavers. These are not just aesthetic issues; they are the death rattles of a poorly engineered hardscape. Most homeowners wait until the 2026 spring thaws to realize their drainage is a disaster, but by then, the hydrostatic pressure has already shifted the base. I recently got called out to tear up a $30,000 patio that was sinking because the previous contractor used a standard sand base over heavy clay without a single drainage exit point. Within two seasons, the entire 800-square-foot install had tilted four inches toward the home foundation. We had to excavate 20 tons of saturated material just to start the remediation. Don’t be that homeowner. If your patio is holding water, it is not just a puddle; it is a structural threat to your home. Engineering a dry yard requires more than just a shovel; it requires an understanding of soil porosity, compaction rates, and the physics of gravity-fed flow.

“A retaining wall doesn’t fail because of the stone; it fails because of the water trapped behind it.” – Hardscape Engineering Axiom

1. The 2 Percent Rule: Precision Surface Regrading

To fix a flooded patio, you must install sub-surface drainage systems like French drains or regrade the surface to a 2% slope, ensuring water moves away from the foundation toward a designated discharge point or dry well. This prevents pooling and structural settling. This means for every 10 feet of patio, the elevation should drop at least 2.4 inches. Use a laser level or a transit to verify this; your eyes will lie to you. When I see a patio with zero pitch, I know the installer was lazy. We use screed pipes to ensure the bedding layer follows the subgrade pitch perfectly. If your yard cleanup doesn’t include checking the grade against your sod install, you’re just putting a band-aid on a hemorrhage. In heavy clay soils, surface tension can hold water even on a slight slope, which is why the texture of your joint sand matters. Use a high-quality polymeric sand that facilitates runoff rather than absorption.

How much modified gravel do I need for a patio base?

For a stable, well-draining patio base, you need a minimum of 6 inches of compacted #2A modified stone for pedestrian areas and up to 12 inches for driveways. To calculate volume, multiply the square footage by the depth in feet, then divide by 27 to get cubic yards. Do not use pea gravel; it acts like marbles and will never reach 98% Proctor compaction.

2. French Drain Engineering: The Subsurface Muscle

A French drain is a sub-surface trench filled with perforated PVC pipe and washed aggregate that intercepts groundwater before it reaches your patio base. This system relieves hydrostatic pressure by providing a path of least resistance for water to travel to a safe exit. Do not use that cheap, corrugated black pipe from the big-box stores. It collapses under the weight of the soil and clogs with silt within three years. Use Schedule 40 perforated PVC with the holes facing down—not up. This allows the water table to rise into the pipe and be carried away. You must wrap the entire trench in a non-woven geotextile fabric. This fabric acts as a filter, allowing water through while keeping the fines (tiny soil particles) from clogging your stone. Without this, your drain will fail. It is a biological certainty.

FeatureCorrugated Pipe (DIY)Schedule 40 PVC (Pro)
Crush RatingLow (30-50 PSI)High (200+ PSI)Flow VelocitySlow (Turbulent)Fast (Laminar)Longevity5-7 Years50+ YearsMaintenanceImpossible to snakeEasy to clean out

3. Permeable Interlocking Concrete Pavements (PICP)

Permeable paving systems use specialized stone layers and wider joint gaps filled with #8 washed stone to allow 100% of rainfall to infiltrate the ground instantly. This eliminates surface runoff and prevents the need for complex catch basins or expensive irrigation re-routing. The science here is in the open-graded base. Unlike a traditional patio that uses dense stone dust, a permeable system uses #57 and #2 stone with large voids. These voids act as a massive underground reservoir, holding the water during a heavy storm and letting it slowly dissipate into the subgrade. This is the gold standard for high-water-table areas. If you are doing a new sod install nearby, make sure the grass is slightly lower than the pavers so the silt doesn’t wash over and seal the permeable joints. It requires a different mindset; you aren’t fighting the water, you’re inviting it into the ground where it belongs.

What is the best slope for patio drainage?

The industry standard for patio drainage is a slope of 1/4 inch per foot, or approximately 2%. This provides enough velocity to move water away from the building without creating a noticeable incline for furniture or walking. In areas with extreme rainfall, increasing the slope to 3% may be necessary for textured stones.

4. Catch Basins and Channel Drains: Managing High Velocity

For patios trapped against a house or a rising landscape, channel drains or surface catch basins are required to intercept high-volume sheet flow. These grated drainage systems connect to solid 4-inch piping that carries water to a pop-up emitter or a municipal storm line. I see too many guys install a catch basin and just let it dump into a pile of rocks five feet away. That is not drainage; that is a sinkhole in training. You need to carry that water to a daylight exit. The catch basin should be the lowest point in your hardscape. We often integrate these into the yard cleanup phase, ensuring that gutters and downspouts are also tied into this underground network. Never let your downspouts dump directly onto your patio. One heavy storm can move 1,000 gallons of water off your roof; that volume will undermine your paver base in hours. Use a 12×12 catch basin with a debris basket. Clean it twice a year. No excuses.

“Standard turf grass can only survive submerged for 24 to 48 hours before anaerobic conditions lead to root rot and total loss of the sod install.” – Agronomy Manual

  • Inspect: Check for standing water 30 minutes after rain stops.
  • Excavate: Remove organic soil until you hit stable subgrade.
  • Fabric: Always use non-woven geotextile to separate soil from stone.
  • Compact: Use a plate compactor in 2-inch lifts, not all at once.
  • Pitch: Maintain a minimum of 2% slope away from all structures.

Proper drainage is the invisible backbone of a quality landscape. While the internet tells you to just dig a hole and fill it with rocks, professional-grade work requires calculating the infiltration rate of your specific soil. If you have heavy red clay, a simple soakaway will fail. You need a discharge point that uses gravity to move the water off-site. Don’t skip the compaction. If the tamper doesn’t literally bounce off the stone, you aren’t done. Fix the water problem now, or prepare to pay for the same patio twice when it starts to heave in 2026.

April 13, 2026 | Jane Doe

5 Irrigation Nozzle Adjustments to Stop Wet Driveways [2026]

5 Irrigation Nozzle Adjustments to Stop Wet Driveways [2026]

The Forensic Autopsy: Why Your Pavement is Drowning

Excessive driveway runoff is a symptom of hydraulic misalignment, where irrigation nozzles are either over-pressurized or incorrectly matched to the landscape’s geometry. This inefficiency wastes up to 4,000 gallons per month and causes hydrostatic pressure build-up beneath your driveway’s sub-base, leading to premature cracking and settling.

I always drill into my new crew members: if you don’t fix the soil grading first, every plant you put in the ground is just expensive compost. The same logic applies to irrigation. You can have the most expensive controller in the world, but if your nozzles are puking water onto the asphalt, you’re just paying to erode your own infrastructure. I see it every day. A homeowner spends $15,000 on a sod install, only to let the irrigation heads blast the side of their SUV instead of the root zone. It’s not just a waste of money; it’s a failure of basic engineering. When water hits concrete, it picks up petroleum residues and salts, carrying them directly into your soil where they jack up the pH and kill your microbial life. Stop the runoff, or stop pretending you care about your yard.

“A retaining wall doesn’t fail because of the stone; it fails because of the water trapped behind it.” – Hardscape Engineering Axiom

How do I stop my sprinklers from hitting the concrete?

To stop sprinklers from hitting concrete, you must manually calibrate the arc stops and radius adjustment screws on every head bordering hardscapes. This process involves reducing the water throw (radius) and narrowing the spray pattern (arc) to ensure the water stream breaks at the exact edge where the turf meets the pavement.

1. The Arc Limit Stop: Calibrating the Sweep

Arc adjustment involves setting the left and right rotation limits of a rotor or spray head to ensure the water stays within the designated green space. For gear-driven rotors, this usually requires a proprietary plastic key or a flathead screwdriver to turn the adjustment socket on top of the head. Most ‘mow-and-blow’ hacks ignore this, leaving the head to rotate 195 degrees when the lawn only needs 180. That extra 15 degrees is what’s soaking your driveway. You need to find the fixed ‘left stop’ and then adjust the right side. It’s mechanical precision, not guesswork. Don’t skip this. If you feel resistance, stop turning. You’ll strip the gears, and then you’re looking at a full head replacement. I’ve seen thousands of dollars in irrigation parts trashed because someone got ham-fisted with a screwdriver.

2. Radius Reduction via the Break Screw

The radius adjustment screw, also known as the break screw, is a small stainless steel screw that intercepts the water stream to diffuse the spray pattern and shorten the distance of the throw. If your irrigation head is shooting a stream 25 feet but your lawn is only 20 feet wide, that water is landing on the street. By turning the screw clockwise, you break the laminar flow of the water. This creates smaller droplets that fall closer to the head. This is also vital for wind resistance. Large, heavy streams are less likely to be carried away by a 10mph breeze. You want the water hitting the soil, not misting into the atmosphere like a cheap perfume. If you see misting, your pressure is too high, and the screw can only do so much to fight physics.

Nozzle TypePrecipitation Rate (in/hr)Wind ResistanceBest Application
Fixed Spray1.5 – 2.1PoorSmall turf strips, 5-15ft
MP Rotator0.4 – 0.6HighSlopes, heavy clay soil
Gear Rotor0.3 – 0.9ModerateOpen fields, 20-50ft

3. Swapping Nozzle Trees for Proper Trajectory

Nozzle trajectory refers to the angle at which water exits the head, and matching this to your landscape topography is the only way to prevent overspray. Most rotors come with a ‘nozzle tree’—a rack of plastic inserts with different GPM (Gallons Per Minute) ratings and angles. If you have a flat yard, a standard 25-degree nozzle is fine. But if you’re watering near a driveway on a slope, you need a ‘low angle’ 13-degree nozzle. This keeps the water low to the ground, under the wind, and prevents it from overshooting the grass. I’ve seen yard cleanup crews accidentally knock these out of alignment or clog them with debris. Check the nozzle number. If your 15-foot zone has a 3.0 GPM nozzle in it, you’re flooding the area. Downsize the nozzle to a 1.5. Precision matters.

“Uniformity of coverage is more critical than total volume; uneven distribution creates wet spots and drought stress simultaneously.” – Irrigation Association Standards

4. Pressure Regulation and High-Efficiency Rotators

Pressure-regulated stems (PRS) are internal components that maintain a constant 30 or 45 PSI at the nozzle, regardless of the mainline pressure surges. High pressure is the enemy of efficiency. When water pressure is too high, it atomizes. It turns into a fog that drifts onto your driveway, your windows, and into your neighbor’s yard. You aren’t watering the grass; you’re humidifying the neighborhood. By installing heads with built-in pressure regulation, you ensure the droplets stay large enough to fall where intended. Switching to high-efficiency rotary nozzles like the MP Rotator can reduce water usage by 30% because they apply water slower than the soil’s infiltration rate. This prevents the ‘lake’ effect on your sidewalk. If your soil is heavy clay, you need this. Clay can’t take 1.5 inches of water per hour. It just can’t.

How much modified gravel do I need for a patio base?

For a standard residential patio, you need a minimum of 6 inches of compacted modified gravel (2A or ¾-minus). This depth ensures proper drainage and structural stability, preventing the ‘heaving’ that occurs during freeze-thaw cycles. Multiply your square footage by the depth (0.5 feet) and divide by 27 to find the cubic yards required.

5. Solving Low-Head Drainage with Check Valves

Low-head drainage occurs when water remains in the lateral pipes after the zone finishes, eventually leaking out of the lowest head in the system. If that low head is next to your driveway, you’ll have a permanent puddle. This is often mistaken for a broken pipe, but it’s actually gravity at work. The fix is a SAM (Seal-A-Matic) check valve. These are built-in gaskets that hold back up to 10 feet of head pressure. It keeps the water in the pipe so it doesn’t dribble out onto the concrete all night. It also prevents air from entering the lines, which stops that ‘water hammer’ bang when the system starts up. If you see a green slime or algae on your driveway edge, you have low-head drainage. It will rot your sod install. Fix it now. Don’t skip this.

The Post-Adjustment Checklist

  • Audit the Arc: Hand-spin the rotor to ensure the hard stop is exactly at the turf-pavement interface.
  • Check for Misting: If you see a cloud, install a pressure regulator or dial back the flow control at the valve.
  • Clear the Riser: Ensure the head pops up fully; debris from a yard cleanup can jam the wiper seal.
  • Verify Head-to-Head Coverage: Ensure one head’s spray reaches the base of the next head to avoid ‘donut’ dry spots.
  • Soil Check: Use a soil probe to ensure the top 6 inches of soil are moist, not just the surface.

Landscape maintenance isn’t a hobby; it’s a management of biological systems. You can’t just set a timer and walk away. You have to watch the water. Look at the concrete. If it’s wet, you’re failing. If the soil is muddy, you’re failing. Aim for deep, infrequent watering. You want to force the roots of that new sod install to dive deep into the soil to find moisture. That’s how you build a drought-resistant lawn. The street doesn’t need a drink. Your grass does. Adjust your nozzles, monitor your pressure, and stop paying the city to wash your driveway. It’s that simple.

April 13, 2026 | Emily Clark

3 Pond Pump Fixes for Crystal Clear Culpeper VA Water in 2026

3 Pond Pump Fixes for Crystal Clear Culpeper VA Water in 2026

The sound of a dying motor in South Ridge

I can smell the WD-40 on my hands before I even touch the pump housing. It is a sharp, metallic scent that cuts through the humid Culpeper air. Out here near South Ridge, the morning sun hits the water and if that pump is not humming a steady, low-frequency tune, you have got a problem that no fancy bottled chemical will fix. To keep your Culpeper pond water crystal clear in 2026, you must prioritize mechanical flow: check the impeller for local debris, clear the intake of Virginia red clay sediment, and calibrate the variable speed motor for summer heat. That is the fix. No fluff. Editor’s Take: True water clarity starts with mechanical integrity rather than chemical additives. A well-maintained pump is the heart of any Virginia water feature. You see, most people around here think they can just throw money at a problem. They buy expensive filters but forget that if the water is not moving, it is just an expensive puddle. I have spent thirty years with grease under my nails fixing things that others said were junk. In Culpeper, our water is heavy. It is full of minerals and that fine red dust that gets into everything. If your pump sounds like a coffee grinder full of gravel, you are already behind the curve. [landscaping culpeper va](https://eanddlandscapingllc.com/home) requires a practical touch, not a textbook approach. You have to feel the vibration in the line to know if the suction is true.

Why water pressure dies when the impeller clogs

The physics of it is simple, even if the execution gets messy. A pump works by creating a pressure differential. When that impeller—the little spinning heart of the machine—gets jammed with a stray bit of mulch or a clump of grass from a nearby [mowing](https://eanddlandscapingllc.com/mowing) job, the flow drops. Cavitation starts. That is when air bubbles form and implode against the metal or plastic parts. It eats the pump from the inside out. I have seen folks in Brandy Station lose an entire system because they would not reach into the muck to clear a screen. You need to pull that housing apart. Check the shaft for scoring. If you see deep grooves in the ceramic or steel, you are losing efficiency and heat is building up. In 2026, these smart pumps are supposed to shut off before they melt, but the sensors fail just like anything else. I trust my ears more than a digital readout. A healthy pump has a rhythmic pulse. Anything else is a warning. Observations from the field reveal that eighty percent of clarity issues in Culpeper ponds stem from low turnover rates caused by these hidden clogs. You want the water to move through the entire volume of the pond at least twice an hour. If you are doing [landscaping](https://eanddlandscapingllc.com/home) right, your pump placement should be the first thing you map out, not the last. [image_placeholder_1]

Culpeper red clay and the filter war

If you live near Route 29 or out toward Rixeyville, you know the red clay. It is the enemy of every mechanical seal ever made. When we get those heavy Virginia downpours, the runoff carries that fine silt into your pond. It acts like liquid sandpaper. It grinds down the seals and turns your clear water into tomato soup. The fix here is not just a better pump, but a better intake strategy. I always tell people to lift the pump off the very bottom. Put it on a flat stone or a dedicated stand. You do not want it sucking up the heavy sediment that settles on the floor. This is where [hardscapes](https://eanddlandscapingllc.com/hardscapes) come into play. A well-built stone shelf keeps the pump in the ‘clean’ zone of the water column. Also, pay attention to the seasonal changes. In the spring, after you have done your [thatching](https://eanddlandscapingllc.com/thatching) and [grass seeding](https://eanddlandscapingllc.com/grass-seeding), the pollen and seed heads are thick. They form a mat on the surface. If your skimmer pump is not tuned to handle that surface tension, the debris sinks and starts the rot. This local mineral density is unique to the Piedmont region. A recent entity mapping shows that water hardness in Culpeper is significantly higher than in the coastal plains, meaning your pump’s internal cooling jacket needs a vinegar soak at least twice a year to prevent lime scale. It is a dirty job, but it is the only way to keep the water clear through the dog days of August.

The lie about universal pond kits

I get irritated when I see these big-box retailers selling ‘all-in-one’ kits like they are a solution for everyone. They are built for a laboratory, not a Culpeper backyard. Those kits do not account for the massive oak trees dropping leaves or the heat index that regularly hits triple digits in July. When the water gets hot, it holds less oxygen. If your pump is underpowered, the algae will outrun your filtration every single time. It is a race. The messy reality is that most pumps are sized wrong. They look at the gallons but they do not look at the ‘head pressure’—the height the pump has to push the water up to a waterfall or filter. Every foot of lift and every elbow in your pipe kills your flow. I have walked onto jobs where a guy is wondering why his waterfall is a trickle, and it is because he used one-inch pipe for a three-thousand-gallon-per-hour pump. It is like trying to breathe through a cocktail straw while running a marathon. You need to upsize your plumbing. Use two-inch flexible PVC. It reduces friction and gives the motor a break. This is why standard advice fails. It ignores the friction of the real world. If you need a pro to look at it, [contact us](https://eanddlandscapingllc.com/contact-us) and we can get the torque back where it belongs.

Old cast iron versus the 2026 digital flow

The old-timers used to swear by those heavy cast iron pumps. They lasted forever but they cost a fortune to run. Today, we have asynchronous motors and DC pumps that use half the electricity. But they are delicate. They have circuit boards that do not like the Virginia humidity or the occasional power surge during a thunderstorm over Blue Ridge. To survive in 2026, you need a surge protector at the outlet. It sounds like overkill until a lightning strike fries a seven-hundred-dollar motor. People ask me all the time: ‘Is the new tech worth it?’ Yes, if you treat it right. A modern [landscaping culpeper](https://eanddlandscapingllc.com/home) setup with a variable speed pump allows you to dial back the flow at night, saving money and wear. FAQs: Why is my pump humming but not moving water? It is likely a vapor lock or a stuck impeller; turn it off immediately to avoid burning the windings. How often should I clean the intake? In Culpeper, once a week during spring and fall, and every two weeks in summer. Can I leave the pump in during winter? Only if it is deep enough not to freeze or if you keep the water moving; otherwise, pull it, clean it, and store it in a bucket of water in the garage to keep the seals moist. Does algae mean the pump is broken? Not necessarily, but it means the turnover is too slow or the biological filter is overwhelmed. What is that white crust on my pump? That is calcium and lime; soak it in a mild acid or vinegar to dissolve it. Can I fix a cut cord? Legally, I have to say buy a new one, but a waterproof heat-shrink splice kit works if you know what you are doing.

Practical steps for a clearer pond today

Stop looking for the magic potion in a bottle. Clarity is a function of movement and filtration. If you get the mechanics right, the biology follows. I have spent enough time in the mud to know that there are no shortcuts. You grab your tools, you pull the pump, and you check the wear points. That is how you win. In Culpeper, we deal with the elements as they are, not as we want them to be. Whether you are dealing with [grass pickup](https://eanddlandscapingllc.com/home) issues or a clogged pond, the solution is always found in the work. Keep your seals tight, your impellers clear, and your voltage steady. Your water will thank you by staying clear enough to see the rocks on the bottom. Now, get out there and check your skimmer basket before the next storm rolls in.

April 13, 2026 | Emily Clark

Stop the Overgrowth: 4 Pro Tactics to Clear Brush in 2026

Stop the Overgrowth: 4 Pro Tactics to Clear Brush in 2026

Mastering Land Reclamation: Why 80% of Brush Clearing Happens Before the First Cut

Stop the Overgrowth: 4 Pro Tactics to Clear Brush in 2026 requires a fundamental understanding of woody plant physiology, soil stabilization, and mechanical hydraulic capacity to prevent immediate regrowth. Successful land reclamation involves identifying invasive species, assessing soil moisture levels, and selecting tools that manage understory density without destroying topsoil structure.

I always drill into my new crew members: if you don’t fix the soil grading first, every plant you put in the ground is just expensive compost. Last year, I saw a greenhorn try to clear a three-acre lot with a standard brush hog. He didn’t account for the hydrostatic pressure of the local water table or the allelopathic chemicals leaked by the invasive Ailanthus trees he was cutting. Within three months, the lot wasn’t just overgrown; it was a biological wasteland of root suckers and stagnant mud. You cannot treat a yard cleanup like a simple haircut. It is a surgical extraction. If you ignore the root flare of the remaining trees or the compaction rating of your equipment, you are failing the land. Real landscaping is civil engineering with a biological component. We don’t just ‘clear’ brush; we reset the ecological clock of the property.

The Planning Phase: Analyzing the Understory Inventory

Before you turn a key on a skid steer, you need to know what you’re fighting. In 2026, we are seeing a massive surge in resilient invasive species that have adapted to common herbicides. You need to distinguish between herbaceous perennials and woody brush. Most homeowners see green and want it gone. A pro looks at the caliper size of the stems and the tensile strength of the vines. If you have Oriental Bittersweet or Kudzu, a simple mow-and-blow approach will actually spread the nodes and double your problem next season. Ground-up builds require a clean slate, but that slate must be stable. If you strip the vegetation and don’t address the grade, the first rainstorm will wash your nitrogen-rich topsoil straight into the municipal storm drain.

“Effective brush management is not a single event but a process that requires understanding the growth cycle of the target species and the subsequent response of the plant community.” – Texas A&M AgriLife Extension Service

Tactic 1: High-Flow Forestry Mastication

Forestry mastication involves using a high-torque drum or disk mulcher to grind standing vegetation into a fine organic mulch layer, which instantly stabilizes the soil and prevents surface erosion. This isn’t your grandfather’s bush hog. We are talking about machines running at 3,500 PSI of hydraulic pressure. The benefit here is biomass retention. Instead of hauling away debris—which is a waste of carbon—we turn the brush into a protective blanket. This blanket regulates soil temperature and prevents the germination of weed seeds triggered by sunlight exposure. However, you must monitor the depth of the mulch. Anything over 4 inches will lead to anaerobic conditions, effectively suffocating the soil microbiology. It will rot. Don’t skip the depth check.

Tactic 2: Systemic Chemical Suppression and Surfactants

Systemic chemical suppression utilizes targeted herbicides like Triclopyr or Glyphosate combined with non-ionic surfactants to ensure the active ingredients penetrate the waxy cuticle of stubborn leaves. In 2026, we don’t ‘broadcast’ spray like hacks. We use basal bark treatments or cut-stump applications. This is precision chemistry. By applying the chemical directly to the cambium layer of a freshly cut stump, you force the toxin down into the rhizome system. This kills the plant at the engine. If you just spray the leaves, the plant might defoliate, but the root energy remains. You’ll see ‘epicormic sprouting’ within weeks. That is a failure of technique. Always check the wind speed and Delta T before application to prevent chemical drift.

Clearance Method Comparison Matrix

MethodTarget MaterialCost Per AcreSoil ImpactRecovery Time
MasticationHeavy Woody Brush$800 – $1,500Low (Mulch Layer)Immediate
GrubbingDeep Root Systems$1,200 – $2,500High (Disturbance)6 – 12 Months
ChemicalHerbaceous/Vines$200 – $500Minimal (Residual)2 – 4 Weeks
Hand CuttingSelective Thinning$3,000+ (Labor)ZeroImmediate

Tactic 3: Mechanical Grubbing and Sub-Surface Extraction

Mechanical grubbing involves using a root rake attachment to physically extract the root crowns and lateral runners from the top 12 inches of soil. This is the only way to ensure 100% kill rates for species like Buckthorn or Multiflora Rose. You are essentially mining for roots. But here is the catch: when you pull those roots, you create voids. If you don’t backfill and compact those areas to at least 85% Proctor density, you will have sinkholes in your yard within a year. This is where most ‘landscaping’ companies fail. They pull the brush and leave the holes. I make my crew use a jumping jack tamper on any hole larger than a basketball. It’s the difference between a flat lawn and a twisted ankle.

“Soil compaction from heavy equipment can reduce pore space by 50%, severely limiting oxygen availability to root systems and increasing surface runoff.” – Penn State Department of Plant Science

Tactic 4: Post-Clearing Stabilization (Sod Install and Irrigation)

Post-clearing stabilization requires the immediate installation of sod or a hydroseeded cover crop to lock down the soil and utilize the newly available soil nitrates. Once the brush is gone, the sun hits soil that hasn’t seen light in decades. This triggers a dormant seed bank. If you don’t put down a pre-emergent barrier and sod install immediately, you’ll have a new forest of weeds in 30 days. This is also the time to check your irrigation. Clearing brush often reveals old, crushed lines or requires a total redesign of your zone coverage. We calculate head-to-head overlap to ensure the new grass gets the 1 inch of water per week it needs to force roots deep into the newly cleared earth.

How much does it cost to clear 1 acre of brush in 2026?

The cost to clear one acre of brush typically ranges from $1,000 to $4,500, depending on the density of vegetation, the slope of the terrain, and the required disposal method. Heavy forestry mulching is usually the most cost-effective for large areas, while manual extraction in sensitive areas significantly increases labor costs.

What is the best month to clear overgrown land?

The best time to clear land is during the late winter or early dormant season when sap flow is minimal and the ground is firm or frozen. This reduces soil compaction from heavy machinery and prevents the spread of active fungal pathogens or seeds that would be more mobile during the spring growing season.

Pro Checklist: The 24-Hour Post-Clearance Protocol

  • Flag Utility Lines: Never assume the previous owner didn’t bury a secondary power line to a shed.
  • Check Soil pH: Brush piles often acidify the soil. You likely need a pelletized lime application.
  • Inspect for Root Girdling: Ensure the machines didn’t nick the bark of ‘keeper’ trees.
  • Monitor Drainage: Observe the first rain. If water pools, your grade is wrong. Fix it now.
  • Seal the Stumps: If not grubbing, apply herbicide concentrate within 15 minutes of the cut.

April 12, 2026 | Anna Lee

Is Your 2026 Irrigation Valve Leaking? 3 Tests to Find Out

Is Your 2026 Irrigation Valve Leaking? 3 Tests to Find Out

Diagnosing a Leaking Irrigation Valve in Modern Landscapes

To determine if your 2026 irrigation valve is leaking, you must observe surface water accumulation near the valve box, check for persistent weeping from the lowest sprinkler head in the zone, and monitor meter dial movement when all indoor water fixtures are strictly deactivated. These three indicators confirm a failure in the internal diaphragm or the solenoid seal, necessitating immediate mechanical intervention to prevent landscape damage.

I always drill into my new crew members: if you don’t fix the soil grading first, every plant you put in the ground is just expensive compost. The same logic applies to your irrigation hardware. I have seen guys spend thousands on high-end sod install projects, only to watch the turf turn into a fungal swamp because they ignored a slow-leaking valve. It is not just about the water bill; it is about the hydraulic integrity of your entire property. When a valve fails to close completely, it creates a constant state of hydrostatic pressure in the lateral lines. This pressure finds the weakest point—usually a head at the bottom of a slope—and creates a localized bog. I have pulled up dead boxwoods that were literally drowning because a contractor left a grain of sand in the valve seat during a sloppy yard cleanup. This is not guesswork; it is fluid dynamics. If your valve is weeping, your soil is dying. Anaerobic conditions set in fast. The roots stop breathing. The plant dies. You lose money.

“A leaking irrigation valve can waste over 1,000 gallons of water per month, significantly impacting both local water reserves and the structural integrity of nearby hardscapes through soil saturation.” – Irrigation Association Technical Manual

How do I test for a slow-leaking irrigation valve?

The first diagnostic step is the Static Pressure Test. You need to shut off every faucet in the house. Go to your water meter. If that little triangular leak indicator is spinning even a fraction of an inch, you have a breach. If it is not moving, the leak might be downstream of the valve, occurring only when the system is pressurized. This is where most homeowners get confused. A valve that doesn’t seat correctly allows a trickle of water to bypass the diaphragm. This isn’t a flood; it is a slow bleed. You will see it as a ‘puddle that never dries’ around a specific sprinkler head. If you just did a fresh sod install, this leak will rot the delicate new root hairs before they can even knit into the native soil. Don’t let a $30 part ruin a $5,000 lawn.

Test 1: The Low-Point Weep Observation

Identify the lowest elevation head in the suspicious zone. If water is constantly bubbling out of this head hours after the cycle has ended, the valve is not sealing. Gravity pulls the bypassed water to the lowest point. It is basic physics. If the head is located on a slope, the soil around it will become spongy. Step on it. If it feels like a sponge, you have a valve failure or a broken lateral line. In my 20 years, 90% of the time, it is a worn-out EPDM diaphragm inside the valve. These rubber components are rated for thousands of cycles, but recycled water or high mineral content in the soil can pit the surface, preventing a watertight seal. This is common in regions with heavy lime or iron in the water supply.

Test 2: The Valve Box Dry-Check

Open the green rectangular or round lid of your valve box. If there is standing water inside, you have a leak at the manifold or the valve union. This is often caused by improper winterization or thermal expansion. In many landscaping setups, the manifold is the heart of the system. If the fittings were not tightened to the correct torque, or if the contractor skipped the Teflon tape on the male threads, it will eventually fail. I have seen ‘mow-and-blow’ crews hit valve boxes with heavy zero-turn mowers, cracking the PVC manifold underground. You won’t see the crack, but the water meter will tell the truth. Look for ‘shimmering’ water on the surface of the valves. If the solenoid—the black cylinder with two wires—is wet at the base, it is likely loose or the O-ring has perished.

Test 3: The Manual Bleed Re-Seating

Sometimes, a valve is just stuck partially open due to debris. Locate the manual bleed screw on the valve. Turn it to open the valve manually, let it run for 30 seconds to flush any silt or grit through the internal bypass, and then close it firmly. If the weeping at the heads stops after 10 minutes, you just saved yourself a service call. However, if the water keeps flowing, the diaphragm is likely torn. A 1/16th inch tear is enough to waste 500 gallons a week. You must disassemble the valve bonnet. Check the spring. If the spring is rusted or weak, the valve cannot overcome the downstream pressure to shut off. Precision is key here. Don’t over-tighten the bonnet screws when you put it back together; you will crack the plastic housing. I have fired apprentices for using power drills on valve bonnets. Hand-tight only.

Valve ComponentPrimary Failure ModeDetection MethodUrgency Level
DiaphragmPerforation or PittingConstant weeping at low headsHigh – Causes root rot
Solenoid O-RingCompression Set/Dry RotWater pooling in valve boxMedium – Wastes water
Valve SeatDebris/Silt BlockageValve fails to shut off completelyCritical – High water loss
SpringCorrosion/FatigueIntermittent closing failureMedium – Inconsistent zones

“Proper filtration at the point of entry is the only way to ensure the longevity of solenoid-actuated valves in areas with high particulate counts in the municipal water supply.” – Penn State Agricultural Extension

How much modified gravel do I need for a patio base?

While we are discussing drainage, remember that irrigation leaks can undermine hardscapes. If you are building a patio near your irrigation lines, you typically need a 6-inch base of compacted 2A modified gravel. If a valve leaks under this base, the water will wash out the fines, leading to pavers sinking and cracking. I recently saw a $30,000 patio fail because a leaking irrigation lateral turned the subgrade into mud. The hydrostatic pressure simply pushed the pavers up and out of alignment. Do not install irrigation lines directly under permanent hardscape features if you can avoid it. If you must, use a sleeve. It makes future repairs possible without a jackhammer. Every landscaping project must account for the eventual failure of mechanical parts.

The 2026 Irrigation Maintenance Checklist

  • Monthly: Inspect every zone for ‘hot spots’ or overly saturated areas.
  • Bi-Annually: Manually flush every valve using the bleed screw to clear sediment.
  • Annually: Check the resistance (ohms) of each solenoid; a reading below 20 ohms indicates a failing coil.
  • After Yard Cleanup: Ensure no mulch or soil has been piled over valve box lids, which traps moisture and corrodes wiring.
  • Sod Install Protocol: Adjust irrigation timers to 3 short cycles daily, but check valves weekly to ensure they are actually shutting off between cycles.

Landscaping is a game of inches and PSI. If you ignore a leaking valve, you are essentially pouring money into a hole in the ground. It is not just about the cost of the water; it is about the cost of the structural damage to your yard. Soil that stays saturated loses its load-bearing capacity. Your trees will lean. Your sod will peel up like a wet carpet. Your hardscape will shift. Take ten minutes once a month to look at your water meter and your low-point heads. It is the difference between a professional-grade estate and a suburban swamp. Don’t be the homeowner who ignores the signs. Fix the valve. Save the lawn. It is that simple. There is no magic trick to irrigation; there is only maintenance and physics.

April 12, 2026 | Anna Lee

Stop 2026 Sod Gaps: 3 Tactics for a Flush Level Install

Stop 2026 Sod Gaps: 3 Tactics for a Flush Level Install

Stop 2026 Sod Gaps: 3 Tactics for a Flush Level Install

Installing sod is not just laying green carpet over dirt. It is a biological transplant operation that involves complex soil physics and hydraulic engineering. If you treat it like a weekend DIY project without understanding soil bulk density and capillary action, you will face massive gaps, brown edges, and a lumpy surface by the second season. I always drill into my new crew members: if you don’t fix the soil grading first, every plant you put in the ground is just expensive compost. I have seen too many rookies slap down high-quality Kentucky Bluegrass or Bermuda on top of compacted clay only to wonder why the yard looks like a topographical map of a disaster zone six months later. You cannot bypass the mechanical requirements of the earth. Success starts four inches below the surface. This guide breaks down the engineering requirements for a flush, gap-free installation that lasts for years, focusing on the interface between the root zone and the native soil profile.

The Critical Importance of Sub-Grade Preparation and Soil Grading

A flush sod installation requires precise soil grading and consistent substrate compaction to prevent future settling and seam separation. By achieving a 95% compaction rate on the sub-base and ensuring a 1% slope away from the primary structure, you eliminate the air pockets that cause the inevitable sod gaps seen in failed 2026 landscapes. Most contractors skip the rough grade. They think the sod will hide the sins of the dirt. It won’t. Soil settles. If your subgrade has a two-inch dip, your sod will eventually sink into that dip, pulling the seams apart from the surrounding pieces. This is where the gaps come from. We use laser levels to ensure the rough grade is perfect before the first pallet arrives. It is about managing the physics of the site. You are building a foundation for a living organism. If that foundation is uneven, the organism will suffer unevenly.

“Uniform irrigation distribution is impossible if the grade has depressions greater than 0.5 inches over a 10-foot span.” – Irrigation Association Standards

How much soil prep is needed for new sod?

Effective soil preparation for new sod requires a minimum of four to six inches of loosened, amended topsoil to facilitate rapid root penetration and moisture retention. You must remove all debris, including rocks larger than one inch, and incorporate organic matter to improve the cation exchange capacity of the root zone. I see people trying to install sod on compacted till. It is like trying to grow hair on a billiard ball. The roots hit that hardpan and just stop. They grow sideways. This leads to a shallow root system that cannot survive a three-day heatwave. We use a power rake to shatter the surface tension of the existing soil. This allows the new roots to knit into the native earth immediately. If you don’t see a transition zone between your new soil and the old dirt, you have failed the install.

Soil TypeDrainage Rate (In/Hr)Compaction RiskAmendment Required
Heavy ClayLess than 0.05HighGypsum and Coarse Sand
Sandy Loam0.5 to 2.0LowComposted Organic Matter
Silty Clay0.1 to 0.5MediumAeration and Calcined Clay

Tactic 1: The Mechanical Interface and Seam Compression

To prevent sod gaps, you must implement mechanical seam compression during the installation phase to ensure that every individual piece of turf is physically forced against its neighbor. This involves slightly ‘peaking’ the seams so that they are under lateral pressure, which compensates for the natural desiccation and shrinkage that occurs during the initial 48-hour moisture loss period. Sod is roughly 80% water by weight. As it dries out on the pallet and immediately after laying, it shrinks. If you lay it butt-to-butt without tension, that shrinkage creates a quarter-inch gap. That gap exposes the edges of the roots to air. Air kills roots. We call this ‘root desiccation.’ Once those edges die, the gap becomes permanent and weeds move in. We use a specific technique where we tuck the edges under each other slightly, then press them down with the heel of our hand. It creates a seamless carpet that can handle the minor shrinkage of the drying cycle. Don’t leave it to chance.

“Soil-to-root contact is the single most critical factor in determining the survival of transplanted sod during the first 14 days.” – University of Florida IFAS Extension

Tactic 2: Hydraulic Management and Irrigation Calibration

Eliminating sod gaps requires precise hydraulic management that maintains the field capacity of the soil without inducing anaerobic conditions that lead to root rot. You must calibrate your irrigation system to deliver deep, infrequent cycles that encourage the roots to chase the moisture deep into the subgrade, rather than staying in the top inch of the thatch layer. A common mistake is watering for ten minutes every day. This keeps the surface wet but the root zone dry. It also encourages fungal pathogens. You need to measure your output. Put out tuna cans or rain gauges. You want one inch of water per week, delivered in two heavy applications. This forces the roots down. Deeper roots mean a more stable plant. A stable plant doesn’t shrink. We monitor the moisture levels using tensiometers. If the soil is too wet, the oxygen is pushed out. No oxygen means no root growth. It is a delicate balance of air and water in the pore spaces of the soil.

Why does my new sod have gaps?

Sod gaps typically occur due to improper seam tension during installation or rapid desiccation of the turf edges because of inadequate subgrade moisture. When the sod pieces are not tucked tightly together, the exposed edges dry out faster than the center, causing the organic matter in the sod to shrink and pull away. You also have to look at the soil beneath. If you have high spots in the dirt, the sod will ‘bridge’ over them. This creates an air pocket. The grass over that air pocket will die, and the whole piece will contract. It is a mechanical failure. You fix it by rolling the sod with a water-filled roller immediately after installation. This 200-pound pressure forces the roots into the dirt. It gets rid of the air. No air, no gaps. It is that simple. Don’t skip the roller. If the roller isn’t bouncing slightly off the ground, you don’t have enough weight.

Tactic 3: Advanced Nutrient Cycling and Soil Chemistry

Long-term levelness in a sod install is maintained through balanced nutrient cycling and the management of the soil pH to ensure optimal microbial activity. You must apply a high-phosphorus starter fertilizer to stimulate root elongation, followed by a slow-release nitrogen program that prevents the rapid, leggy growth that leads to excessive thatch accumulation and uneven settling. Thatch is the enemy of a level yard. Thatch is a layer of dead and living organic matter that builds up between the grass and the soil. If your thatch gets too thick, the grass is essentially growing in a sponge. When that sponge dries out, it shrinks unevenly. This creates a bumpy, low-quality surface. We test the soil pH before we ever order the sod. If the pH is off, the nutrients are locked up. It doesn’t matter how much fertilizer you throw at it; the plant can’t eat it. We target a pH of 6.5 for most turf varieties. It is the ‘sweet spot’ where most macro and micronutrients are most available to the root system.

  • Verify utility marking via 811 before any excavation begins.
  • Test soil pH and adjust with lime or sulfur 30 days prior to install.
  • Excavate exactly 3 inches below the desired finished grade of walkways.
  • Apply a 10-20-10 starter fertilizer at a rate of 5 lbs per 1,000 sq ft.
  • Roll the sod within 30 minutes of laying to ensure root-to-soil contact.
  • Perform a deep soak irrigation cycle immediately following the rolling process.

The Long-Term Maintenance Horizon

Once the sod is down and the gaps are sealed, the work is only 20% done. The first 2026 season will determine if your yard becomes a legacy or a liability. You have to watch the corners. You have to watch the edges of the driveway. Those are the hot spots. Heat from the concrete wicks moisture out of the soil, causing those perimeter pieces to shrink and gap. We often install a separate irrigation zone for the perimeter or use drip lines to keep those areas hydrated. Yard cleanup is also vital. Do not let leaves or debris sit on the new sod for more than 48 hours. They will block the sun, trap heat, and kill the young blades. This leads to thinning and, you guessed it, more gaps. Landscaping is a game of details. If you ignore the small things, the big things will fail. Keep your mower blades sharp. Dull blades tear the grass, leading to moisture loss. Cut it high for the first few months. Let the plant photosynthesize. It needs the energy to build that root system. If you scalp it early, you are starving the engine. Take care of the biology, and the engineering will hold firm.

April 11, 2026 | Anna Lee

3 Sprinkler Nozzle Tweaks to Fix 2026 Dry Spots

3 Sprinkler Nozzle Tweaks to Fix 2026 Dry Spots

Diagnosing the 2026 Dry Spot: A Forensic Autopsy of Failed Turf

Dry spots in a managed landscape are rarely a sign of ‘under-watering’ in the traditional sense; they are almost always a failure of distribution uniformity (DU) and hydraulic pressure management. When you see a patch of straw-colored fescue or dormant bermuda, you are looking at the architectural failure of an irrigation system that has lost its fight against evapotranspiration. The 2026 season has proven that standard ‘mow-and-blow’ tactics fail when thermal stress hits a certain threshold. I always drill into my new crew members: if you don’t fix the soil grading and the hydraulic physics first, every plant you put in the ground is just expensive compost. You can dump ten thousand gallons on a yard, but if the nozzles are atomizing the water into a mist that drifts into the neighbor’s driveway, your soil profile remains bone-dry. I’ve spent twenty years digging up ‘pro’ installs that were nothing more than a series of oversights. Most dry spots are created the day the system is designed, not the day the sun gets hot.

“A lawn is not a decoration; it is a living biological system that requires precise hydraulic delivery to maintain turgor pressure in the cellular structure of the leaf blade.” – Agronomy Field Manual 101

How do I calculate precipitation rates for my lawn?

To calculate precipitation rates, you must measure the total Gallons Per Minute (GPM) used by a specific zone and divide it by the square footage of the coverage area, then multiply by 96.25. This yields the inches per hour, a critical metric for irrigation scheduling and preventing runoff on compacted soils. Understanding your GPM is the only way to avoid the ‘dry spot’ trap. Guessing is for amateurs.

Tweak 1: Transitioning to High-Efficiency Rotary Nozzles for Matched Precipitation

Matched Precipitation Rates (MPR) ensure that every square foot of a lawn zone receives the exact same volume of water regardless of the arc or radius settings. Most older systems use fixed-spray nozzles that dump an uneven volume, leading to ‘donuts’ or dry patches where the water doesn’t overlap. By switching to high-efficiency rotary nozzles, we utilize multiple rotating streams that deliver water at a slower, more deliberate rate. This is the infiltration rate secret: you want to apply water only as fast as the soil can absorb it. In heavy clay soils, standard sprays cause immediate runoff, leaving the root zone parched. Rotary nozzles solve this by mimicking a gentle rain, allowing the water to penetrate deep into the macropores of the soil structure. They also resist wind drift because the droplets are larger and heavier. It is simple physics.

Nozzle TypeApplication Rate (in/hr)Wind ResistanceSoil Suitability
Standard Spray1.5 – 2.0Low (Mist)Sandy Loam Only
High-Efficiency Rotary0.4 – 0.6High (Large Droplets)Heavy Clay / Silt
Bubblers3.0+ExtremeTree Wells Only

Tweak 2: Correcting Head-to-Head Coverage and Nozzle Trajectory

Head-to-head coverage means the spray from one sprinkler head must reach the base of the next one in the sequence. Anything less creates a shadow zone that will inevitably turn into a dry spot during high-heat cycles. I often see ‘landscapers’ try to stretch the distance between heads to save on pipe and labor. This is a death sentence for a sod install. When the trajectory is too low, the water hits the grass blades near the head and never reaches the perimeter. When it’s too high, the wind shears it away. Adjusting the trajectory of your nozzles to 15-25 degrees ensures the water cuts through the boundary layer of the air. We use a technical audit—literally placing catch cans in a grid—to see where the coverage fails. If you find a gap, you don’t just turn up the timer; you change the nozzle orifice or the riser height. Don’t skip this. A two-inch riser in a four-inch lawn is useless; the grass blocks the water. Use six-inch pops to clear the canopy.

What is the best nozzle for a windy yard?

The best nozzle for a windy yard is a low-angle rotary nozzle, which produces heavy droplets that resist drift and evaporation. These nozzles are engineered to maintain a flat trajectory, keeping the water close to the ground and ensuring it reaches the intended hydrozone rather than being lost to the atmosphere. We specifically look for nozzles that offer multi-stream technology, as they provide the most consistent coverage under erratic wind conditions.

Tweak 3: Installing Pressure-Regulated Nozzle Stems to Stop Mist

High water pressure is the silent killer of a healthy yard because it causes atomization, turning water into a fine mist that evaporates before it hits the ground. Most residential lines run at 60-80 PSI, but a standard spray nozzle is designed to operate at exactly 30 PSI. When you push 80 PSI through a 30 PSI nozzle, you lose 30-50% of your water to the wind. Installing Pressure Regulating Stems (PRS) in each head ensures that regardless of the incoming pressure, the nozzle receives its optimal operating PSI. This keeps the droplets large and the distribution profile consistent. It also saves thousands of gallons of water over a single season. I’ve seen systems where simply adding pressure regulators fixed ‘unsolvable’ dry spots overnight. It isn’t magic; it’s hydraulic engineering. You want a steady stream, not a cloud.

“A retaining wall doesn’t fail because of the stone; it fails because of the water trapped behind it, and a lawn doesn’t fail because of the heat; it fails because of the lack of pore-space hydration.” – Hardscape Engineering Axiom

The 2026 Irrigation Audit Checklist

  • Check Riser Height: Ensure the nozzle is at least 2 inches above the grass canopy.
  • Verify Overlap: Confirm 100% head-to-head coverage in every zone.
  • Clean Internal Filters: Sediment in the basket reduces GPM and ruins the spray pattern.
  • Inspect for ‘Tilt’: Heaved heads spray into the dirt or over the target; keep them vertical.
  • Adjust Arc Edges: Stop watering the sidewalk; that water belongs on the sod.
  • Test Pressure: Use a pitot tube to check the PSI at the furthest head in the run.

Soil Physics and the Hydrophobic Barrier

Sometimes, dry spots aren’t the nozzle’s fault; they are a result of hydrophobic soil. This happens when the soil gets so dry it begins to repel water. You can spray all day, and the water just beads up and runs off. In these cases, a yard cleanup isn’t enough; you need to mechanically aerate and apply a surfactant or wetting agent to break the surface tension. Deep core aeration pulls three-inch plugs, opening up the rhizosphere to receive the water your new nozzles are delivering. If you are doing a new sod install, ensure the soil is tilled with organic matter to prevent this layering effect. Real landscaping is about what’s happening under the surface. If you don’t respect the soil, the soil won’t respect your budget. Fix the nozzles, fix the pressure, and then let the biology take over. It will rot if you don’t manage the drainage, but it will burn if you don’t manage the physics. Your yard is a machine; treat it like one.