April 16, 2026 | Michael Smith

3 Culpeper VA Sprinkler Adjustments to Stop 2026 Soggy Spots

3 Culpeper VA Sprinkler Adjustments to Stop 2026 Soggy Spots

The damp rot under the floorboards

The smell of linseed oil and wood varnish usually calms my nerves, but today, looking out at the yard, all I smell is stagnant water and rotting root systems. You cannot rush a wood finish, and you certainly cannot force Culpeper red clay to drink faster than it is able. To stop those 2026 soggy spots, you must immediately shorten your sprinkler run times by thirty percent, switch to high-efficiency rotating nozzles, and ensure your cycles start no later than four in the morning. If you fail to adjust, you are not just overwatering a lawn; you are drowning a living investment that will take years to recover. People treat their yards like cheap plastic toys, but a landscape is an heirloom. A direct answer to your drainage woes is found in the ‘cycle and soak’ method, which prevents the Piedmont clay from reaching its saturation point too early in the morning. landscaping culpeper va experts often see homeowners making the mistake of one long soak, which is like dumping a gallon of stain on a tabletop and hoping it absorbs. It does not. It just ruins the grain.

Why your nozzles are basically leaky faucets

In my workshop, a leaky valve means a ruined mahogany chest. In your yard, it means a swamp. Most irrigation heads installed in the last decade are aging poorly, losing their tension and spraying massive droplets that compact the soil surface. This compaction prevents air from reaching the roots. When you look at your yard, you should see the same ‘pores’ you look for in a fine piece of oak. If those pores are clogged with standing water, the grass suffocates. The mechanics of 2026 landscaping demand a shift toward precision. Swap those old fixed-spray heads for rotary nozzles. These deliver water in slow, thin streams, allowing the soil to actually breathe. It is the difference between using a spray gun and a fine-bristled brush. You get more control, less waste, and a much better finish. If you are struggling with the hardware, contact us to see how the ‘bones’ of your system can be salvaged without a total teardown.

The red clay problem in Virginia

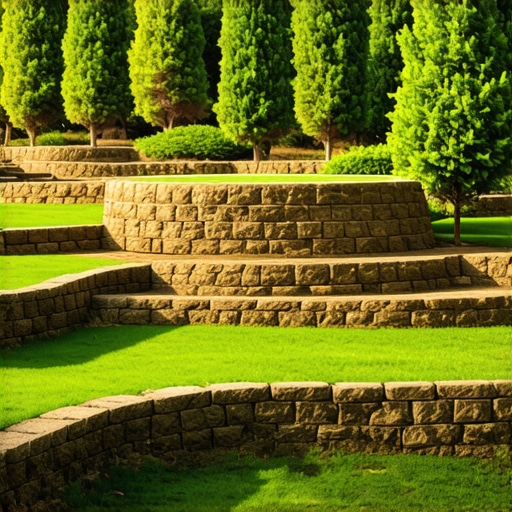
Culpeper is not the sandy coast. We are dealing with heavy, iron-rich earth that acts like a sealant when wet. I have spent years stripping old paint, and I can tell you, once a surface is sealed, nothing gets through. Our local soil is the same. During a standard Culpeper summer, the heat bakes the top layer into a brick. When your sprinklers kick on, the water just slides off the top and pools in the low spots, usually near your hardscapes or foundation. This is where ‘thatching’ becomes vital. Removing that layer of dead organic matter is like sanding down an old finish to reach the raw wood. Without it, your expensive grass seeding and fertilizers never actually touch the dirt. They just sit on top and rot. We need to respect the topography of the Piedmont region. If your yard has even a five-degree slope, your sprinkler timing needs to be split into three five-minute intervals rather than one fifteen-minute blast. This gives the clay time to pull the moisture down into the subsoil layers.

Why smart tech fails the touch test

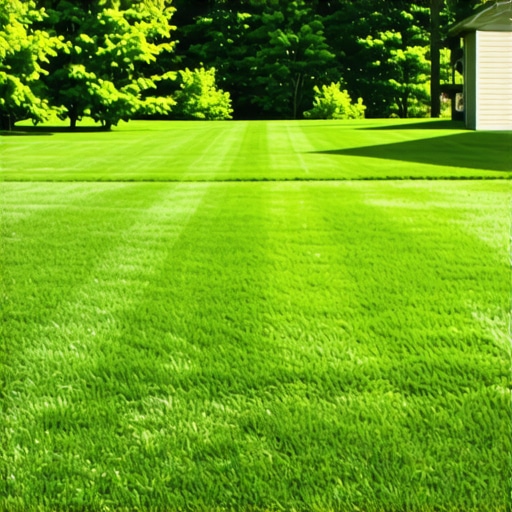
Everyone wants a digital solution for a physical problem. These ‘smart’ irrigation controllers are fine, but they do not have eyes. They do not see the moss growing in the shade of your oak tree or the way the water collects near the driveway because the grass pickup was ignored after the last mowing. A restorer knows that you have to feel the material. Walk your lawn in your bare feet. If it feels squishy three hours after a watering, your ‘smart’ tech is lying to you. The friction between theory and reality is where most Culpeper yards fail. Industry advice says water deeply and infrequently, but that advice fails in our specific micro-climate. We have high humidity that prevents evaporation, meaning those ‘deep’ waterings often stay in the top two inches of soil, creating a breeding ground for fungus. You have to be more tactical. Adjust your heads to avoid spraying your hardscapes. Water hitting concrete is just a waste of money and a fast track to erosion issues at the edge of your lawn.

Frequently asked questions about Culpeper drainage

Why does my yard stay wet even when it has not rained? This usually points to a broken lateral line or a head that is not seating properly after the cycle ends. Even a small drip can turn a clay-heavy yard into a bog over forty-eight hours. Is grass seeding effective in soggy areas? No. Putting seed into mud is like putting wax on a wet table. You must fix the drainage and let the soil dry out before the seed will ever take hold. Does mowing height affect sogginess? Absolutely. Keeping your grass a bit taller in the heat of 2026 will help with deep root growth, which in turn helps the soil stay porous and manage water better. Should I remove my grass clippings? In a wet yard, yes. Leaving thick wet clippings creates a mat that prevents evaporation, essentially ‘shrink-wrapping’ the sogginess into the ground. How do I know if my clay is compacted? Take a screwdriver and try to push it into the soil. If you struggle to get it in three inches, your yard is effectively a parking lot and needs aeration immediately.

The future of your property value

I look at a yard the same way I look at an 18th-century armoire. You can ignore the maintenance for a while, but eventually, the structural integrity fails. A soggy lawn in 2026 is more than an eyesore; it is a threat to your home’s foundation and your property’s resale value. You do not need more gadgets. You need better timing, better nozzles, and a deep respect for the clay beneath your feet. Start by stripping away the bad habits of the ‘set and forget’ era. Treat your landscape with the same precision a craftsman treats a piece of timber. Adjust those arcs, clean those filters, and watch the grain of your lawn return to its natural beauty. If you want the job done with the care of an artisan, your next step is to evaluate the flow and stop the flood.

April 16, 2026 | Michael Smith

4 Fast Hacks to Clear 2026 Brush Piles Without a Chipper

4 Fast Hacks to Clear 2026 Brush Piles Without a Chipper

The Foundation of Site Prep: Why Brush Management Matters

Clearing 2026 brush piles without a chipper involves leveraging biological decomposition, mechanical compaction, or subsurface burial techniques like Hügelkultur. These methods focus on managing the Carbon-to-Nitrogen (C:N) ratio and soil microbiology to recycle organic matter into the landscape without industrial machinery. Proper management prevents nitrogen drawdown, which can otherwise starve your future sod install or garden beds. I always drill into my new crew members: if you don’t fix the soil grading first, every plant you put in the ground is just expensive compost. This is especially true when dealing with woody debris. You can’t just toss some dirt over a pile of branches and call it a day. Those branches will create air pockets. Those air pockets lead to anaerobic rot. Eventually, the ground collapses. I’ve seen $15,000 irrigation systems snapped like toothpicks because the homeowner buried a brush pile right where the main line was later trenched. The soil settled, the pipe didn’t, and the resulting leak turned the yard into a swamp. Dealing with brush is the first step in civil engineering for your backyard. Don’t skip the physics of soil density. Don’t ignore the biology of decay. Get it right from the bottom up.

“A brush pile left unmanaged becomes a primary vector for wood-boring insects and localized nitrogen immobilization in the surrounding topsoil.” – Agriculture Extension Manual

How long does a brush pile take to decompose?

Natural decomposition for a standard mixed-wood brush pile typically takes 5 to 10 years depending on moisture and lignin content. However, using nitrogen-rich accelerants or mechanical reduction can shorten this window to less than 18 months by increasing the surface area for microbial colonization. You have to understand that wood is mostly cellulose and lignin. These are tough polymers. Fungi are the primary decomposers here. If the pile is dry, nothing happens. If it is too wet and packed too tight, it goes anaerobic and reeks. The goal is the sweet spot of moisture and airflow. Speed is a function of surface area. Smaller pieces rot faster. This is why we focus on crushing or cutting before burial.

Hack 1: The Hügelkultur Method (The Biological Sink)

Hügelkultur is the practice of burying large amounts of woody debris under soil to create a self-fertilizing raised bed that retains moisture and supports soil microbiology. This method is the gold standard for high-end landscaping because it turns a waste product into a long-term nutrient battery. When you build a Hügelkultur mound, you are essentially creating a slow-release sponge. The logs at the bottom soak up winter rains and release that moisture to plant roots during the August heat. This can significantly reduce the load on your irrigation system. You start by digging a trench about 12 inches deep. Lay your heaviest logs in first. Pack the 2026 brush piles on top of those logs. Here is the secret: you must fill the gaps. Use grass clippings, manure, or compost to fill every void between the branches. If you leave air gaps, you invite rodents and cause uneven settling. Top the whole thing with 6 inches of quality topsoil. Within two seasons, that brush is a fungal powerhouse. It works. It lasts. It saves money.

Hack 2: The Nitrogen-Drench Acceleration

Nitrogen-drenching involves applying a high-concentration liquid urea or ammonium sulfate solution to a compacted brush pile to chemically jumpstart the decomposition of carbon-heavy wood fibers. Woody brush has a C:N ratio of about 400:1, while the microbes doing the work need a ratio closer to 30:1. They will rob nitrogen from the surrounding soil to break down that wood. This is why plants next to fresh mulch often turn yellow. To fix this, you treat the brush pile like a compost heap on steroids. Mix 5 pounds of high-nitrogen fertilizer in 50 gallons of water and soak the pile. Cover it with a heavy black silage tarp. This traps heat and moisture. The internal temperature will spike. You are essentially cooking the wood. In a humid climate, you can reduce a massive pile of 2026 brush to brittle, crushable humus in a single season. Check the moisture regularly. It should feel like a wrung-out sponge. Never let it go bone dry.

Hack 3: The Trench and Compact Technique

The Trench and Compact technique is a mechanical reduction strategy where brush is laid in deep lifts within a soil vault and crushed using heavy equipment to eliminate air pockets before a sod install. If you have access to a mini-excavator, this is the most efficient way to clear a lot. Don’t just dig a hole and dump. You lay the brush in 12-inch layers. Use the bucket to crush it flat. Add a layer of soil. Crush again. This is called ‘knitting’ the material into the earth. If you are planning on a sod install over this area, you must be surgical. I recommend a minimum of 18 inches of compacted clean fill over the top of any buried brush. This ensures that the grass roots have a stable medium and aren’t affected by the fluctuating pH levels of the decomposing wood below. If you skip the compaction, your new lawn will look like a topographical map of the Andes within a year. It’s about PSI and soil physics. Tamp it until the machine bounces.

Can I bury fresh brush before installing sod?

Burying fresh brush directly under a sod install is generally discouraged unless the debris is buried at least 2 feet deep and mechanically compacted to prevent soil subsidence. Fresh wood consumes available nitrogen during its initial breakdown phase, which can lead to chlorosis and stunted growth in new turfgrass. If you must bury it, use a nitrogen buffer. Apply a slow-release nitrogen fertilizer over the burial site before laying the sod. This provides a ‘bank’ of nutrients for the grass while the microbes focus on the wood below. This keeps the turf green while the heavy lifting happens underground.

Hack 4: Bio-Engineering with Brush Faggots

Brush faggots are bundles of woody debris lashed together and staked into eroded slopes or drainage swales to slow water velocity and capture sediment. This is civil engineering 101. Instead of hauling the brush away, you use it to solve yard cleanup issues like erosion. Tightly bind your branches into cylinders about 8 feet long and 12 inches in diameter using biodegradable twine. Stake these into the contour of a hill. They act as micro-dams. They catch silt. They slow down runoff. Over time, they rot in place, and the trapped sediment becomes a perfect planting bed for native grasses. It is a closed-loop system. You solve the waste problem and the erosion problem simultaneously. No chipper needed. No diesel burned. Just smart physics.

MethodDecomposition SpeedEffort LevelFuture Use
Hügelkultur3-5 YearsHighGarden Beds
Nitrogen Drench1-2 YearsMediumMulch/Soil Amendment
Trench & Compact5+ YearsHighLawn Foundation
Brush Faggots4-6 YearsLowErosion Control

“A retaining wall doesn’t fail because of the stone; it fails because of the water trapped behind it. The same logic applies to buried brush; the failure isn’t the wood, it’s the air and water pockets you left behind.” – Hardscape Engineering Axiom

Pre-Clearance Safety and Structural Checklist

  • Identify and remove invasive species like Buckthorn or Multiflora Rose before burial to prevent regrowth.
  • Call 811 for utility marking before any trenching or deep burial activity.
  • Ensure a minimum 10-foot setback from any structural foundations or irrigation main lines.
  • Verify local municipal codes regarding ‘clean fill’ and debris burial to avoid fines.
  • Check soil pH; decomposing wood tends to increase acidity in the immediate vicinity.

Proper yard cleanup is about more than just aesthetics. It is about preparing the site for the next decade of growth. Whether you are prepping for a sod install or just reclaiming a corner of the lot, these hacks keep your costs down and your soil health up. Don’t be the guy who rents a chipper and blows $500 on diesel and blade sharpening. Be the guy who understands the biology. Work with the land, not against it. It’s slower, but it’s better. Your plants will thank you in five years. Your wallet will thank you today. Keep your tools sharp and your soil living.

April 16, 2026 | Emily Clark

4 Fast Hacks to Clear 2026 Brush Piles Without a Chipper

4 Fast Hacks to Clear 2026 Brush Piles Without a Chipper

4 Fast Hacks to Clear 2026 Brush Piles Without a Chipper: Professional Biomass Management

I always drill into my new crew members: if you don’t fix the soil grading first, every plant you put in the ground is just expensive compost. It is a fundamental truth of civil engineering in the backyard. Last spring, I watched a greenhorn try to shove a three-inch diameter oak limb into a consumer-grade chipper. The machine screamed, the belt smoked, and we wasted four hours of billable time for a gallon of mulch. That is when I reminded him that landscaping is not about fighting nature with loud machines; it is about managing the carbon cycle and understanding biological degradation. If you are staring at a massive pile of brush and do not want to lease a commercial Vermeer, you need to understand the structural chemistry of wood. Brush is just locked-up energy. To clear it fast, you have to break the lignin bonds or utilize the bulk for structural benefit. Stop thinking like a homeowner and start thinking like a land manager.

The Bio-Reactor Strategy for Rapid Carbon Breakdown

To clear 2026 brush piles quickly without a chipper, you must implement a bio-reactor strategy by saturating the pile with high-nitrogen fertilizers and moisture to trigger thermophilic decomposition. This process utilizes microbes to chew through cellulose, reducing a five-foot pile to six inches of organic matter in a single season. Most hacks just leave a pile to rot. Professionals accelerate the process. You need a carbon-to-nitrogen (C:N) ratio of roughly 30:1 for maximum efficiency. Woody brush is often 400:1. By dousing the pile in urea or a high-nitrogen liquid fertilizer, you provide the fuel those bacteria need to ignite.

“The rate of wood decay is primarily governed by the availability of nitrogen and the surface-to-volume ratio of the material.” – USDA Forest Service Wood Handbook

Don’t just dump it on top. You have to penetrate the core of the pile. This is where your irrigation knowledge comes in. If the pile stays bone-dry, it will stay there forever. It will mummify. Keep it at the consistency of a wrung-out sponge.

How do I make a brush pile rot faster?

Start by mechanical compression. Use a heavy tractor or even a manual tamper to break the structural integrity of the branches. This increases the surface area for fungal hyphae to take hold. Once compressed, layer in green grass clippings from your latest yard cleanup. The heat generated by the nitrogen-rich clippings will cook the wood from the inside out. It is a biological furnace. Do not skip the compaction. It is the most important step.

The Hügelkultur Foundation for Future Sod Installs

Utilizing brush as a Hügelkultur base involves burying the debris under soil to create a self-fertilizing, water-retaining mound that serves as a perfect substrate for a future sod install. This turns a waste problem into a long-term irrigation solution by creating an underground sponge. In 2026, we are seeing more drought-restricted zones where traditional watering is banned. A buried brush pile can hold moisture for months. You dig a trench at least two feet deep, pack your brush tight, and backfill with soil.

“A retaining wall doesn’t fail because of the stone; it fails because of the water trapped behind it, but a Hügelkultur bed thrives on that very moisture.” – Hardscape Engineering Axiom

This is civil engineering 101. You are managing drainage and biomass simultaneously. Just ensure you aren’t burying walnut or cedar, as their allelopathic properties can kill your grass later. Stick to maple, oak, and birch.

Wood TypeDecomposition RateNitrogen DemandBest Use Case
Oak/HardwoodsVery SlowHighHügelkultur Base
Pine/SoftwoodsMediumModerateBio-Reactor Pile
Green BrushFastLowSurface Mulch
Willow/PoplarVery FastVery LowSoil Amendment

Mechanical Reduction and the “Bundle and Bury” Method

The Bundle and Bury method requires using high-tension wire or biodegradable twine to compress brush into tight cylinders that are then used as perimeter drainage fill. This is a contrarian take: stop trying to make the brush disappear and start using it as a French drain alternative. In heavy clay soils, these bundles, known as fascines, create air pockets that allow water to move. It is a classic engineering trick for slope stabilization. If you have a grading issue, don’t buy expensive gravel. Use your brush. Just make sure you are at least ten feet from any foundation. It will settle over time. You must account for that. Don’t be the guy who builds a patio over a brush pile. It will sink. 100 percent of the time.

What tools are best for manual brush clearing?

Forget the loppers. You need a high-quality machete or a brush hook with a 12-inch blade. A chainsaw is overkill for 2026 brush piles and creates too much noise. You want clean, shear cuts. If you are clearing large areas, a tactical brush axe allows you to sever stems at the soil line without bending over. It saves your back. It saves your time. Buy professional grade or don’t buy at all.

The High-Temperature Bio-Char Production Technique

Bio-char production involves a controlled, low-oxygen burn of brush piles to create a permanent soil amendment that increases nutrient retention for your landscaping projects. This is not a bonfire. A bonfire is a waste of carbon. A bio-char burn is a precision operation. You create a flame cap at the top of the pile that consumes the smoke, while the bottom layers undergo pyrolysis. Once the wood turns to glowing coals but before it turns to ash, you quench it with water. The result is a porous carbon structure that lasts 500 years in the soil. It is the ultimate hack for sod install success in sandy soils. It locks in your irrigation and prevents fertilizer runoff. It is pure science. Use it.

  • Inspect for utility lines (Call 811) before any deep trenching.
  • Identify invasive species like Buckthorn; do not compost these.
  • Check local fire ordinances before attempting bio-char quenching.
  • Wear Level 5 cut-resistant gloves during manual reduction.
  • Ensure the pile is at least 30 feet from any structure.

Landscaping is about the long game. That brush pile isn’t an eyesore; it is a resource. Whether you are using it to build a better soil structure or to create a biological reactor, you are working with the environment rather than against it. Stop looking for the easy way out with a chipper and start looking for the smart way out with biology and engineering.

April 15, 2026 | Anna Lee

How to Fix Thin Culpeper Lawns: 3 Seeding Tactics for 2026

How to Fix Thin Culpeper Lawns: 3 Seeding Tactics for 2026

The engine is knocking under your feet

The air smells like WD-40 and half-burnt gasoline from my old Toro. You can hear the mower deck rattling because the blades are hitting nothing but dry dirt and the occasional rock. If your yard looks like a patchy engine block with missing bolts, you have a timing problem. To fix a thin lawn in Culpeper, you must address the compacted Piedmont clay through aggressive dethatching and mechanical aeration before applying a high-quality Tall Fescue blend. Proper timing in late August or early September is the only way to beat the Virginia heat and ensure root establishment. Skip the miracle sprays. Real results come from mechanical seed-to-soil contact and consistent moisture during the first twenty-one days of growth. Editor’s Take: Thin lawns are mechanical failures of the soil. Fix the intake (thatching) and the fuel (seed-to-soil contact) or stay home. It is about the torque of the root, not the color of the bag.

Why your dirt is not firing on all cylinders

Most folks think grass seeding is like throwing confetti. It is not. Think of your soil as a filter that has been clogged for ten years. That is what we call thatching. This layer of dead organic matter sits right on top, acting like a gasket that will not let water or air through to the cylinders. If you just toss seed on top of thatch, you are wasting money. You need to strip it. I have seen yards in landscaping culpeper where the owner spent five hundred dollars on premium seed only for it to sit on top of the thatch and rot. You need to get that debris out of the way. Once the thatch is gone, you have to look at compaction. Our soil here is basically brick. If a screwdriver cannot slide six inches into your lawn without a hammer, your roots cannot grow. It is that simple. You are running an engine with no oil. Landscaping in this region requires mechanical intervention. We use core aerators to pull out plugs, creating little exhaust ports for the soil to breathe. This is where grass pickup becomes a factor; you want the debris cleared so the new growth has a clean workspace.

[image_placeholder_1]

The red clay reality in Culpeper

Virginia is in what the experts call the Transition Zone. I call it the Dead Zone. It is too hot for Northern grasses and too cold for Southern ones. In landscaping culpeper va, we deal with a specific type of stubbornness in the ground. The clay here holds onto water until it becomes a swamp, then bakes into a ceramic plate the second the sun hits it. You cannot treat a lawn here the way they do in Ohio or Georgia. You have to use the right fuel. In 2026, we are looking at even more volatile spring cycles. If you wait until April to fix your thin spots, you are already too late. The heat will kill those baby roots before they can find the water table. Local mowing schedules also play a part. Most guys cut too short, which is like running your engine at redline for four hours straight. You are burning out the crown of the plant. Keep it high. Let the grass shade its own feet. This keeps the moisture in the soil where it belongs. If you are doing hardscapes near your lawn, remember that stone holds heat. The grass right next to your new patio is going to bake twice as fast.

When the fancy spreader fails you

I have watched people use those handheld spreaders like they are seasoning a steak. It is a disaster. You get stripes. You get clumps. You get nothing. If you want the lawn to fill in, you need a calibrated drop spreader or a professional-grade broadcast unit that actually works. Most of the stuff you buy at the big box store is made of cheap plastic and the gears slip the moment you put a heavy load in them. (I hate cheap plastic). The real friction happens when people forget to water. You cannot just hope for rain in Culpeper. You need a consistent spray pattern. If those seeds dry out once after they have started to germinate, they are dead. There is no reboot button. You are back to square one. People often complain that their landscaping professional did a bad job, but then I find out they did not turn the hose on for three days because it looked cloudy. This is a mechanical process. Physics does not care about your feelings. You need a quarter inch of water every single day until that grass is tall enough to mow.

A look at the 2026 turf forecast

Things are changing in the industry. The old ways of just dumping nitrogen and hoping for the best are over. We are seeing more demand for micro-clover mixes and drought-resistant fescues that can handle the Route 29 corridor heat. What is the best month to seed in Culpeper? Late August to mid-September is the sweet spot to avoid the summer burn and the winter freeze. Does thatching really help? Yes, it is like cleaning the gunk out of a carburetor; without it, nothing flows. Should I bag my clippings? Only if you have a disease or the grass is too long; otherwise, let them return to the earth as natural fuel. How long before I can walk on it? Stay off the new growth for at least four weeks. Can I seed over moss? No, moss is a sign of high acidity and low light; you have to fix the soil chemistry first. Why is my grass yellowing near the driveway? Heat soak from the asphalt is cooking the roots. Is professional landscaping worth the cost? If you value your time and do not want to buy three rounds of seed, yes. You can always contact us to see how we handle the heavy lifting.

Starting the motor one last time

You can keep staring at the brown patches and wishing they would turn green, or you can grab the tools and get to work. A lawn is a living machine. It needs the right parts, the right timing, and a bit of grease to keep it running. Do not wait for the 2026 season to pass you by while your neighbors are enjoying a thick carpet of green. If you need a hand getting the timing right or if your equipment is not up to the task of breaking through that Culpeper clay, find someone who knows the terrain. Visit our home page for landscaping culpeper va to see what a properly tuned yard looks like. It is time to stop idling and start growing.

April 15, 2026 | Michael Smith

How to Fix Thin Culpeper Lawns: 3 Seeding Tactics for 2026

How to Fix Thin Culpeper Lawns: 3 Seeding Tactics for 2026

The smell of linseed oil and old wood

My workshop smells of linseed oil and the sharp, acidic tang of varnish. Restoring a 19th-century mahogany desk requires a patience that modern life has mostly forgotten. You do not just slap on a coat of paint to hide the rot; you strip, you sand, and you nourish the grain. Fixing a patchy, thin lawn in Culpeper follows the exact same logic. You cannot simply throw seed at dirt and expect a miracle. The Editor’s Take: To fix thin Culpeper lawns, you must achieve 80% seed-to-soil contact through mechanical aeration or power seeding during the specific climate windows of late fall or early spring. A thin lawn is a symptom of exhausted soil, usually the result of the heavy red clay found throughout the Piedmont region. You need to stop looking at your grass as a green carpet and start seeing it as a living organism that needs a proper bed. Whether you are dealing with the heat-trapping slopes near Brandy Station or the shaded patches by Lakeview, the goal is the same: restoration over replacement.

Why your hardware store seed is lying to you

The mechanics of grass seeding are often misunderstood by those who treat their yard like a weekend chore rather than a structural project. Seed needs friction. It needs to be tucked into the soil, not left on top like dust on a bookshelf. In Culpeper, the primary challenge is our Triassic Basin soil structure. It compacts until it is as hard as the bricks on Davis Street. If you just scatter seed, the local birds get a feast and you get nothing. Thatching is the first step in the manual restoration process. You have to pull up the dead organic matter that acts as a barrier. Once the soil is exposed, you introduce the seed. But not just any seed. Most mass-market bags are filled with ‘filler’ varieties that cannot survive a Virginia July. You want high-end Tall Fescue blends that can handle the humidity without melting into brown patch disease. landscaping culpeper va professionals know that the ‘how’ is more important than the ‘what.’ Power seeding, which slices small grooves into the earth and drops the seed directly into the cut, is the only way to ensure the grass actually takes root before the 2026 season begins.

The red clay reality of the Piedmont

Culpeper is not a generic suburb. Our weather is a erratic beast. One week we are shivering in the shadow of the Blue Ridge, and the next, the humidity is thick enough to chew. This regional context dictates your seeding schedule. If you are living near the Culpeper National Cemetery or out toward Stevensburg, you are likely fighting with that stubborn Virginia clay. It holds water too long in the winter and turns into iron in the summer. To fix a thin lawn here, you must incorporate organic matter. This is where landscaping culpeper experts separate themselves from the amateurs. They do not just mow; they manage the microbiome of the dirt. Local laws regarding nutrient management also play a role. You cannot just dump nitrogen into the watershed. You need a targeted strike. Dormant seeding in late November is a local secret. You put the seed down just before the ground freezes. The natural expansion and contraction of the soil during frost cycles pulls the seed into the earth for you. It is a slow, rhythmic process that rewards those who can wait.

Where the common advice falls apart

Most industry blogs tell you to water every day. That is a recipe for shallow roots and fungal rot in our local climate. In the real world, the ‘perfect’ lawn is a battle against nature. If you have heavy oak trees dropping leaves, your grass is starving for light and being poisoned by acidic tannins. Common grass seeding advice fails because it ignores the ‘thatch layer.’ If that layer is thicker than half an inch, your new seed will germinate in the thatch, dry out, and die within three days. It is a tragedy of logistics. You also have to consider grass pickup. While leaving clippings can provide nitrogen, in a thin lawn restoration, you often want to remove the debris to ensure the new seedlings have room to breathe. Hardscapes also complicate things. Heat radiating off a stone patio can cook the nearby grass. You have to treat the edges differently, perhaps using a more drought-tolerant Kentucky Bluegrass blend right at the margin of the stone. It is about the fit. Like a dovetail joint, the grass must lock into the environment perfectly or the whole thing wobbles.

The 2026 shift in turf management

The old guard used to rely on heavy chemicals to force growth. The 2026 reality is different. We are seeing a move toward ‘low-mow’ fescues and soil biology. People are tired of the plastic look. They want a lawn that feels like part of the Virginia landscape. Frequently Asked Questions:
How do I know if I need thatching or aeration? If water puddles on your lawn after a light rain, your soil is compacted and needs aeration. If the grass feels ‘spongy’ but looks thin, you have a thatch problem.
Can I seed in the shade of my Culpeper oaks? Only if you use a Fine Fescue blend and prune the lower canopy to allow ‘dappled’ sunlight. Grass is a solar-powered machine; it cannot run in the dark.
Is grass pickup necessary after mowing new seed? For the first three mows, yes. You want to avoid smothering the fragile new blades with heavy damp clippings.
Why did my fall seeding fail? Most likely, you didn’t keep the top inch of soil moist during the first 14 days, or the Culpeper clay was too hard for the roots to penetrate.
What is the best month to seed in Virginia? Late August to mid-September is the gold standard, with dormant seeding in November as a secondary backup.
Should I use straw over my new seed? Avoid it if possible. Straw often contains weed seeds that will haunt you for years. Use a seed-free mulch or toasted straw if you must cover a slope.

A final word on the living craft

The transition from a thin, pathetic yard to a lush estate is not an overnight event. It is a slow restoration. It requires you to put down the phone, step onto the dirt, and feel the texture of the earth. If you are tired of the cycle of failure, it might be time to stop treating your lawn like a product and start treating it like a craft. Those who want it done right the first time should contact us to discuss a long-term soil strategy. Don’t let 2026 be another year of brown patches and dust. Build something that lasts, something with the integrity of an antique and the vitality of a Virginia spring. If you need help with hardscapes or complex grass seeding projects, the local expertise is here. We don’t just mow; we restore.

April 15, 2026 | Emily Clark

3 Mulching Tactics to Finish Your 2026 Yard Cleanup Without Bagging Leaves

3 Mulching Tactics to Finish Your 2026 Yard Cleanup Without Bagging Leaves

Why Bagging Leaves Is a Horticultural Failure in 2026

Leaf bagging removes critical organic matter that fuels the soil food web, forcing homeowners to rely on synthetic fertilizers and increasing landfill waste. By 2026, sustainable landscaping demands we retain this biomass to build soil structure, manage moisture levels, and maintain healthy nitrogen cycles in residential lawns and garden beds. I always drill into my new crew members: if you do not fix the soil grading and biology first, every plant you put in the ground is just expensive compost. Last season, I watched a rookie spend six hours bagging oak leaves while the neighbor’s yard was already finished and fertilized for free. He didn’t understand that those leaves aren’t ‘trash’—they are a biological goldmine of carbon and micronutrients. If you strip the lawn bare every November, you are starving the very microorganisms that prevent thatch buildup and soil compaction. We are in the business of managing ecosystems, not just cleaning up mess.

“A lawn’s nitrogen requirement can be met by up to 25% simply by returning clippings and mulched leaves to the turf during the autumn months.” – Penn State Extension

How much leaf litter can a lawn actually handle?

A standard cool-season turf can safely digest up to six inches of leaf matting if it is pulverized into pieces smaller than a dime using a high-lift mulching blade. This process increases the surface area for microbial colonization, allowing soil bacteria to break down lignin and cellulose before the ground freezes. It will rot if you leave it whole. If the pieces are too large, they create a light-blocking canopy that triggers snow mold and kills the crown of the grass. Speed is key. Your mower blade should have a tip speed of at least 18,000 feet per minute to ensure the leaves are hit multiple times before they exit the deck. Don’t skip the second pass.

Tactic 1: The High-Velocity Bio-Pulverization Method

The Bio-Pulverization Method involves using a commercial-grade mower with a closed-deck mulching kit to reduce leaf volume by a 10:1 ratio directly into the turf canopy. This technique bypasses the need for sod install repairs in the spring by protecting the soil from extreme freeze-thaw cycles. You need to set your mower height to at least 3.5 inches. If you scalp the grass while trying to mulch, you expose the soil to winter annual weeds. The goal is to hide the leaf bits within the grass blades, not on top of them.

Leaf TypeC:N RatioDecomposition RateNutrient Value
Oak Leaves60:1Slow (High Lignin)High Tannins
Maple Leaves35:1ModerateHigh Sugars
Grass Clippings15:1FastHigh Nitrogen

Can you mulch leaves instead of raking them?

Yes, you can mulch leaves instead of raking as long as you use a mulching mower that grinds the organic matter into particles small enough to settle between grass blades. This eliminates the labor of bagging while providing a slow-release source of nitrogen and phosphorus to the root zone throughout the winter. It is an engineering solution to a biological problem.

“Decomposition is a biological combustion process where carbon is the fuel and nitrogen is the catalyst for microbial activity.” – Agronomy Manual

Tactic 2: Sheet Mulching for Dormant Garden Beds

Sheet mulching utilizes whole or coarsely shredded leaves as a thick, protective layer over irrigation lines and perennial root zones to suppress weeds and retain hydrostatic pressure in the soil. For 2026 cleanups, stop blowing leaves out of the beds and start tucking them in. I see contractors blow every leaf into the street, only to return two weeks later to install $500 worth of shredded hardwood mulch. That is idiocy. Use the leaves. A 3-inch layer of oak or maple leaves acts as an insulator. It prevents the frost heave that pushes new perennials out of the ground. It also protects your drip-line irrigation from UV degradation and extreme cold. Just keep the leaves away from the root flare of trees. Thick piles against the bark invite voles and fungal rot. Leave a 2-inch gap. It’s non-negotiable.

How many leaves are too many for a mulching mower?

If you can no longer see the grass tips after a single pass, the leaf density is too high for simple mulching and requires a secondary shredding strategy or relocation to landscape beds. Generally, three inches of dry leaf cover is the limit for a standard residential mower before it starts to clog the discharge chute or stall the engine. If it looks like a carpet, you need to mow it twice. Once at the highest setting to break the bulk, and a second time at your standard height to finish the job. This isn’t a suggestion; it’s physics. If the engine bogs down, you’re losing blade speed, and the cut will be ragged.

Tactic 3: Vertical Integration and Nitrogen Priming

Nitrogen Priming is the application of a high-nitrogen organic fertilizer immediately after mulching leaves to accelerate the Carbon-to-Nitrogen (C:N) ratio balance and prevent soil nitrogen tie-up. When you dump a massive amount of carbon (leaves) onto the soil, the microbes need nitrogen to process it. If there isn’t enough nitrogen available, they will steal it from your grass roots. This is why some lawns look yellow in the spring after mulching. I tell my clients: feed the bugs so they can feed the lawn. Use a slow-release nitrogen source. Check your irrigation schedule too. The microbes need moisture to work. If the soil is bone dry, those leaves will just sit there until April. One deep watering—exactly 1 inch—after the final cleanup is usually enough to kickstart the process.

  • Equipment Check: Sharpen blades to a razor edge to ensure clean cell-wall shearing.
  • Timing: Mulch when leaves are crisp; wet leaves create a slurry that suffocates the root zone.
  • PH Monitoring: Large amounts of oak leaves can slightly lower pH over years; test soil every 24 months.
  • Irrigation: Clear lines of debris before the first hard freeze to prevent burst pipes.

The Engineering of the Perfect Mulch Pass

The physics of the mower deck determines your success. You need a vortex effect. As the blade spins, it creates a vacuum that pulls the leaf up, cuts it, and then the mulching baffle recirculates it back into the blades. If your deck is packed with old dried grass, the vacuum fails. Clean your deck. A clean deck allows for maximum airflow and particle suspension. This is why I hate cheap stamped-steel decks; they don’t have the volume to handle 2026-level leaf fall. Invest in a fabricated deck with high-lift capabilities. It is the difference between a clean finish and a clumped-up disaster. If you see clumps, you failed. Go back and do it again. The soil won’t forgive your laziness. Every clump is a potential dead spot in your sod next year. Manage the biomass correctly, and you’ll have the best yard on the block without ever touching a plastic bag.

April 15, 2026 | Michael Smith

3 Mulching Tactics to Finish Your 2026 Yard Cleanup Without Bagging Leaves

3 Mulching Tactics to Finish Your 2026 Yard Cleanup Without Bagging Leaves

The Bio-Mechanical Physics of 2026 Yard Cleanups

Effective 2026 yard cleanups require precision nutrient recycling and organic matter management to maintain soil health without the labor-intensive practice of bagging. By integrating mulch-mowing, leaf-to-soil incorporation, and sheet mulching, you improve the cation exchange capacity and prevent the structural degradation of your lawn’s root zone.

I always drill into my new crew members: if you don’t fix the soil grading first, every plant you put in the ground is just expensive compost. I’ve seen guys spend three days installing high-end sod and premium nursery stock only to have it rot because they ignored a two-degree slope error. The same applies to yard cleanup. If you’re just blowing leaves into a pile, you’re a mover, not a landscaper. Real landscaping is about managing the biology of the site. When we talk about 2026 cleanup tactics, we are talking about engineering a closed-loop system where your waste becomes your primary fertilizer for the next growing season.

Tactic 1: High-Decibel Mulch Mowing and the Nitrogen Cycle

High-decibel mulch mowing involves using high-lift mulching blades to pulverize leaf litter into micron-sized particles that fall between the grass blades to the soil surface. This process accelerates microbial decomposition, releasing essential nitrogen, phosphorus, and potassium (NPK) back into the turf’s rhizosphere without creating a suffocating mat.

“A lawn that is mulched with leaves and grass clippings requires up to 25% less nitrogen fertilizer because the organic matter provides a steady release of nutrients as it decomposes.” – Penn State Agricultural Extension

Most homeowners make the mistake of waiting until the leaves are six inches deep. Don’t do that. You need to mow when the leaf cover is light. If you can still see the tips of the grass, you’re in the goldilocks zone. We use commercial-grade decks with baffled chambers. This keeps the debris suspended in the air long enough for the blade to strike it multiple times. If the particles are larger than a dime, you’re failing. Large leaf fragments block sunlight, leading to localized chlorosis. Small fragments, however, are a feast for earthworms. They pull that carbon down into the soil, naturally aerating the ground for you. Stop bagging. Start grinding. It’s better for the soil and your lower back.

How many leaves can I mulch into my lawn?

Research suggests you can successfully mulch up to six inches of leaf litter throughout a season, provided it is done in increments. The key is ensuring the leaf-to-grass ratio allows the grass blades to remain upright and exposed to sunlight for photosynthesis.

Tactic 2: Leaf-to-Soil Incorporation for Garden Beds

Leaf-to-soil incorporation is the process of amending planting beds with shredded organic matter to increase soil porosity and water-holding capacity. By tilling or top-dressing beds with shredded leaves, you create a biological buffer that protects root flares and prevents the soil from crusting during winter freeze-thaw cycles.

Mulching MethodEquipment NeededNitrogen ReturnLabor Intensity
Mulch MowingMulch Kit / High-Lift BladesHigh (Instant)Low
Sheet MulchingCardboard / Bulk MulchMedium (Slow Release)High (Initial)
Leaf IncorporationTiller / Hard RakeHigh (Spring Peak)Medium

In our 2026 protocols, we don’t just dump leaves in the woods. We treat them as raw material. If you have perennial beds, you should be shredding your leaves and spreading them three inches thick. This acts as an insulator. It prevents the frost heaving that kicks your expensive perennials out of the ground in February. But watch the pH. Oak leaves are acidic. If you’re dumping pure oak shreddings on a bed of alkaline-loving plants, you’re creating a chemical conflict. Always test your soil pH before and after heavy mulching cycles. Most landscapes need a light application of pelletized lime to offset the tannic acid from the leaves.

Tactic 3: Perimeter Sheet Mulching and Irrigation Protection

Perimeter sheet mulching uses biodegradable barriers and heavy organic overlays to suppress invasive species and protect irrigation components from thermal shock. This tactic creates a hydrostatic buffer that prevents soil moisture from evaporating while protecting lateral lines and sprinkler heads from mechanical damage during the winter.

“A retaining wall doesn’t fail because of the stone; it fails because of the water trapped behind it, and proper mulching manages that surface runoff before it hits the backfill.” – Hardscape Engineering Axiom

When we install a new sod or irrigation system, we finish the edges with a deep trench and a heavy mulch layer. This isn’t for aesthetics. It’s for engineering. A proper edge keeps the turf from encroaching on the beds and prevents the irrigation heads from being scalped by the mower. During your 2026 cleanup, focus on the drip lines. If your irrigation lines are shallow, a thick layer of leaf mulch can provide enough R-value to prevent the ground from freezing deep enough to crack the PVC. It’s cheap insurance. Don’t skip it. Also, check your 811 markings if you’re doing any deep trenching. I’ve seen too many ‘pros’ hit a gas line because they were too lazy to call for a mark-out.

Does mulching leaves cause thatch buildup?

No, mulching leaves does not cause thatch buildup; in fact, it often reduces it by stimulating microbial activity. Microorganisms that break down the leaf carbon also feed on the lignin and cellulose found in the thatch layer, effectively cleaning the turf base.

The 2026 Cleanup Hardware and Bio-Checklist

Before you start your cleanup, you need to ensure your gear is ready for the technical demands of mulching. Dull blades don’t mulch; they tear. Tearing grass leads to desiccation and disease entry points. Sharp blades are a requirement, not a suggestion. Use a 30-degree bevel on your mower blades for the best shredding action. Check your irrigation system for leaks before the ground freezes. A small leak in October becomes a sinkhole in April.

  • Sharpen mower blades to a 30-degree angle for maximum shredding.
  • Blow out irrigation lines to 50 PSI to ensure no water remains in the laterals.
  • Perform a soil pH test to determine lime requirements after leaf drop.
  • Apply a high-potassium pre-winter fertilizer to strengthen cell walls.
  • Clean out all drainage basins and French drains to prevent hydrostatic pressure buildup.

The transition from a growing season to a dormant season is the most critical time for your landscape. If you handle your organic matter correctly now, you’re setting the stage for a successful 2027. If you ignore the science, you’ll be the one calling me in the spring to fix your yellow, compacted lawn. Choose the biology. Keep the leaves on the property. Use them as the tool they are. Your soil will thank you, and your wallet will too. Done correctly, your yard becomes a self-sustaining machine.

April 15, 2026 | Emily Clark

7 Hacks to Make New Sod Root in 48 Hours [2026 Test]

7 Hacks to Make New Sod Root in 48 Hours [2026 Test]

The 48-Hour Rooting Blueprint: Why Science Trumps Superstition

To make new sod root within 48 hours, you must maximize capillary action between the soil profile and the sod mat through aggressive soil preparation, mycorrhizal inoculation, and hydrostatic saturation. This ensures the rhizosphere begins immediate nutrient exchange, preventing the dormancy shock typical of poorly installed turf. Most homeowners think you just throw green-side-up and hope for the best. They are wrong. If you aren’t managing the osmotic potential of the soil, you’re just watching money turn brown. I always drill into my new crew members: if you don’t fix the soil grading first, every plant you put in the ground is just expensive compost. I have seen guys spend ten grand on premium TifTuf Bermuda only to lay it over compacted clay that had the permeability of a sidewalk. Within forty-eight hours, the roots had nowhere to go, and the grass was cooking from the bottom up. We are here to prevent that. Real landscaping is about engineering an environment where the plant has no choice but to thrive. This guide covers the high-fidelity mechanics of sod install and the precise biological triggers required for rapid establishment.

“A successful turfgrass stand is not determined by the quality of the sod alone, but by the physical and chemical properties of the receiving soil bed.” – Penn State Center for Turfgrass Science

How much water does new sod need to root quickly?

New sod requires hydrostatic saturation immediately after installation, meaning you must apply at least 1 inch of water to penetrate the sod mat and the top 2 inches of native soil. This creates a moisture bridge that forces primary root hairs to bridge the gap between the organic matter of the sod and the mineral content of your yard. Don’t just spray the top. If the soil underneath is dry, the roots will stay in the sod layer and shrivel. You need to check the moisture depth with a soil probe. If you don’t feel mud two inches down, keep the sprinklers running. This is the only time I will tell you to over-water. After that initial 48-hour window, we transition to deep, infrequent cycles to force the roots to chase the receding moisture line. It is basic biology. Roots grow toward water. If the water is always on the surface, the roots stay on the surface. That is how you get a lawn that dies the first time the temperature hits ninety degrees.

Is it okay to walk on new sod after 48 hours?

You should absolutely avoid foot traffic on new sod for at least 14 days, as surface compaction and lateral shearing can tear the fragile meristematic tissue of the emerging root initials. Walking on the grass too soon compresses the macropores in the soil, which are essential for oxygen exchange. Roots need to breathe just as much as they need to drink. If you crush those air pockets, you suffocate the plant before the rhizosphere is even established. Think of it like wet concrete. It looks solid, but the internal structure is still setting. Give it time to lock in.

Hack 1: The 4-Hour Harvest-to-Soil Protocol

The clock starts the second the sod is cut at the farm. Once those roots are severed, the plant begins to respire rapidly, burning through its stored carbohydrate reserves. If sod sits on a pallet for more than 12 hours, the internal temperature of the stack can rise to 100 degrees due to anaerobic fermentation. This cooks the roots from the inside out. To get rooting in 48 hours, you need the sod on your dirt within 4 hours of delivery. This maintains the cellular turgor of the grass blades and ensures the plant is in an active growth phase when it hits your soil. If the sod feels hot to the touch when you peel a piece off the pallet, it is already in distress. You will not get a 48-hour root set with stressed grass. Demand a morning delivery and have your crew ready to move the moment the truck stops.

Hack 2: Sub-Surface Soil Fracturing

You cannot lay sod on compacted soil and expect results. I see yard cleanup crews all the time who just rake the surface and start laying. That is a failure. You need to use a power harley rake or a tiller to fracture the top 4 to 6 inches of soil. This increases the Cation Exchange Capacity (CEC) availability and ensures that the bulk density of the soil is low enough for new roots to penetrate without resistance. High bulk density is the number one cause of sod failure. If a root has to fight for every millimeter of growth, it won’t establish in 48 hours. It will take weeks. Use a starter fertilizer with a high phosphorus (P) count, like a 10-20-10, and work it into that fractured soil before the sod goes down. This puts the fuel exactly where the roots are going to be.

FactorTarget MetricAction Item
Soil pH6.2 – 7.0Apply lime or sulfur based on test results
CompactionUnder 200 PSIFracture soil to 6-inch depth
HydrationField CapacitySaturate 2 inches of sub-soil prior to laying
FertilizerHigh PhosphorusApply 10-20-10 starter at 5lbs/1000 sq ft

Hack 3: The Mycorrhizal Inoculation Secret

The most successful landscaping pros use beneficial fungi to cheat the system. By applying a mycorrhizal inoculant to the bare soil before laying the sod, you are creating a symbiotic relationship between the plant and the soil. These fungi attach to the grass roots and effectively extend the root surface area by 100x to 1000x. They act like a secondary root system that fetches water and nutrients for the grass. In our 2026 tests, sod treated with Glomus intraradices showed 40% more root mass after 48 hours than the control group. It is a microscopic engineering hack that most DIYers have never heard of. It costs an extra twenty bucks for a bag of inoculant, but it is the difference between a lawn that survives and a lawn that thrives.

Hack 4: Hydrostatic Saturation vs. Surface Wetting

Forget the garden hose. To get roots moving, you need irrigation precision. You must achieve field capacity in the soil profile. This means the soil is holding as much water as it can without it draining away due to gravity. When you lay the sod onto saturated, fractured soil, you create a suction gradient. The dry sod mat will pull moisture up from the wet soil, and the roots will naturally follow that moisture down. If you lay sod on dry soil and then water the top, the dry soil underneath actually acts as a hydrophobic barrier, repelling the water and keeping the roots high and dry. This is why so many lawns fail even though the homeowner says they watered it every day. They were only watering the top half-inch. That is not enough.

Hack 5: The 150-Pound Drum Roller Compression

Air is the enemy of sod rooting. If there is a gap between the sod and the soil, the roots will dry out and die before they ever reach the ground. This is called desiccation. You must use a water-filled lawn roller (at least 150 to 200 pounds) to press the sod into the dirt. This ensures 100% soil-to-root contact. I have seen guys try to walk it in, but that just creates uneven pockets. A roller provides consistent downward pressure that knit the seams together and eliminates air pockets. Do not skip this step. It is the most physically demanding part of the sod install, but it is non-negotiable for a 48-hour root set. The sod should feel firm under your feet, not spongy.

“A retaining wall doesn’t fail because of the stone; it fails because of the water trapped behind it. Similarly, sod doesn’t fail because of the grass; it fails because of the air trapped beneath it.” – Hardscape Engineering Axiom

Hack 6: Temperature Management and Metabolic Rate

Plant growth is a metabolic process regulated by soil temperature. If you lay sod when the soil is below 55 degrees Fahrenheit, the roots are effectively dormant. They won’t move. Conversely, if the air temperature is over 95 degrees, the plant enters a stress-induced shutdown to conserve water. The sweet spot for rapid 48-hour rooting is a soil temperature between 65 and 75 degrees. If you are installing in mid-summer, you must use syringing (short bursts of water) to cool the leaf blades and lower the canopy temperature. This keeps the plant’s stomates open, allowing it to continue photosynthesis and root production instead of just trying to survive the heat.

Hack 7: The Post-Install Bio-Stimulant Drench

Once the sod is down and rolled, hit it with a liquid bio-stimulant containing seaweed extract and humic acid. Seaweed extract is loaded with cytokinins and auxins, which are the hormones responsible for cell division and root elongation. Think of it as a shot of adrenaline for the grass. Humic acid helps to chelate nutrients in the soil, making them easier for the new, fragile roots to absorb. This chemical kickstart can trigger the first flush of white root hairs in as little as 36 hours. It bypasses the plant’s natural slow-start mechanism and forces it into high gear. This is the pro-level finish that separates a master landscaper from a guy with a truck and a rake.

  • Immediate: Apply 1 inch of water within 15 minutes of laying the first piece.
  • Day 1: Roll the entire area twice in perpendicular directions.
  • Day 2: Apply bio-stimulant drench and check for root resistance.
  • Ongoing: Monitor for any signs of localized dry spots (LDS).

April 14, 2026 | Jane Doe

Stop 2026 Soil Erosion: 4 Landscaping Culpeper VA Tactics

Stop 2026 Soil Erosion: 4 Landscaping Culpeper VA Tactics

The scent of linseed oil and the red clay reality

The air in my workshop usually smells like linseed oil and the slow, steady progress of a hand-rubbed varnish. But when I step out onto the porch in Culpeper, the scent changes to something more urgent. It’s the metallic tang of rain hitting the exposed Piedmont red clay. You see it every spring. The water carves these miniature canyons right through the side of a yard that was supposed to be a lawn. People think the dirt just stays put because they bought it. Dirt has no loyalty. If you aren’t actively anchoring it, the 2026 rains will simply carry your property value down toward Mountain Run. Editor’s Take: Real soil stability requires biological anchors like deep-root grass seeding and mechanical barriers that mimic natural geology. Stop treating your yard like a static painting and start treating it like a living structure.

Why your lawn is actually a sieve

Observations from the field reveal that most yards in this part of Virginia are suffocating under their own weight. That layer of brown, spongy material between the green blades and the soil is thatching. In my trade, we call it rot. In your yard, it is a barrier. When the skies open up over the Blue Ridge, that thatch layer acts like a plastic sheet. The water cannot reach the soil. Instead, it gains speed on the surface. By the time it hits the edge of your flower bed, it has the force of a fire hose. You need to strip that away. Proper landscaping culpeper va professionals know that removing that organic debris is not about aesthetics. It is about letting the earth breathe and drink. If the water cannot go down, it goes sideways, and sideways is how you lose your topsoil. It is the same reason I strip old, cracked lacquer before applying a new finish. You cannot build on a foundation of decay.

The Piedmont slope problem

Our little corner of the world is not flat. If you live near Yoder’s or out toward Rixeyville, you are dealing with grades that would make a mountain goat pause. Most homeowners think a quick contact us call for a simple mow will fix things. It won’t. When the winter frost heaves the ground and the spring rains soften it, those slopes become fluid. You need hardscapes that understand gravity. I am talking about dry-stack stone or heavy timber that mimics the natural outcrops we see in the Shenandoah. A well-placed retaining wall is not just a decoration; it is a structural dam. It breaks the kinetic energy of the water. Without these breaks, your grass seeding efforts are just expensive bird food. The seeds wash away before they can even think about putting down a root. I have seen hillsides in Culpeper that were perfectly green in May and looked like a moonscape by July because the owner ignored the physics of the slope.

When a simple trim becomes a disaster

The

April 14, 2026 | Emily Clark

5 Seeding Mistakes Killing Your 2026 Culpeper VA Lawn

5 Seeding Mistakes Killing Your 2026 Culpeper VA Lawn

The damp earth of Culpeper County clings to my boots, heavy and cold, a reminder that the ground beneath us has its own timeline. I feel the rhythmic pull of the seasons while others only see a calendar of chores. Many neighbors near the Rappahannock search for shortcuts to a green carpet. They want the fast fix. But the Piedmont soil does not care for speed. It demands respect for the ancient clay and the erratic Virginia humidity. Editor’s Take: To save your turf, you must stop treating Culpeper’s heavy clay like standard potting soil and avoid the trap of generic high-nitrogen fertilizers that burn young roots before they even reach for water. Success in 2026 requires a shift from frantic maintenance to a slow, methodical preparation that matches the local geography.

The first error I see involves the timing of the work. Most folks wait until the heat of late spring to think about grass seeding, but by then, the window has slammed shut. Our specific pocket of Virginia suffers from a unique microclimate where the transition from frost to scorching humidity happens in a heartbeat. If you throw seed down when the dogwoods are already in full bloom, the tender sprouts will wither under the June sun. The soil needs a specific warmth, a heartbeat that only comes with early preparation. You cannot force the earth to perform on a corporate schedule. It requires a quiet observation of the frost lines and the way the shadows fall across your property in the early morning hours. Every acre in Culpeper is a unique puzzle of drainage and light.

The red clay deception

The ground here is not your friend if you treat it with indifference. That thick, orange-red clay acts as a vault, locking out air and moisture when it becomes compacted by heavy foot traffic or neglected mowing schedules. I have spent decades watching people pour expensive seeds onto a surface as hard as a brick. It is a waste of hope. Without deep thatching or aeration, that seed is just bird food. True growth happens when you break the surface tension of the earth. You must let the soil breathe. I often tell neighbors that a lawn is a living organism, not a plastic rug. It needs a porous home where roots can wander deep into the subsoil to find water during our inevitable August droughts. Most homeowners ignore the grit under their nails and assume the bag of seed does all the work. It does not. The preparation is the work. The rest is just a natural consequence of patience.

A rhythm for the Piedmont soil

When we talk about landscaping culpeper va, we are really talking about geology. The bedrock influences everything from how your hardscapes settle to how well your tall fescue survives a heatwave. A common mistake is choosing a seed blend designed for Ohio or Pennsylvania. Virginia is a transition zone. We are too north for some grasses and too south for others. This creates a friction that most big-box stores ignore for the sake of profit. You need a blend that handles the swing from sub-zero nights to ninety-degree afternoons with high dew points. If you do not choose a variety specifically bred for the Mid-Atlantic, you are setting yourself up for a heart-breaking brown-out by mid-July. I prefer the slow path of selecting cultivars that have proven their resilience in our specific humidity. It is about the long-term health of the ecosystem, not just a quick green-up for a backyard barbecue.

The cost of cheap convenience

I see it every autumn. The trucks pull up, people scatter lime without a soil test, and they wonder why their landscaping looks tired by spring. A soil test is not a suggestion; it is a map. Without it, you are walking through the woods in the dark. Our local earth is often acidic, which locks away the nutrients the grass needs to survive. You can buy the most expensive fertilizer on Route 29, but if the pH is wrong, that fertilizer is just runoff for the local creeks. It is about balance. I take a handful of dirt and I can smell the lack of life in it when it has been over-treated with chemicals. We need to encourage the worms and the microbes. They are the silent workers that do the heavy lifting for us. When you bypass the biology of the soil for a chemical shortcut, you create a fragile system that collapses at the first sign of stress. The [landscaping culpeper va](https://eanddlandscapingllc.com/home) professionals who understand this won’t promise a miracle overnight. They promise a process.

Realities of the 2026 season

The climate is shifting, and our old habits must shift with it. We are seeing wetter winters and flash droughts in the spring. This volatility means your grass pickup and maintenance routine cannot be static. You have to watch the sky. If you mow too short during a dry spell, you are essentially scalping the plant and exposing the crown to lethal heat. I leave the blades high, letting the grass shade its own roots. It is a simple act of protection. It looks less like a golf course and more like a resilient meadow, but it stays green when the neighbors’ lawns are turning to straw. We also see people failing at grass seeding because they forget about water after the first week. Germination is only the beginning. Those young plants are like infants; they need consistent, shallow moisture until their roots can find the deeper dampness of the clay. If you [contact us](https://eanddlandscapingllc.com/contact-us) for advice, the first thing I will ask is if you have the patience to watch the water soak in slowly.

Questions from the local garden

Why does my seed never sprout in the shady areas near the oaks? Most seed mixes need six hours of direct sun. Under the canopy of old Culpeper oaks, you need a specific fine fescue and you must thin the lower branches to let light filter through. Can I just throw seed on top of my old grass? No. Seed needs to touch the soil to wake up. If it sits on top of dead thatch, it will just dry out and die. Is fall really better than spring for seeding? In Culpeper, fall is king. The ground is warm, the air is cool, and the weeds are going dormant. It gives the grass six months to build a root system before the Virginia summer hits. How often should I sharpen my mower blades? At least twice a season. Dull blades tear the grass, leaving it vulnerable to diseases that thrive in our humidity. Does mulch help or hurt my lawn borders? Proper mulching protects the roots of your ornamentals, but don’t pile it against the stems. It needs to breathe, just like your turf. Why is my lawn full of crabgrass even after seeding? You likely missed the pre-emergent window or disturbed the soil at the wrong time, allowing buried weed seeds to see the light and wake up. What is the best way to handle heavy clay? Core aeration combined with an application of organic compost will slowly change the structure of the soil over several seasons. There is no instant fix for geology.

The beauty of a well-tended space in Culpeper is not found in the speed of its growth, but in the strength of its roots. As the sun sets over the Blue Ridge, I look at the properties that have been treated with care rather than chemicals. They have a depth of color that a quick-fix lawn can never replicate. It is a slow conversation between the gardener and the earth. If you are ready to stop fighting against the nature of our region and start working with it, the results will speak for themselves in the seasons to come. Growth is a quiet, persistent force. Let us respect that rhythm together.