
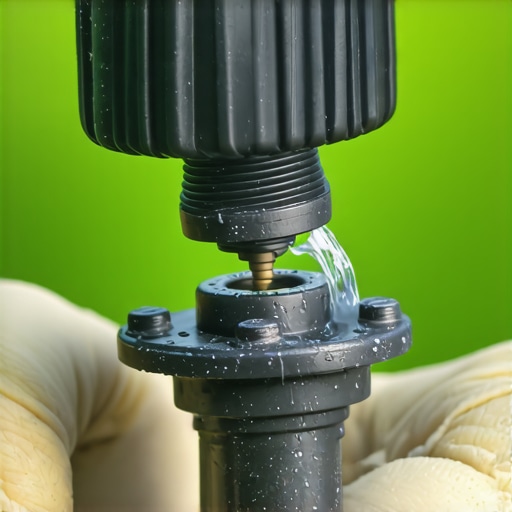
Why Your Irrigation Valve is Leaking and the $15 Solution
A leaking irrigation valve usually stems from a ruptured internal diaphragm or a grit-clogged seat, causing constant weeping at the sprinkler head. Instead of excavating the entire manifold, the diaphragm hack involves swapping the internal rubber assembly and bonnet, saving hours of landscaping labor and sod install repairs. It is the difference between a ten minute fix and a weekend long disaster. Most homeowners see water pooling around a valve box and assume the entire unit is cracked. They start digging. They hit the main line. They turn a minor nuisance into a catastrophic system failure. Stop digging. The fix is almost always inside the valve bonnet.
The Hardscape Autopsy: When a $20 Part Ruins a $30,000 Patio
I recently got called out to tear up a $30,000 patio that was sinking because the previous contractor ignored a weeping valve. The homeowner had noticed a small, constant damp spot at the edge of the pavers. Instead of fixing the valve, they just kept adding more polymeric sand. Over two years, that constant trickle of water undermined the compacted modified stone base, created a subterranean void, and the entire west corner of the patio subsided by three inches. It took me four days of excavation and reconstruction to fix a problem that started with a piece of debris the size of a grain of salt caught in a sprinkler diaphragm. This is why I tell my crew: we do not leave a site until every valve is tested for a tight seal. Water is the strongest force in civil engineering. It always wins. If you see a leak, you address it with surgical precision immediately.
“Irrigation system efficiency is not just about coverage; it is about the structural integrity of the soil profile and the prevention of hydrostatic saturation in the root zone.” – Agricultural Irrigation Standards Manual
The Forensic Diagnosis: How to Identify a Blown Diaphragm
Identifying a failing irrigation valve requires understanding the difference between a mechanical failure and an electrical one. If your yard cleanup reveals a specific zone that will not turn off, or a sod install area that is consistently muddy even when the controller is unplugged, you have a mechanical breach. The diaphragm is a flexible EPDM rubber membrane that separates the top chamber of the valve from the bottom. When the solenoid activates, it releases pressure from the top chamber, allowing the high pressure below to lift the diaphragm and start the flow. If there is a tear in that rubber, or if a pebble is preventing it from seating against the plastic rim, the valve stays open. It will leak. It will rot your grass. Don’t let it.
| Symptom | Probable Cause | The Solution | |||||||||
|---|---|---|---|---|---|---|---|---|---|---|---|
| Zone won’t shut off | Debris in diaphragm or ruptured rubber | The Diaphragm Hack (Replace internals) | Zone won’t turn on | Solenoid failure or cut wire | Multi-meter test and solenoid swap | Leaking out of the top | Cracked bonnet or loose screws | Bonnet replacement | Water weeping at heads | Small tear in diaphragm seat | Cleaning the valve seat and diaphragm |
How do I know if my sprinkler valve diaphragm is bad?
You know a sprinkler valve diaphragm is bad when water consistently bypasses the seal, usually manifesting as a low flow leak at the lowest sprinkler head in the zone. This is known as low head drainage, but if it continues for hours after the cycle ends, the valve seat is compromised. We measure this in gallons per hour. A slow weep can waste 50 gallons a day. That is 1,500 gallons a month. Your water bill will show it before your eyes do. Look for moss growth on the sidewalk or a specific patch of sod that feels spongy underfoot. If you pull the solenoid and water still flows, the mechanical seal is dead. It is time for the hack.
The Step by Step Diaphragm Hack: No PVC Cutting Required
The beauty of this method is that it avoids the mess of landscaping excavation. You are essentially using a donor valve to replace the guts of the existing one. First, shut off the main water supply to the irrigation system. This is non-negotiable. If you skip this, you will get a face full of 50 PSI water the moment you loosen a screw. Open the manual bleed screw on the valve to relieve any residual pressure. Next, use a Phillips head or nut driver to remove the 4 to 6 screws on the top of the valve bonnet. Carefully lift the bonnet and the internal spring. You will see the rubber diaphragm. Remove it. Inspect the plastic seat inside the valve body for scratches. If the seat is smooth, simply take the diaphragm, spring, and bonnet from a brand new identical valve and drop them into the old body. Screw it back down in a star pattern. Do not over-torque. Plastic threads are unforgiving. It should be snug, not crushed.
“A retaining wall doesn’t fail because of the stone; it fails because of the water trapped behind it, often originating from unmaintained irrigation laterals.” – Hardscape Engineering Axiom
Can I replace a sprinkler valve without cutting the pipe?
Yes, you can replace the critical components of a sprinkler valve without cutting the pipe by performing a bonnet swap, which effectively replaces every moving part of the valve. The only reason to cut the PVC pipe is if the actual bottom housing of the valve is cracked, which is rare unless the system froze during winter. By keeping the existing body in the ground, you maintain the structural integrity of the landscaping and avoid the risk of getting dirt into the main lines. This is the industry standard for pro technicians who value efficiency over billable hours. It is cleaner, faster, and more reliable than a fresh glue joint in a wet hole.
Essential Tools for Irrigation Maintenance
- Multi-meter: For checking ohms on the solenoid.
- Nut Driver: Better than a screwdriver for valve bonnets to prevent stripping.
- Wire Strippers: For clean connections on the waterproof wire nuts.
- Needle Nose Pliers: To pull debris or old diaphragms out of tight valve boxes.
- Silicon Grease: A tiny dab on the new diaphragm can help it seat perfectly.
Impact on New Sod and Yard Cleanup
If you are in the middle of a sod install, a malfunctioning valve is a death sentence for your investment. New sod requires precise moisture levels. A stuck valve will drown the roots, leading to anaerobic conditions where the soil smells like rotten eggs. This is the result of microbial activity in oxygen depleted soil. Conversely, a valve that fails to open will brown out the sod in 48 hours during a summer heatwave. When doing a yard cleanup, always check the valve boxes. Remove any mulch or dirt that has covered the lids. A buried valve box is a forgotten valve box. We call them ghost valves, and they are the leading cause of massive water waste in residential landscaping. Keep your boxes clear and your diaphragms fresh. It is the cheapest insurance policy you can buy for your yard. Your grass will thank you. Your wallet will too. Don’t be the guy with the $30,000 sinking patio. Check your valves.