
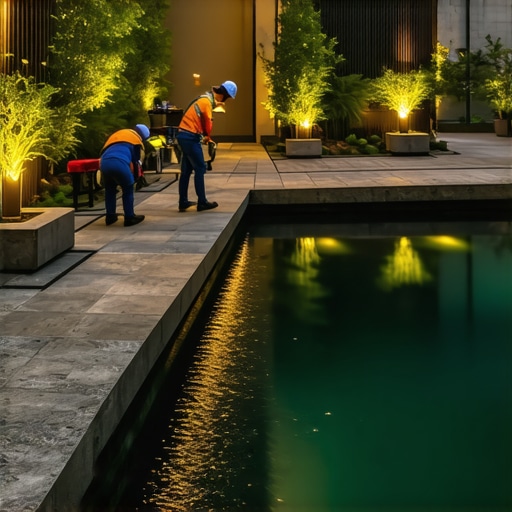
The Professional Approach to Submersible Light Maintenance
To replace pond lights without draining the basin, you must utilize the service loop or slack wire method, ensuring all low-voltage power is disconnected at the transformer before attempting to breach the water’s surface tension. This procedure requires identifying the conduit entry point and carefully extracting the fixture to the shoreline for bulb or LED module replacement while maintaining the integrity of the IP68 waterproof seals.
I always drill into my new crew members: if you do not fix the soil grading and the wiring slack during the initial install, every light you put in the ground is just an expensive future headache. I remember a job in the early 2000s where a ‘mow-and-blow’ crew had installed high-end brass fixtures but cut the wires so tight there was zero slack. When a bulb blew, the homeowner had to drain 5,000 gallons of water just to reach the housing. It was a total failure of foresight. We do things differently. We build for the guy who has to fix it ten years from now. That guy is usually me. If you do not have at least three to five feet of extra cable coiled behind the rock shelf, you are already behind the 8-ball. This is about engineering, not just aesthetics.
Why Draining Is the Amateur Choice
Draining a pond to change a light is a catastrophic waste of resources and a biological shock to your ecosystem. You destroy the beneficial bacteria colonies and stress the fish. A professional pond is a closed-loop system. We use the service loop. This is a length of UF-rated direct burial wire tucked behind the liner or under a stone ledge. It allows the fixture to be pulled up like a bucket from a well. If your contractor did not leave a loop, you are looking at a full retrofit. Don’t be that contractor.
“Submersible lighting systems must maintain a vacuum-tight seal to prevent the ingress of water via capillary action through the wire jacket, which can lead to catastrophic internal corrosion of the LED driver.” – International Hardscape Engineering Standards
The Engineering Behind IP68 Ratings
When selecting your 2026 replacement modules, you are looking at IP68 ingress protection. This is not a suggestion. It is a mathematical necessity. The first digit, 6, means the unit is dust-tight. The second digit, 8, means it can handle continuous immersion under pressure. Cheap big-box lights are often rated IP65 or IP67. They will fail. The hydrostatic pressure of three feet of water is enough to force moisture past a weak gasket. Once that moisture hits the 12V circuit, the light is toast. We use heavy cast brass or 316 stainless steel. Plastic housings warp under the heat of the lamp and the cool of the water. They crack. They leak. It will rot.
| Material Type | Corrosion Resistance | Thermal Conductivity | Longevity Expectancy |
|---|---|---|---|
| Cast Brass | Excellent | High | 20+ Years |
| 316 Stainless Steel | Superior | Medium | 25+ Years |
| Composite Plastic | Poor | Low | 2 to 4 Years |
| Aluminum (Powder Coated) | Moderate | High | 5 to 7 Years |
Step-by-Step: The Dry-Swap Protocol
Before you touch the water, you must kill the power at the transformer. Do not just flip a switch. Unplug it. Check the GFCI outlet. Safety is not optional when you are mixing 120V line voltage and 12V secondary loads near a body of water. Once the power is dead, reach into the water and locate the fixture. If it was installed correctly, it should be weighted or wedged, not glued. Gently pull the fixture toward the surface. If you feel resistance, stop. You are likely snagged on a liner weight or a boulder.
- Power Check: Verify the transformer is off and the timer is bypassed.
- Fixture Extraction: Pull the light to the surface using the service loop.
- Lens Cleaning: Scrape off calcium deposits and bio-film using a soft brush.
- Seal Inspection: Check the O-ring for dry rot or cracking.
- Component Replacement: Swap the LED diode or the MR16 bulb.
- Re-Sealing: Apply a thin layer of dielectric silicone grease to the gasket.
- Testing: Submerge the light 1 inch and turn on power before full sinking.
How much modified gravel do I need for a pond edge?
For a standard pond edge or hardscape surround, you need a minimum of 4 inches of compacted 21A modified stone to prevent the light conduit from shifting. This base layer ensures that the hydrostatic pressure from the surrounding soil does not pinch the irrigation pipes or electrical runs. If the ground heaves during a freeze-thaw cycle, your lights will aim at the sky instead of the waterfall. Set your base right. Use a plate compactor. It should literally bounce off the ground when you are done. If it doesn’t, it isn’t tight enough.
The Biological Impact of Light Color and Heat
We are seeing a move toward 3000K warm white LEDs. Why? Because higher Kelvin ratings (blue light) actually encourage filamentous algae growth. You are basically building a tanning bed for pond scum. The heat output of a traditional 50W halogen bulb also creates a localized micro-climate that fish love, but so does bacteria. Transitioning to 5W LEDs reduces the thermal footprint. This keeps your biological filter from working overtime. It also saves you on the irrigation and yard cleanup side because you aren’t scrubbing algae off the lenses every two weeks.
“Artificial light at night (ALAN) in aquatic environments should be minimized to avoid disrupting the circadian rhythms of local fauna, particularly in sensitive riparian zones.” – Agricultural Extension Office Bulletin
What is the best depth for pond lighting?
The sweet spot for pond lighting is 12 to 18 inches below the surface. At this depth, you get maximum light refraction through the water column without losing all your lumens to the depths. If you go deeper, you need more wattage to punch through the suspended solids. If you go shallower, you see the fixture itself, which is a rookie mistake. You want to see the effect, not the source. Hide the fixture behind a ledge rock or under a spillway. This also protects the wire from UV degradation and physical damage during yard cleanup or sod install activities near the pond edge.
The Long-Term Maintenance Cycle
Your 2026 lights are part of an integrated landscape system. This means you don’t just ‘set it and forget it.’ Every spring, during your irrigation startup, you need to check the voltage drop at the end of the run. Use a multimeter. If you are seeing less than 10.5V at a 12V fixture, your wires are undersized or your connections are corroded. We use heat-shrink connectors with internal solder. The ‘wire nuts’ you find at the hardware store are garbage for pond use. They will leak. The copper will turn green. The light will flicker. Fix it now or fix it later. I prefer now. Don’t skip the dielectric grease. It is the only thing standing between your electronics and a short circuit.
Advanced Troubleshooting: When the Loop Fails
If you pull on that wire and it doesn’t budge, you have a hard-piped system or a pinch point. This is where the ‘no draining’ rule gets tested. You can sometimes use a fish tape to clear a blockage in the conduit, but if the previous guy used 90-degree elbows instead of sweeping bends, you are out of luck. This is why we use flexible PVC or poly-pipe for light runs. It handles the curves. If you are stuck, you might have to partially drain the pond just to clear the obstruction. It’s a mess. Avoid it by installing conduit that is at least 1 inch in diameter, even for a single wire. Give yourself room to breathe. The next guy will thank you.