
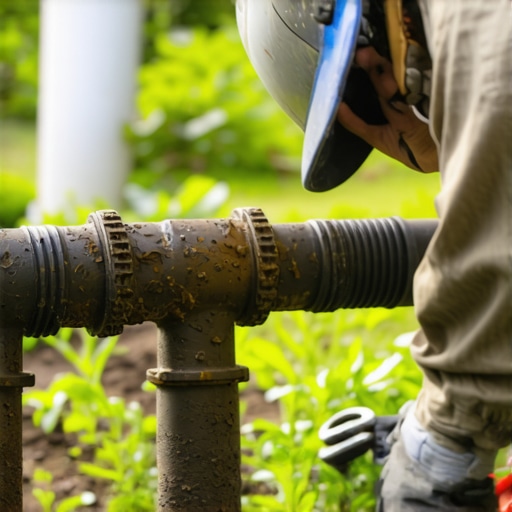
The Anatomy of a System Failure: Why Your Manifold Cracked
Finding a swamp in your yard when the irrigation is off is a gut punch. It usually starts with a localized wet spot right over the valve box or a sudden drop in pressure across all zones. I recently got called out to tear up a $30,000 patio that was sinking because the previous contractor buried an irrigation manifold directly under the pavers without a proper access vault. The hydrostatic pressure from a slow leak saturated the sub-grade, turned the compacted aggregate into slurry, and the whole installation failed. This is what happens when you treat irrigation as an afterthought. A cracked manifold isn’t just a plumbing issue: it is a threat to your entire landscape investment, from your sod install to your foundation. Repairing it without excavating your whole yard requires surgical precision and the right mechanical fittings.
How to Replace an Irrigation Manifold Without Extensive Digging
To replace a cracked irrigation manifold without massive excavation, you must utilize telescoping repair couplings or slip-fix fittings that allow for pipe insertion without the need for lateral movement. By cutting out the damaged section and using solvent-welded expansion unions, you can bridge the gap in a confined valve box without disturbing the surrounding soil or hardscape.
“Irrigation system components must be installed to withstand the maximum working pressure of the system, including surge pressures. Structural integrity depends on proper solvent welding and stress-free alignment of the manifold assembly.” – Irrigation Association Technical Manual
The Forensic Diagnosis: Stress, Frost, and Friction
Most manifolds crack because of three things: poor winterization, soil heave, or ‘manifold stress.’ If your crew didn’t use Schedule 80 PVC for the header, they cut corners. Schedule 40 is fine for lateral lines, but the manifold is the heart. It takes the full brunt of the static pressure 24/7. When water freezes, it expands by roughly 9 percent. If even a half-cup of water remains trapped in a valve body because the system wasn’t blown out with a high-cfm compressor, the plastic will hairline. You won’t see it in December. You’ll see it in May when your yard cleanup reveals a mud hole. Don’t buy those pre-assembled thin-walled manifolds from big-box stores. They are garbage. We build ours in the shop using heavy-duty nipples and high-pressure tees.
Materials Comparison for Manifold Repairs
| Material Type | Durability Rating | Application Best Use | Repair Difficulty |
|---|---|---|---|
| Schedule 40 PVC | Medium | Standard lateral lines | Moderate |
| Schedule 80 PVC | High | Mainline and Manifolds | Low (Rigid) |
| Poly Pipe (HDPE) | High | Cold climates (Flex) | Easy |
| Slip-Fix Unions | Professional | Tight-space repairs | Very Easy |
The Surgical Extraction Process
First, shut off the main water supply. Do not trust the backflow preventer alone: shut it off at the meter if you have to. Dig out the valve box, but don’t go wider. Go deeper. You need at least four inches of clearance under the pipes to work. Cut the main supply line and the lateral zone lines about six inches away from the manifold. Use a PVC saw or a ratcheting cutter for a square edge. A jagged cut is a failure point. Once the old unit is out, check the soil. If it is saturated clay, remove it. Replace it with 3/4-inch washed stone for drainage. This prevents future frost heave from snapping your new fittings.
How much does it cost to fix an irrigation manifold?
A professional manifold repair typically costs between $300 and $850 depending on the number of zones and the depth of the burial. Doing it yourself with professional-grade telescoping fittings will cost about $100 in materials. Never skimp on the valves. Use Jar-Top valves if you want easy maintenance, but Scrubber valves are better if you have high sediment in your water.
Can I use a slip-fix on the main pressure line?
Yes, but you must use a heavy-duty, double-O-ring slip-fix rated for at least 150 PSI. The secret is the primer. I see hacks skipping purple primer all the time. Purple primer isn’t just for code: it is a chemical cleaner that softens the PVC so the cement can create a true molecular bond. Without it, you just have a ‘glued’ joint that will eventually blow apart under a water hammer. It will fail. Always wait the full cure time. If the can says 30 minutes, wait an hour.
- Shut off water: Isolate the system at the main.
- Clear the debris: Use a shop vac to suck water out of the hole so you aren’t working in mud.
- Square cuts: Use a ratcheting cutter to ensure the pipe ends are perfectly flat.
- Deburr: Use a pocket knife to smooth the inside and outside edges of the cut.
- Dry fit: Assemble the entire new manifold and slip-fixes without glue first.
- Solvent Weld: Prime both sides, apply cement, insert, and give a quarter turn.
“Failure to provide adequate support for irrigation valves and manifolds leads to mechanical stress at the joints, which is the primary cause of longitudinal cracks in PVC piping systems.” – Penn State Agricultural Extension
The Engineering of the No-Dig Manifold
The magic tool here is the telescoping union. These fittings have a male and female end that slide into each other. You glue one end to the existing pipe in the ground, and the other to your new manifold. You then ‘stretch’ the fitting until it locks into place. It eliminates the need to bend the pipes to get them into a standard coupling. Bending pipe creates ‘memory stress.’ Eventually, that pipe wants to go back to being straight, and it will crack your new manifold header to do it. Use the telescoping method. It is the only way to ensure a zero-stress installation. After the repair, don’t just throw the dirt back in. Use a layer of pea gravel around the fittings. This allows for slight movement during temperature shifts and makes the next guy’s life easier if they ever have to do a yard cleanup or another repair. Your irrigation system is an engineering project. Treat it like one. Avoid the big-box kits. Build it for the long haul. Keep the soil off the valves. Ensure the box is level. If you do this, you won’t be calling me to dig up your patio in three years.