
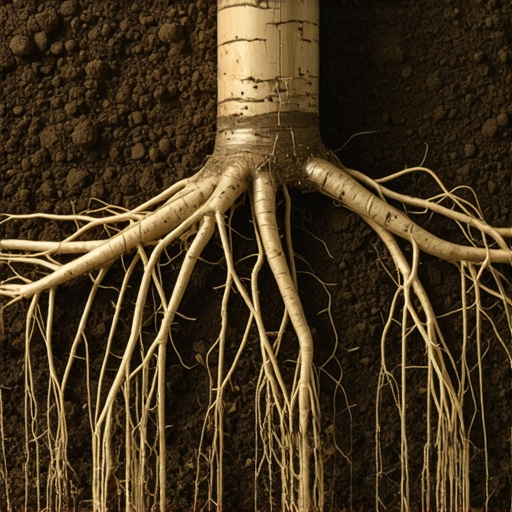
Sod Rooting Speed: Why 2026 Soil Prep Matters Most
I always drill into my new crew members: if you don’t fix the soil grading first, every plant you put in the ground is just expensive compost. I remember an apprentice back in ’04 who thought he could skip the power rake on a 5000 square foot sod install because the homeowner was in a rush for a graduation party. He laid the sod over compacted Georgia clay that felt like concrete. Two weeks later, the turf was brown, the roots were ‘J-rooting’ horizontally because they couldn’t penetrate the hardpan, and we had to rip the whole thing out on our own dime. That lesson stuck. Success in landscaping isn’t about what you see on day one; it is about the engineering happening six inches beneath the surface. Planning for a 2026 lawn requires understanding that soil is a living, breathing biological filter, not just dirt.
The Biological Mechanics of Sod Rooting
Rapid sod rooting speed depends on the interface between the cut rhizomes and the receiving soil’s bulk density. Soil preparation for 2026 sod installs must focus on eliminating compaction and balancing pH levels to ensure the cation exchange capacity (CEC) allows for immediate nutrient uptake and root elongation.
When you lay a piece of sod, you are essentially performing a massive transplant surgery. The roots have been severed from their original nutrient source, and they are in a state of shock. To force these roots to strike deep into the ground, the receiving soil must be more attractive than the sod mat itself. This is where most DIYers fail. They buy high-quality sod but lay it on a ‘dead’ soil base. You need to focus on the pore space. Soil should ideally be 50 percent solids, 25 percent air, and 25 percent water. If your yard cleanup did not include mechanical aeration or tilling to break up the subsoil, your bulk density is likely too high, effectively creating a physical wall that young roots cannot penetrate. We measure this in grams per cubic centimeter. For most turfgrass, you want a bulk density below 1.4 g/cm3. Anything higher and you are essentially planting on a sidewalk. The roots will stay in the top 1 inch of the sod mat, making the lawn entirely dependent on daily watering and highly susceptible to fungal pathogens like Pythium blight.
Compaction and the 2026 Preparation Timeline
Effective yard cleanup and soil prep starts months before the sod install. Mechanically breaking the hardpan layer is non-negotiable. Without a 6-inch friable root zone, your new lawn will fail under the first sign of heat stress or hydrostatic pressure issues during heavy rains.
“Soil compaction is the single most important physical factor limiting plant growth in the urban environment.” – University of Maryland Extension
If you are planning for a 2026 installation, the time to act is now. You need to address the chemical composition. A standard soil test is your roadmap. You are looking for a pH between 6.2 and 7.0 for most cool-season grasses like Tall Fescue or Kentucky Bluegrass. If your soil is too acidic, the phosphorus you apply—which is critical for root development—will become ‘locked’ and unavailable to the plant. We use calcitic lime to move the needle, but it takes six months to fully react with the soil chemistry. That is why 2026 planning happens in 2025. You cannot just throw down lime and sod the same day and expect a miracle. The chemistry has to stabilize. Furthermore, you must evaluate the organic matter percentage. Most new construction sites have about 1 percent organic matter because the builders scraped away the topsoil. You want 5 percent. Incorporating composted leaf mulch during your yard cleanup phase will build the fungal networks needed for long-term health.
| Amendment Type | Function in Soil Prep | Application Timing |
|---|---|---|
| Calcitic Lime | Adjusts pH and adds Calcium | 6 months pre-install |
| Leaf Compost | Increases Organic Matter/CEC | 3 months pre-install |
| Starter Fertilizer | High Phosphorus (P) for roots | Day of install |
| Gypsum | Breaks up heavy clay salts | 4 months pre-install |
Irrigation Engineering: Beyond Just Sprinklers
A professional irrigation system isn’t just about water; it is about distribution uniformity. For a 2026 landscape, your layout must account for head-to-head coverage to prevent localized dry spots that kill new sod before the roots can strike deep into the subsoil.
Irrigation is the lifeblood of the first 21 days. However, more sod is killed by ‘little and often’ watering than by drought. When you water for 10 minutes every day, you keep the surface wet but the subsoil bone dry. The roots have no reason to grow downward. This is called ‘lazy root syndrome.’ Instead, once the sod is down, you need to saturate the profile. We aim for the ‘squish’ test. When you walk on it, it should feel like a wet sponge for the first week. By week two, you back off. You want the top half-inch to dry out slightly, forcing the roots to hunt for moisture deeper in the prepared soil. If your irrigation zones are poorly designed, you will have ‘donuts’ of brown grass where the spray patterns don’t overlap. This is why we insist on pressure-regulated heads and matched precipitation nozzles. Every square inch must receive the exact same amount of water, measured in inches per hour. Don’t guess. Use tuna cans or a rain gauge to verify your output.
How much water does new sod need daily?
New sod typically requires 0.5 to 1 inch of water per day during the first week, split into two or three short sessions to keep the soil-sod interface moist. By week three, you should transition to 1 to 1.5 inches per week in a single, deep application to encourage deep rooting.
What is the best fertilizer for new sod?
The best fertilizer for new sod is a high-phosphorus ‘starter’ blend, such as a 10-20-10 ratio. Phosphorus is relatively immobile in soil, so it must be present at the root zone during the initial sod install to facilitate ATP production and rapid cellular division in the root tips.
The Installation Process: The Bounce Factor
When we lay the sod, we use a staggered brick pattern. This prevents long seams where water can channel and erode the soil underneath. But the most important tool in our kit is the 200-pound water roller. You must roll the sod immediately after laying it. This isn’t for leveling the yard—it is for capillary contact. Any air pocket between the sod and the soil is a death trap. Roots cannot grow through air to reach the soil. They will hit the pocket, desiccate, and die. The roller ensures the ‘knit’ is tight. You want to see the soil slightly oozing into the seams of the sod. That is the sign of a successful bond. If you walk on the lawn and it feels ‘springy,’ you haven’t rolled it enough. It should feel firm, like the earth itself.
- Step 1: Clear all debris and existing vegetation (The ‘Clean Slate’ phase).
- Step 2: Rough grade to move water away from the foundation (1 inch drop per 10 feet).
- Step 3: Amend soil based on 2025 lab results (Lime, sulfur, or compost).
- Step 4: Final grade with a landscape rake to a ‘flour-like’ consistency.
- Step 5: Install irrigation and pressure-test all lines.
- Step 6: Lay sod in staggered rows, tight seams, no overlapping.
- Step 7: Roll with a water-filled roller to eliminate air pockets.
- Step 8: Initial ‘saturation’ watering to a 4-inch depth.
“A retaining wall doesn’t fail because of the stone; it fails because of the water trapped behind it.” – Hardscape Engineering Axiom
The same logic applies to your lawn. If your landscaping doesn’t account for drainage, the water will sit in the root zone, displace the oxygen, and drown the plants. Anaerobic soil smells like rotten eggs; if you smell that during your yard cleanup, you have a drainage crisis that no amount of fertilizer will fix. You likely need a French drain or a dry creek bed to move that volume of water. In the heavy clay regions, we often incorporate expanded shale to provide permanent aeration in the soil profile. It is an investment, but for a 2026 project, it is what separates a professional result from a weekend fail. Do not skip the prep. The soil is the only part of the job you can’t easily fix once the grass is growing. Get it right the first time.