Soil Tamping for 2026 Sod: Engineering Root-to-Soil Contact
Most homeowners and low-bid contractors think a sod install is just laying green carpet over dirt. They are wrong. If you leave air pockets beneath your turf, you are essentially building a graveyard for root systems. Proper soil tamping ensures that the delicate rhyzomes and roots of your new sod make 100% contact with the soil, facilitating immediate capillary action and nutrient uptake. Without this engineering step, your grass will brown out in patches within fourteen days, no matter how much water you dump on it.
The Critical Physics of Soil Compaction and Air Pockets
Soil tamping for sod requires achieving a specific balance of bulk density where the soil is firm enough to eliminate large macro-pores (air pockets) but loose enough to allow for gas exchange and root penetration. To remove air pockets effectively, you must understand that air is an insulator that prevents roots from drawing moisture from the deeper soil profile. I always drill into my new crew members: if you don’t fix the soil grading and compaction first, every plant you put in the ground is just expensive compost. I’ve seen $15,000 turf jobs fail because the lead tech thought ‘walking it in’ was sufficient. It isn’t. You need consistent PSI (pounds per square inch) across the entire footprint to prevent differential settling.
“A successful turfgrass stand is dependent on the intimate contact between the sod and the underlying soil to facilitate the movement of water and nutrients.” – Agricultural Extension Agronomy Manual
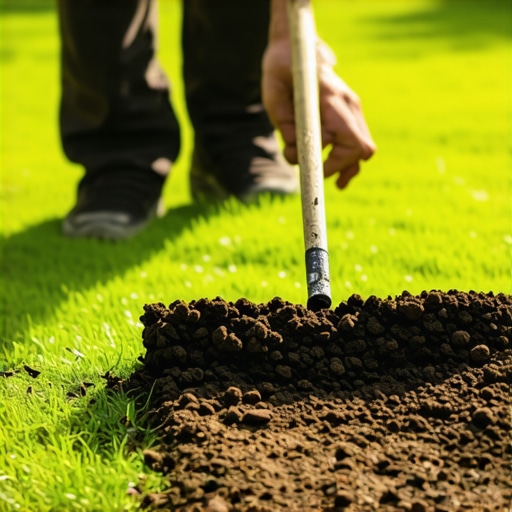
How much should I tamp soil before laying sod?
To prepare for a sod install, you should tamp the soil until it reaches approximately 80% to 85% of its maximum dry density, often referred to as the Proctor density in civil engineering. You want the soil firm enough that a 200-pound man walking across it leaves a footprint no deeper than 1/4 inch. If you sink to your ankles, your yard cleanup and prep phase failed. Over-compacting past 90% is equally dangerous, as it crushes the micro-pores necessary for oxygen to reach the roots, leading to anaerobic conditions and root rot.
| Compaction Method | Equipment Used | Best For | Target Soil Density |
|---|---|---|---|
| Light Rolling | Water-filled Poly Roller | Sandy Loams / Small Residential | 75-80% |
| Mechanical Tamping | Vibratory Plate Compactor | Clay Soils / High-Traffic Areas | 80-85% |
| Hand Tamping | 8×8 Cast Iron Tamper | Edges, Corners, Tight Irrigation Hubs | Variable |
The Forensic Breakdown of Air Pocket Formation
Air pockets usually form during the yard cleanup phase when organic debris—like buried branches, thick thatch, or construction lath—is left in the substrate. As this organic matter decays, it creates a void. Furthermore, if the irrigation lines were recently trenched and the backfill wasn’t mechanically vibrated, the soil will eventually ‘bridge.’ This bridging leaves a cavernous air gap under your sod. When you step on it, the sod shears. To fix this, you must use a ‘lift’ method: fill 3 inches of soil, tamp, then fill the next 3 inches. Never dump 10 inches of loose topsoil and expect a surface roller to fix the bottom. It won’t happen. Physics doesn’t work that way.
Can I use a lawn roller instead of a plate tamper for sod prep?
While a lawn roller is the standard tool for many landscaping outfits, it often lacks the downward force required for heavy clay soils. A water-filled roller primarily addresses surface irregularities but may fail to collapse deep-seated air pockets in the ‘B’ horizon of your soil. For 2026 standards, we recommend a vibratory plate compactor set to a low frequency for the initial subgrade prep, followed by a light rolling once the sod is actually laid to ‘knit’ the seams together. The vibration forces soil particles to reorient and fill the voids that static weight simply cannot reach.
- Step 1: Clear all debris larger than a nickel during your yard cleanup.
- Step 2: Rough grade the area to ensure 2% slope away from foundations.
- Step 3: Apply 2 inches of screened topsoil/compost mix.
- Step 4: Mechanical tamping in a north-south pattern, then east-west.
- Step 5: Hand-tamp around irrigation heads and valve boxes to prevent settling.
- Step 6: Final rake to ‘fluff’ the top 1/8 inch for seed-bed contact.
“Soil compaction is the most overlooked factor in urban landscape failure; root growth is physically impeded when soil strength exceeds 2.0 MPa.” – ICPI Technical Guidelines
The Contrarian Truth About Watering and Compaction
Most landscaping blogs tell you to soak the ground before laying sod. That is a recipe for a muddy disaster and uneven tamping. You want the soil ‘moist-dry’—it should hold its shape when squeezed in a fist but crumble easily. If it’s too wet, tamping will cause ‘pumping,’ where water is forced to the surface, destroying the soil structure. If it’s too dry, the particles won’t lubricate enough to slide into those air pockets. You need that ‘Goldilocks’ moisture window to get the density right. Once the sod is down, then you hit the irrigation hard. The first 48 hours are about saturation, but the 48 hours *before* the install are about structural integrity. Don’t skip the compaction check. It’s the difference between a lawn that lasts twenty years and one that looks like a topographical map of the moon by next July.