
The Engineering of Soil: Why Your Garden Planning Starts Six Inches Under
I always drill into my new crew members: if you don’t fix the soil grading and the microbial foundation first, every plant you put in the ground is just expensive compost. In my twenty years of running a high-end landscaping firm, the most common mistake I see is homeowners treating their vegetable garden like a front-yard ornamental bed. They want the aesthetic of dark, dyed bark mulch around their peppers and kale. It is a fundamental engineering failure. Bark is designed by nature to protect a tree for decades; it is high in lignin and extremely slow to break down. When you place it in an annual vegetable environment, you aren’t building soil—you are creating a nitrogen-starved barrier that disrupts the very biology required for high-yield food production.
The Nitrogen Tie-Up: Why Bark Mulch Starves Your Crops
Selecting the best mulch for vegetable gardens requires a deep understanding of the Carbon-to-Nitrogen (C:N) ratio and how soil microorganisms prioritize fuel sources. While bark mulch is effective for suppressing weeds in perennial borders, its massive carbon load forces soil bacteria to scavenge available nitrogen from the top three inches of the root zone to fuel the decomposition process. This effectively robs your vegetables of the nitrates they need for leaf and fruit development. This is not just a theory; it is a chemical reality that I have measured with soil probes on dozens of failed residential sites. You see yellowed lower leaves and stunted growth not because of a lack of fertilizer, but because your mulch is literally stealing the food you just provided.
“The carbon-to-nitrogen ratio of most wood mulches is approximately 300:1 to 500:1. Because microorganisms need nitrogen to break down the carbon, they will pull it from the surrounding soil, making it unavailable to plants.” – Penn State Agricultural Extension
What is the best mulch for a vegetable garden?
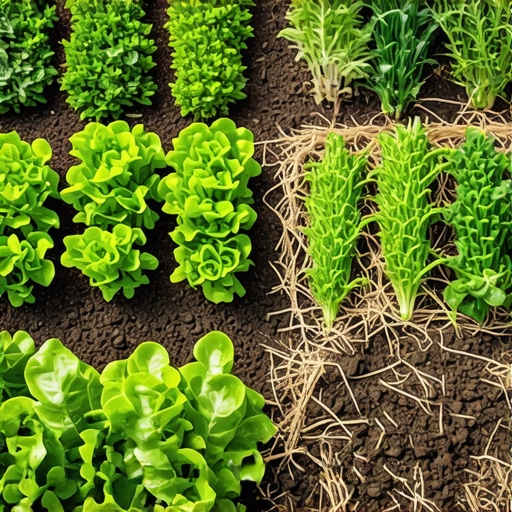
The best mulch for a vegetable garden is a material with a lower C:N ratio and high porosity, such as clean wheat straw, seedless salt hay, or aged leaf mold. These materials provide thermal insulation for the root zone while decomposing rapidly enough to contribute organic matter back into the soil during a single growing season without causing significant nitrogen immobilization.
Why shouldn’t you use bark mulch in vegetable beds?
You should avoid bark mulch in vegetable beds because its high lignin content creates a hydrophobic layer that can repel light irrigation and its slow decomposition rate interferes with the frequent planting and soil disturbance typical of annual gardening. Additionally, bark can harbor artillery fungi and lead to soil acidification over time, which is detrimental to pH-sensitive crops like legumes.
The Physics of the Garden Floor: Material Comparisons
In the world of high-end landscaping, we look at the bulk density and the gas exchange rate of any surface cover. Straw is the gold standard for a reason. Its hollow tubes create a stationary air layer, providing a R-value for the soil that bark simply cannot match. This regulates the soil temperature. If the soil temp swings more than 10 degrees in a day, your tomatoes stop producing. Bark is too dense; it traps heat during the day and releases it too slowly at night, cooking the delicate surface roots of shallow-feeding crops. We use straw because it allows the soil to breathe while maintaining a consistent 65 to 75-degree root environment.
| Mulch Type | C:N Ratio | Decomposition Speed | Main Benefit | Worst Failure |
|---|---|---|---|---|
| Clean Straw | 80:1 | Fast (1 season) | Thermoregulation | Weed seeds if low quality |
| Leaf Mold | 40:1 | Moderate | Nutrient density | Can compact if wet |
| Pine Bark | 500:1 | Very Slow | Durability | Nitrogen immobilization |
| Grass Clippings | 20:1 | Very Fast | Nitrogen boost | Matting/Anaerobic rot |
Every material has a purpose, but you must match the material to the biological cycle of the plant. A tomato plant is a 90-day sprint; a pine tree is a 100-year marathon. Don’t use marathon materials for a sprint crop. It will fail. I’ve seen it a thousand times.
Installation Protocol: The Master Landscaper’s Checklist
Before you spread a single flake of straw, you need to verify your infrastructure. I’ve seen $50,000 yard cleanups ruined because the irrigation wasn’t calibrated for the mulch depth. If you are installing a new garden, follow this checklist to ensure the environment is optimized for biological success.
- Check Drainage: Ensure the bed has a 1-2% grade to prevent water pooling under the mulch.
- Utility Marking: Always call 811 before installing irrigation lines or deep-staking for vertical crops.
- Pre-Irrigation: Saturate the soil to a depth of 6 inches before applying mulch to avoid creating a dry-pocket.
- Depth Calibration: Apply exactly 3 inches of loose straw. Any more and you risk anaerobic conditions; any less and the sun will germinate weed seeds.
- Nitrogen Buffer: Apply a light layer of compost or blood meal directly to the soil surface before mulching to offset any initial carbon shock.
“Soil temperature fluctuations of more than 10 degrees Fahrenheit in a 24-hour period can trigger root stress responses in Solanaceous crops, halting fruit production for up to 72 hours.” – Modern Agronomy Manual
Hydrostatic Pressure and Irrigation Integration
One aspect the DIY crowd ignores is the hydrostatic pressure and water tension within the mulch layer. When you use bark, the water often sits on top or runs off the sides due to its waxy cuticle. In a vegetable garden, we need vertical infiltration. Straw allows water to move through the stalks and reach the soil surface via capillary action. If you’re using drip irrigation, the emitters should be placed under the mulch. This prevents evaporation and ensures that the water-soluble nutrients reach the root flare directly. Don’t let your irrigation guy tell you otherwise. If the emitters are on top of wood chips, 40% of your water is lost to the atmosphere before it even hits the dirt.
Year One: The Settling-In Period
Expect your straw mulch to grey out and compress by 30% within the first sixty days. This is normal. It means the microbes are working. Unlike a hardscape project where we want zero settling, in a garden, settling is a sign of life. By the end of the season, you should be able to turn that straw directly into the soil. It becomes the structure for next year’s crop. If you had used bark, you would be left with hard nuggets that interfere with your spade and your seeds for the next three years. Quality landscaping is about the long-game. Build the soil, and the plants will take care of themselves. Skip the bark. Buy the straw. Your soil will thank you.