
The Forensic Diagnosis of a Failing Surface
Identifying an uneven lawn involves observing surface irregularities, drainage issues, and scalping patterns caused by a mower. These lumps are typically the result of soil compaction, thaw-freeze cycles, or subterranean pest activity that disrupts the soil profile and root architecture. I always drill into my new crew members: if you don’t fix the soil grading first, every plant you put in the ground is just expensive compost. I have seen guys spend 5000 dollars on a high end sod install only to lay it over a lumpy, clay-heavy mess. Within three months, the mower is scalping the high spots and the low spots are drowning in fungus. You do not build a house on a crooked foundation, and you do not build a lawn on bad dirt. A lumpy lawn is not just a cosmetic failure; it is a structural hazard for your turf grass. When your mower blades hit a high spot, they scalp the crown of the grass, shearing off the growth point and leaving the plant vulnerable to pathogens. In the low spots, water collects, leading to anaerobic soil conditions where roots literally drown due to a lack of oxygen. This creates a cycle of rot and patchy growth that no amount of fertilizer can fix. [image_placeholder_1]
The Physics of Soil Heaving and Settling
Soil heaving and settling are driven by hydrostatic pressure, organic matter decomposition, and the bulk density of the soil structure. In regions with heavy clay, the shrink-swell capacity of the soil causes it to expand when wet and contract during dry spells, creating a micro-topography of ridges and valleys. You have to understand the soil chemistry here. If you have pockets of buried debris, like old construction lumber or tree stumps, they will eventually rot. As that organic matter breaks down, the volume of the material decreases, and the surface soil collapses into the void. This is how you get those mysterious ankle-breaking holes in a yard that was once flat. Then there is the issue of frost heave. In colder climates, water in the soil freezes and expands by about nine percent. This expansion exerts enough force to push rocks and heavy soil upwards. Once the ice melts, the soil does not always settle back into its original position.
“Surface drainage is the most important factor in the longevity of any landscape installation; without a 2 percent slope away from structures, water will inevitably cause structural failure.” – Hardscape Engineering Axiom
How much modified gravel do I need for a patio base?
To calculate the amount of modified gravel needed, multiply the square footage by the desired depth in feet, then divide by 21.6 to convert to cubic yards. A standard 4 inch base for a pedestrian patio requires approximately 1.25 tons of crushed stone per 100 square feet. This calculation is vital because a thin base will lead to shifting and lumpy surfaces within two seasons. We use 2A modified or 3/4 inch minus gravel to ensure proper compaction and drainage. Anything less and you are asking for a sinking patio.
The Remediation: Top-Dressing and Leveling Mixes
Remediating a lumpy lawn requires the application of a top-dressing mix composed of sand, screened topsoil, and organic compost to fill low spots without smothering the rhizomes. The specific ratio of these materials depends on your existing soil texture and percolation rate. While the internet tells you to water every day, turf grass actually needs deep, infrequent watering, exactly 1 inch per week, to force roots to chase the water down. This makes the lawn more resilient to the drying out that causes soil cracking and lumps. For most lawns, a 70/30 mix of masonry sand and high quality topsoil is the gold standard. Sand provides the structural stability that does not compact easily, while the soil provides the nutrients and moisture retention needed for the grass to grow through the new layer. Do not use play sand; it is too fine and will pack down like concrete. You need sharp, angular sand, often called masonry sand or ASTM C33 sand, which allows for better air and water movement.
| Material Type | Best Use Case | Compaction Risk | Nutrient Content |
|---|---|---|---|
| Masonry Sand | Deep leveling (over 1 inch) | Very Low | Zero |
| Screened Topsoil | General grading | Moderate | Medium |
| Finished Compost | Soil biology boost | High (decomposes) | High |
| 70/30 Sand-Soil Mix | Fine leveling and health | Low | Medium |
The Step-by-Step Leveling Process
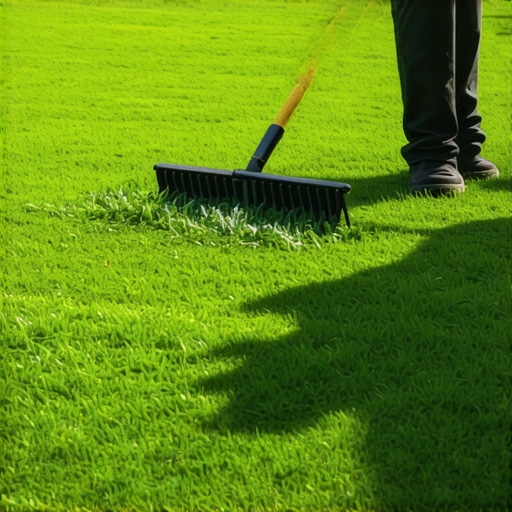
The process of leveling a lawn involves mowing the grass at its lowest setting, dethatching the surface, and broadcasting a leveling medium into the low points. You must use a leveling rake or a drag mat to ensure the material is distributed evenly across the micro-topography of the yard. Stop using lawn rollers. It is a common DIY mistake. A lawn roller does not fix bumps; it creates a compacted, anaerobic environment where grass roots suffocate and die. To do this right, follow this checklist:
- Mow the lawn to 1.5 inches or lower to expose the soil surface.
- Power rake or dethatch to remove the organic layer between the grass and the soil.
- Identify every low spot deeper than 0.5 inches.
- Spread the leveling mix in 0.25 inch layers.
- Use a 36-inch or 48-inch landscape rake to work the material down into the thatch.
- Apply a high-nitrogen starter fertilizer to encourage vertical growth through the sand.
- Irrigation should be light and frequent for the first 7 days to settle the material.
If the lumps are deeper than 2 or 3 inches, you cannot just dump sand on top. You will kill the grass. For those deep depressions, you have to use a spade to carefully cut a square of sod out, lift it up, fill the hole with a structural soil mix, and then place the sod back on top. We call this the “lift and fill” method. It is tedious, but it is the only way to fix a major hole without waiting a full season for new seed to take hold.
“Soil compaction is the primary physical constraint to turfgrass root growth, often reducing pore space below the 10 percent threshold required for gas exchange.” – Penn State Center for Turfgrass Science
What is the best sand for leveling a lawn?
The best sand for leveling a lawn is washed masonry sand or sharp sand, as it features angular particles that do not pack tightly, maintaining macropores for drainage. Avoid silica sand or play sand because their rounded particles settle too closely together, creating a compaction layer that prevents root penetration. Use sand that meets ASTM C33 standards for the best long term results in your yard cleanup and landscaping projects.
Year-One Maintenance and Settlement
Maintaining a level lawn requires consistent core aeration, top-dressing, and irrigation management to prevent the return of surface irregularities. After a major leveling job, the lawn will be in a state of flux for at least twelve months. The soil will settle. The microbes will begin breaking down the new organic matter. You need to keep a close eye on the bulk density. If you notice new dips forming, it is likely just the material settling into the air pockets you missed. A yard cleanup in the fall is the perfect time to do a follow-up fine leveling. Remove all debris, as a single leaf left under a pile of sand will rot and create a new void. This is not a one-and-done project. It is an ongoing battle against the physics of the earth and the biology of the grass. But once you get that surface true and flat, your mower will glide over it, your drainage will improve, and your grass will finally have the foundation it needs to thrive.