
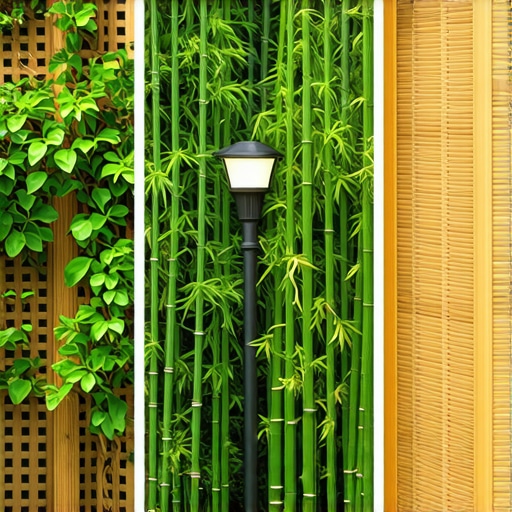
Engineering Privacy: Why Backyard Screening Is More Than Just a Fence
Privacy screening involves strategic biomass placement and structural engineering to create visual barriers. Successful installs require analyzing soil drainage, prevailing wind loads, and root zone expansion to prevent systemic plant failure or fence collapse within three years of installation. I always drill into my new crew members: if you don’t fix the soil grading first, every plant you put in the ground is just expensive compost. I have seen countless homeowners drop ten thousand dollars on a row of Thuja Occidentalis only to watch them turn into brown sticks because the drainage was so poor the roots literally drowned in a subterranean bathtub of heavy clay. You cannot fight physics. Before we even talk about aesthetic choices for 2026, we have to talk about the dirt. If your yard has a high bulk density or poor percolation, your privacy screen will fail before the first frost. Most of the hacks in this industry will just dig a hole, throw in some cheap potting soil, and collect their check. That is not how we operate. We look at the hydrostatic pressure and the soil pH because a screen is a long term investment in your property value.
The Layered Native Hedgerow Strategy
Utilizing multi-species native shrubbery creates a resilient, cost-effective barrier that mimics natural woodland edges. By staggering heights and growth rates, homeowners achieve year-round opacity without the high maintenance costs or pest vulnerability associated with single-species monocultures like Arborvitae. This approach uses the ecological niche concept. We use a primary layer of evergreens for year round density, backed by a secondary layer of deciduous shrubs that provide width and structural complexity. When we install a native hedge, we are looking at the USDA Hardiness Zones and selecting plants that can handle the 2026 climate volatility. We avoid the big box store specials. We want nursery stock with healthy root flares. Don’t bury that flare. If you bury the root flare, you invite girdling roots and trunk rot. It is a death sentence. We also implement drip line irrigation with pressure compensating emitters to ensure deep water penetration without wasting a gallon. Overhead watering is for amateurs. It breeds fungus. We want the water at the roots where the mycorrhizal fungi can actually use it to help the plant establish a massive root system.
“The primary cause of plant death in urban landscapes is not lack of water, but rather poor soil aeration and the resulting anaerobic conditions.” – Penn State Agricultural Extension
How far apart should I plant privacy trees?
Spacing depends entirely on the mature width of the specific cultivar and your target timeline for a closed canopy. Generally, for a dense screen, you space plants at 75 percent of their mature spread, ensuring enough airflow to prevent powdery mildew and spider mite infestations. For instance, if a shrub grows 8 feet wide, you plant them on 6 foot centers. This forces the growth outward and upward into each other, creating a solid wall of foliage. If you plant them too close, you get resource competition and the bottom branches will die off due to lack of sunlight, leaving you with a privacy screen that has a massive hole at eye level. We call that ‘leggy’ growth, and it is a sign of a bad install. We also look at the prevailing wind. If you are in a high wind corridor, we might stagger the plants in two rows, creating a zig zag pattern. This breaks up the wind pressure and prevents the entire screen from acting like a sail and blowing over in a storm.
Engineered Trellis Systems with Perennial Climbers
Combining pressure-treated timber frames with high-tensile wire mesh allows for vertical privacy in tight spaces. Selecting aggressive but non-invasive climbers ensures rapid coverage, while the structural base resists wind shear and hydrostatic soil pressure better than traditional privacy fencing. This is the ultimate move for small backyards where every square inch of sod install counts. We start with 4×4 posts set at least 36 inches deep, depending on the local frost line. If you don’t get below the frost line, the ground will heave your posts out like a bad tooth. We use a 3000 PSI concrete mix for the footings, but we don’t bring the concrete all the way to the surface. We leave two inches for soil so the grass can grow right up to the post. For the infill, we use cattle panels or heavy duty hog wire. These are cheap, incredibly strong, and they won’t rot like wood lattice. Then we plant something like Clematis armandii or a native honeysuckle. These plants use thigmotropism to climb the wire, and within two seasons, you have a solid green wall that is only six inches thick.
| Screen Type | Est. Cost per Linear Foot | Maintenance Level | Est. Years to Maturity |
|---|---|---|---|
| Native Hedgerow | $45 – $85 | Moderate (Pruning) | 3 – 5 Years |
| Trellis + Climber | $30 – $60 | Low (Training) | 2 Years |
| Earth Berm + Mixed | $90 – $150 | High (Irrigation) | 4 – 6 Years |
What is the best soil for privacy hedges?
The best soil is a well draining loam with an organic matter content of at least 5 percent and a pH between 6.0 and 7.0. If you have heavy clay, we amend the entire planting area, not just the hole, with expanded shale or compost to break up the structure and improve pore space. Adding organic matter to a single hole in clay creates what we call the ‘pot effect’ where water enters the hole but cannot escape into the surrounding heavy soil. This results in root rot. We test the soil before we touch a shovel. You need to know your cation exchange capacity (CEC) to understand how well your soil holds onto nutrients. If the CEC is low, you need to be more aggressive with your fertilization schedule using a slow release organic NPK fertilizer. We don’t use that cheap liquid stuff that just leaches into the groundwater. We want sustained nutrient release that builds the soil biology over time.
The Earth Berm and Mixed Evergreen Approach
Creating engineered soil berms provides immediate height advantage for smaller, cheaper nursery stock. This method improves site drainage and utilizes bulk organic matter to accelerate root establishment, making it the most cost-effective long-term solution for large-scale property perimeters. A berm is basically a man made hill. But you can’t just pile up dirt. You have to layer it and compact it properly so it doesn’t wash away in the first rainstorm. We use a 3 to 1 slope ratio to prevent erosion. We often incorporate a French drain at the base of the berm to manage the runoff. If you don’t manage the runoff, you are just pushing your drainage problem onto your neighbor, which is a great way to end up in a lawsuit. Once the berm is shaped, we top it with a thick layer of hardwood mulch. No dyed mulch. That stuff is garbage. We want natural mulch that breaks down and feeds the soil microbes. Then we plant a mix of conifers and broadleaf evergreens. The height of the berm gives you a 3 foot head start, meaning you can buy smaller, cheaper plants that actually establish faster and healthier than large, root bound B&B (ball and burlap) trees.
“A retaining wall doesn’t fail because of the stone; it fails because of the water trapped behind it.” – Hardscape Engineering Axiom
- Step 1: Call 811 to mark all underground utilities. Never skip this.
- Step 2: Conduct a percolation test to determine drainage speed.
- Step 3: Remove all existing invasive species and weeds during a thorough yard cleanup.
- Step 4: Amend soil based on lab results, not guesswork.
- Step 5: Install irrigation lines before the plants go in.
- Step 6: Set plants, ensuring the root flare is visible above grade.
- Step 7: Apply 3 inches of organic mulch, keeping it away from the trunks.
Proper maintenance is the final piece of the puzzle. You can’t just plant and walk away. You need a maintenance schedule. We check the irrigation emitters once a month to ensure they aren’t clogged with mineral deposits. We look for signs of chlorosis which indicates a nutrient deficiency or a pH imbalance. We also do targeted pruning to encourage dense growth. Most homeowners wait until a plant is overgrown to prune it. That is a mistake. You want to do light, frequent pruning to stimulate the lateral buds. This makes the screen thicker and more effective. If you follow these engineering principles, your privacy screen will be the talk of the neighborhood by 2026. It will be a functional, biological asset that solves your privacy issues without the constant repairs of a cheap fence. Stop thinking like a gardener and start thinking like an engineer. The soil is your foundation. The plants are your structure. Treat them with the respect they deserve.