
I always drill into my new crew members: if you do not fix the soil grading and irrigation delivery first, every plant you put in the ground is just expensive compost. I remember an apprentice, eager but green, who spent three hours trying to ‘revive’ a wilting Japanese Maple with high-nitrogen spikes. He did not realize the 2 GPH emitter was completely calcified. The tree was not hungry; it was thirsty. In the world of high-end landscaping, we do not guess. We measure the flow, check the PSI, and clear the line. A clogged emitter is not just a nuisance; it is a systemic failure that leads to localized drought stress and eventual root death. If you are managing a recent sod install or a complex yard cleanup, understanding the mechanics of your drip system is the difference between a thriving site and a warranty claim. Irrigation is hydraulic engineering at the micro-scale.
Identifying a Clogged Drip Emitter Before Your Plants Die
To identify a clogged drip emitter, look for dry soil circles around the plant base, salt crusting on the emitter head, or brittle foliage despite neighboring plants appearing turgid. A moisture meter or a simple finger test 2 inches below the mulch line will confirm hydraulic delivery failure.
When we perform a forensic autopsy on a failing landscape, the irrigation system is our first suspect. A drip system relies on consistent pressure—usually regulated to 25 or 30 PSI—to push water through small orifices or tortuous paths inside the emitter. When those paths are blocked by physical debris, biological slime, or mineral deposits, the flow stops. You will see the soil surface remain bone-dry while the rest of the zone is damp. Do not wait for the plant to wilt. Check the emitters. It takes seconds. If the tubing feels pressurized but the emitter is dry, you have a blockage. Do not ignore it. It will rot.
“A drip irrigation system is only as reliable as its filtration and its maintenance schedule. Neglecting the mesh filter leads to inevitable lateral line failure.” – Agricultural Extension Irrigation Standards
How do I know if my drip emitter is clogged?
Look for the ‘salt halo.’ In areas with hard water, calcium and magnesium deposits leave a white, crusty residue around the emitter opening. If you see this crust and no water flow, the internal diaphragm is likely locked. Another sign is ‘sweating’ at the barb connection. If water is leaking from where the emitter plugs into the 1/2-inch poly tubing but not coming out of the hole, the back-pressure from a clog is forcing a leak at the weakest point. Fix it now.
The Fast Fix: How to Clear an Emitter in Seconds
The fastest way to fix a clogged drip emitter is to use a thin wire to clear physical debris, or to perform a ‘flick and flush’ by snapping the emitter head against the tubing while the system is under pressure to dislodge sediment.
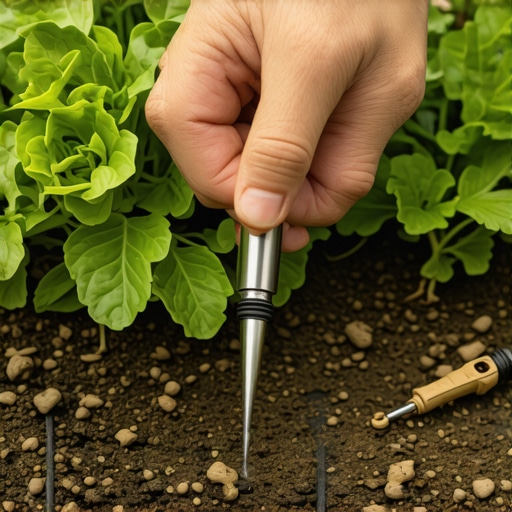
If you are in the field and need a 10-second fix, use a 12-gauge wire or a heavy-duty paperclip. Poke it into the exit hole. This often breaks up the mineral bridge or pushes back a grain of sand. If that fails, try the ‘pressure snap.’ Pull the emitter slightly away from the ground and let it snap back. The vibration under active water pressure can sometimes jar the internal diaphragm loose. However, as a professional, I tell my crew that if a $0.50 emitter is failing, the most efficient ‘seconds-long’ fix is a total replacement. We carry a bag of 1 GPH and 2 GPH pressure-compensating (PC) emitters on every yard cleanup. Cut the old one out, plug the hole with a goof plug if necessary, or simply pop a new one in an inch away. It is faster than cleaning.
| Emitter Type | Common Cause of Clog | Best Repair Method | Durability Level |
|---|---|---|---|
| Non-Compensating | Sand/Silt Debris | Wire Probe / Line Flush | Low |
| Pressure Compensating (PC) | Mineral Build-up | Replacement | High |
| Adjustable Bubbler | Algae/Biofilm | Twist-Open & Flush | Moderate |
| In-line Emitter Tubing | Root Intrusion | Section Replacement | High |
How do you clean drip irrigation emitters with vinegar?
For high-value emitters or specialized components, a 24-hour vinegar soak dissolves calcium carbonate. This is not practical for a whole yard, but for a manifold that is acting up, the acetic acid breaks down the scale. Rinse thoroughly before re-installing. For large-scale issues, we inject acid treatments into the main line, but that is a job for a licensed contractor. Do not DIY acid injection. You will kill your sod install.
The Physics of the Clog: Why Your Irrigation System is Failing
Irrigation clogs occur due to three main factors: physical particulates like sand or rust, biological growth such as algae or bacterial slime, and chemical precipitation where minerals like iron or calcium fall out of solution and solidify within the emitter’s narrow channels.
Most homeowners overlook the filtration. If you do not have a 150-mesh filter at your valve, you are asking for trouble. Small grains of sand from a municipal line or rust from old galvanized pipes will find their way into your 1/4-inch micro-tubing. Once there, they act like a dam. Then there is the biological aspect. In warm weather, if your lines are not buried deep enough, the water inside heats up, turning the poly tubing into an incubator for algae. This slime coats the internal labyrinth of the emitter, reducing flow until it hits zero. This is why we insist on burying lines or covering them with at least 3 inches of mulch. Sunlight is the enemy. It fuels the bloom.
“Hydrostatic pressure must be maintained consistently across the lateral; variations in pressure often lead to sediment settling at the lowest elevation emitters.” – ICPI Hardscape and Irrigation Manual
Preventative Maintenance for Long-Term Landscape Health
Preventing clogs requires a three-step protocol: installing a high-quality 150-mesh filter, flushing the lateral lines every six months by opening the end caps, and inspecting emitter flow during every seasonal yard cleanup to ensure the NPK balance in the soil remains effective.
- Flush the Lines: Every spring, open the end caps of your 1/2-inch poly lines and run the water for two minutes. You will be shocked at the brown sludge that comes out.
- Check the Filter: Unscrew your filter canister monthly. If it is slimy or gritty, your emitters are next.
- Monitor the PSI: Use a pressure gauge. If your pressure is over 40 PSI, you are blowing out the internal diaphragms of your PC emitters. Install a regulator.
- Mulch Management: Keep mulch off the actual emitter head. Soil contact encourages root intrusion, where tiny root hairs grow into the emitter looking for the water source.
When we do a fresh sod install, the irrigation is the heartbeat of the project. If the drip fails, the perimeter of the sod dries out, the seams pull apart, and the whole investment shrinks. A quick check of the emitters is not just ‘maintenance’; it is insurance. Don’t be the guy who loses a $20,000 landscape because of a $0.50 piece of plastic. Check your flow. Keep your hands in the dirt. Stay sharp.