The Hard Reality of Gravity: Why Slope Landscaping Fails
Installing sod on a slope is a game of civil engineering, not just aesthetics. Most homeowners think they can simply unroll grass like a carpet and gravity will respect their effort. It will not. Without mechanical stabilization, a heavy rain transforms your new turf into a sliding mass of mud and expensive organic waste. I always drill into my new crew members: if you don’t fix the soil grading and secure the root zone first, every plant you put in the ground is just expensive compost. I have spent two decades fixing the messes left by contractors who don’t understand shear stress and hydrostatic pressure. The first rule of the dirt is that water always wins unless you give it a pre-engineered path. Success on an incline requires a deep dive into soil physics and root architecture.
Understanding the Physics of Sloped Sod
To successfully install sod on a slope, you must counter gravitational pull and surface runoff velocity by using staggered seams and mechanical anchors such as sod staples or wooden pegs. This prevents the turf from sliding down the hill before the roots can penetrate the subgrade and create a natural biological bond. This is not optional for any grade over 25 percent.
“The primary cause of failure in slope stabilization is the lack of intimate contact between the vegetative cover and the underlying soil, leading to rill erosion.” – USDA NRCS Soil Mechanics Manual
The Grading and Soil Preparation Protocol
Before the first roll of sod arrives, the subgrade must be prepared with the precision of a foundation. Most “mow-and-blow” hacks just rake the surface. You need to scarify the soil. If the ground is as hard as concrete, those roots will just sit on top, waiting for a rainstorm to wash the whole sheet away. We use a Harley rake or a heavy-duty tiller to break up the top 4 inches. This creates a porous interface. Next, check your pH. Turf grass generally thrives between 6.0 and 7.0 pH. If your soil is heavy clay, you are dealing with high bulk density and low infiltration rates. Add gypsum to break up the ionic bonds in the clay or high-quality compost to introduce pore space. Do not over-compact. You want the soil firm enough that your boot leaves a footprint no deeper than a quarter-inch, but loose enough for a root hair to penetrate.
How much soil amendments do I need for a slope?
Calculating soil amendments for a slope requires measuring the total square footage of the incline and multiplying by the depth of the desired root zone (usually 4 to 6 inches). For a standard 1,000 square foot slope, applying a 2-inch layer of organic compost requires approximately 6 cubic yards of material to be tilled into the existing subgrade for optimal stability.
The Installation Strategy: The Staggered Brick Method
We never lay sod parallel to the slope. We lay it perpendicular. Think like a bricklayer. If you align the seams, you create a natural gutter for water to accelerate. Once water finds a straight line, it gains velocity, creates a rill, and eventually a gully. By staggering the joints, you force the water to weave back and forth, slowing its descent and encouraging infiltration. Every piece must be butted tightly against its neighbor. No gaps. Gaps are where the failure starts. If you see a gap, you fill it with a mix of topsoil and seed, or you re-lay the piece. Don’t stretch the sod. Stretched sod shrinks as it dries, creating those fatal gaps.
| Anchor Type | Material Composition | Recommended Grade | Primary Benefit |
|---|---|---|---|
| Standard Sod Staple | 11-Gauge Steel | Up to 3:1 Slope | Low cost, easy installation |
| Biodegradable Stake | PLA/Cornstarch Polymer | Up to 2:1 Slope | No removal needed, eco-friendly |
| Wooden Lath Peg | Untreated Hardwood | Steeper than 2:1 | Maximum shear resistance |
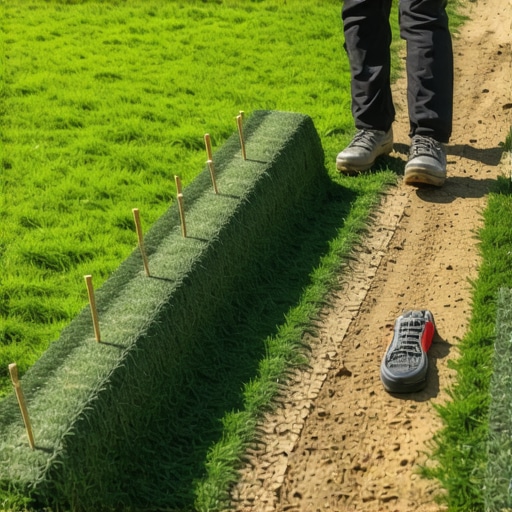
Mechanical Anchoring: The Pegging Process
This is where the amateur fails. Pegging is not just about sticking a pin in the ground. It is about pinning the sod to the subgrade to prevent the “carpet slide.” For steep hills, we use 6-inch to 8-inch stakes. You place at least two to three stakes per piece of sod. Drive them in at an angle facing uphill. This creates a counter-force against gravity. The head of the stake must be flush with the sod surface but not burying the crown of the grass. If the stake is too high, it becomes a projectile for your mower blade. If it is too low, it fails to hold the mat. On extreme grades, I have my crew use 12-inch wooden stakes driven into the center of the roll. It is labor-intensive. It is necessary. If the soil is sandy, steel staples will pull right out; you need the surface area of a wooden peg to provide friction.
How do I prevent sod from drying out on a hill?
To prevent sod from drying out on a hill, you must implement cycle-and-soak irrigation, which involves watering for short durations (5-8 minutes) several times a day to prevent hydrophobic runoff. This ensures the water penetrates the uphill sections and reaches the root zone without washing away the topsoil or dislodging the newly installed pegs.
Irrigation and the Hydrostatic Challenge
Water management on a slope is a paradox. You need water to establish the roots, but water adds weight. A saturated piece of sod is significantly heavier than a dry one. If you over-water a steep slope before the roots have taken hold, the sheer weight of the water can cause a catastrophic slide. We use a “low and slow” approach. Use high-efficiency rotary nozzles that deliver water at a slower rate than the soil’s infiltration capacity. If you see water pooling at the bottom of the hill, you have failed. The top of the hill will always dry out first because of gravity and sun exposure. You may need to hand-water the top 5 feet of the slope while the bottom remains moist from runoff. It is a balancing act. Use a soil moisture meter. Don’t guess. Aim for 1 inch of water per week, delivered in small, frequent doses during the first 14 days.
“A retaining wall doesn’t fail because of the stone; it fails because of the water trapped behind it.” – Hardscape Engineering Axiom
Post-Installation Cleanup and Care
Once the sod is pegged and watered, the work is not over. You need to roll it. Use a water-filled lawn roller to press the sod into the soil. This eliminates air pockets. Air is the enemy of roots. If a root hits an air pocket, it dies. On a slope, you have to be careful with a roller. Do not roll vertically; you risk pulling the sod down. Roll horizontally across the face of the slope. After the first 21 days, tug on the grass. If you feel resistance, the roots have successfully knit into the subgrade. At this point, you can stop the frequent watering and transition to deep, infrequent soaking. This forces the roots to grow deeper into the soil profile to find moisture, which further stabilizes the hill. The stakes can usually stay in the ground. If you used biodegradable ones, they will disappear. If you used steel, the grass will grow over them, and they will eventually rust away. Just ensure they are deep enough to clear the mower deck.
Sod Slope Installation Checklist
- Calculate slope percentage to determine pegging frequency.
- Kill off all existing vegetation using a non-selective herbicide 10 days prior.
- Scarify subgrade to a depth of 4 inches for root penetration.
- Order fresh-cut sod (delivered and installed within 24 hours).
- Lay sod perpendicular to the slope in a staggered pattern.
- Drive stakes at an uphill angle, 3 per piece.
- Roll the area horizontally to ensure soil-to-root contact.
- Set irrigation to cycle-and-soak to prevent runoff.