
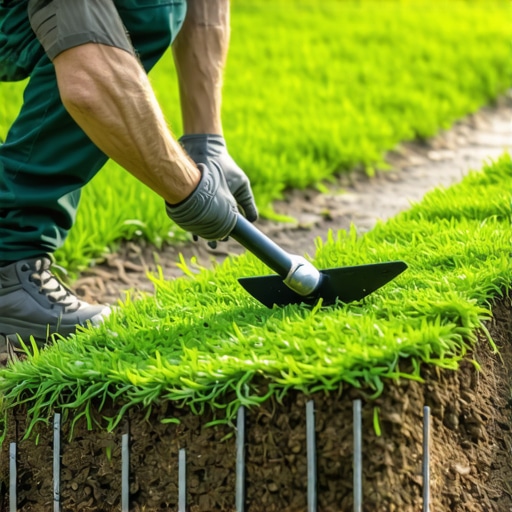
Installing 2026 Sod on Slopes: Professional Grading and Sod Staple Engineering
I always drill into my new crew members: if you don’t fix the soil grading first, every plant you put in the ground is just expensive compost. Last season, I watched a competitor lay forty pallets of premium fescue on a 35-degree incline without a single anchor. Three weeks later, a heavy spring rain turned that hillside into a green landslide that ended up in the homeowner’s pool. It was a $15,000 mistake that could have been avoided with $200 worth of steel staples and a little respect for physics. Landscaping is not about aesthetics; it is about managing water and gravity. When we talk about 2026 sod installations, we are dealing with high-density cultivars designed for drought resistance, but their heavy root mats mean they are prone to ‘bridging’ on uneven slopes. If that sod does not touch the dirt, it dies. Period.
The Physics of Sloped Sod Installation
Installing sod on a slope requires anchoring with 6-inch 11-gauge steel staples and ensuring 100% soil-to-root contact to prevent bridging and washout. Failure to secure the turf results in root desiccation and hydrostatic slide during heavy rainfall events. When you lay a piece of sod on a hill, gravity is constantly trying to pull the weight of the water-saturated grass downward. Without mechanical intervention, the friction between the soil and the sod backing is rarely enough to hold it in place. You must think of staples as the ‘rebar’ of your lawn. They provide the temporary shear strength needed while the roots undergo the biological process of knitting into the native soil. This process takes 14 to 21 days under ideal conditions, but longer if the soil temperature is below 55 degrees Fahrenheit.
How many sod staples do I need per square yard on a hill?
On a standard 2:1 slope, you should expect to use 15 to 20 staples per square yard to prevent slippage and ensure the sod remains flush against the grade. For gentler slopes, a ‘staggered five’ pattern—one in each corner and one in the center—is sufficient. However, as the gradient increases, you must move to a ‘grid’ pattern where staples are placed every 6 to 10 inches along the seams. Seams are your weakest point. If water gets under a seam, it creates a lubricated layer of mud, and the entire sheet will slide. I tell my guys to overlap the staples across the seams, effectively ‘stitching’ the two pieces of sod together. It is tedious work. Your knees will hurt. Do it anyway.
| Slope Gradient | Staple Spacing (Inches) | Staples per Sq Yard | Soil Type Adjustment |
|---|---|---|---|
| 0-15 Degrees | 24 | 4-6 | Standard 11-gauge | 16-30 Degrees | 12 | 10-12 | Increase for Sandy Loam | 31-45 Degrees | 6-8 | 18-22 | Use 8-gauge 10-inch staples |
What is the best way to lay sod on a steep incline?
The only professional way to lay sod on an incline is to work horizontally across the slope in a ‘running bond’ pattern, similar to how a mason lays bricks. Never lay sod vertically (up and down the hill). When you stagger the vertical seams, you prevent water from creating long, straight ‘rills’ or channels that erode the soil underneath the grass. Start at the bottom of the hill (the toe) and work your way up. This allows the bottom row to act as a physical ‘shelf’ for the rows above it. If you start at the top, the weight of the upper rows will push down on the lower ones, causing buckling and air pockets. Air pockets are the enemy of root development. If there is air, the roots will air-prune and die.
“Erosion control on slopes greater than 3:1 requires mechanical stabilization of the vegetative cover until root establishment occurs.” – USDA Natural Resources Conservation Service
The Ground-Up Build: Materials and Preparation
Before a single staple is driven, the soil must be prepared. This is where most ‘mow-and-blow’ contractors fail. They scrape the weeds, throw down some starter fert, and call it a day. That is negligence. You need to test the pH. If you are dealing with heavy clay, your sod will struggle to penetrate the surface. You need to core aerate or tilling in organic matter to break up that compaction. For a 2026-spec install, I recommend a 70/30 blend of screened topsoil and compost. This provides the pore space necessary for oxygen exchange at the root zone. Remember, roots do not just need water; they need to breathe. If the soil is too tight, you get anaerobic conditions, and your expensive sod will rot from the bottom up.
- Grade Check: Use a transit level to ensure water moves away from foundations.
- Moisture Prep: Lightly damp the soil before laying sod; never lay on bone-dry, hydrophobic earth.
- Staple Selection: Use 11-gauge steel. Avoid plastic stakes; they break and do not provide the same tension.
- The Mallet Rule: Drive staples flush with the soil surface so they do not catch mower blades later.
The Technical Reality of Hydrostatic Pressure
Water behaves differently on a slope. It gains velocity. This velocity creates hydrostatic pressure that can lift the sod right off the ground. By using sod staples, you are increasing the ‘roughness’ of the subsurface, breaking up the laminar flow of water beneath the turf. This is why yard cleanup and irrigation timing are critical post-install. You cannot just blast a new hill with a sprinkler. You need ‘low and slow’ irrigation. Use MP Rotator heads that apply water at a rate slower than the soil’s infiltration rate. If you see runoff, stop. You are wasting water and risking your install. Deep, infrequent watering is the goal once the roots have established, but for the first ten days, you are just keeping the mat damp to prevent shrinkage.
“The tensile strength of the sod mat is insufficient to resist gravitational shear stress on steep inclines without auxiliary anchoring.” – Hardscape Engineering Axiom
Maintenance and The Settling-In Period
In year one, a sloped lawn is fragile. Do not even think about putting a heavy zero-turn mower on it for at least six weeks. Use a push mower and cut at the highest setting. You want long blades to shade the soil and reduce evaporation. If you scalp a hill, you are asking for the sun to bake the soil and kill the microbial life you just tried to establish. Keep an eye on the staples. In some soils, freeze-thaw cycles can ‘heave’ them out. If you see a staple head sticking up, hammer it back down. It is a five-minute fix that saves a $400 mower blade. High-quality landscaping is a marathon, not a sprint. Do the prep. Use the steel. Respect the grade.