
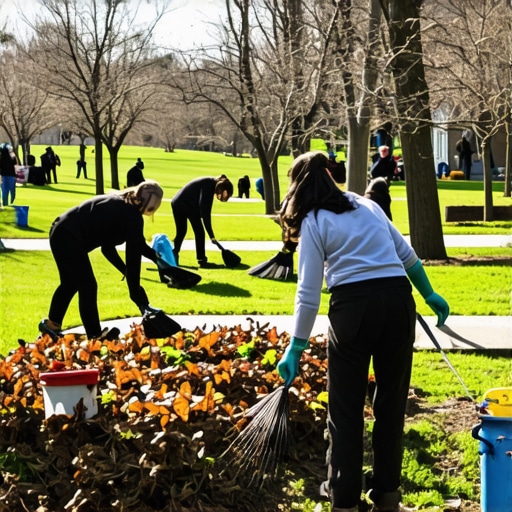
Preparing the Landscape Foundation for 2026
A professional March yard cleanup focuses on five critical tasks: soil chemistry analysis, mechanical aeration, pre-emergent weed control, irrigation system auditing, and structural grading for new sod installation. By addressing these technical requirements before the spring growth surge, you prevent root rot, minimize fungal pathogens, and ensure the long-term structural integrity of your hardscape and turf areas.
I always drill into my new crew members: if you don’t fix the soil grading first, every plant you put in the ground is just expensive compost. I have seen too many rookies spend $5,000 on high-end nursery stock only to watch it drown in a low spot because they were too lazy to check the fall of the land with a transit. Professional landscaping is about managing water and chemistry. If you ignore the physics of the site, nature will win every single time. It is not about making things look pretty; it is about building a biological machine that works. Most homeowners see a yellow patch and reach for a bag of 10-10-10 fertilizer. That is a mistake. You might be dumping nitrogen into a soil that is already locked up because the pH is sitting at 5.2. You are just wasting money and burning the roots. We do things differently because we understand the microscopic reality of the yard.
Why Soil pH Dictates Your Entire Spring Success
Soil testing in early March identifies the specific Cation Exchange Capacity (CEC) and pH levels to determine if lime or sulfur applications are necessary for nutrient availability. Most turfgrass species require a pH between 6.2 and 7.0 to properly metabolize nitrogen, phosphorus, and potassium. Without this balance, your fertilizer remains trapped in the soil, unavailable to the plant.
“Soil pH is a primary factor in nutrient availability. When pH drops below 6.0, the availability of nitrogen, phosphorus, and potassium decreases significantly, often leading to nutrient deficiencies despite adequate fertilization.” – Agricultural Extension Service Manual
1. Core Aeration and Thatch Management
Mechanical core aeration in March relieves soil compaction by removing half-inch diameter plugs, allowing oxygen, water, and nutrients to penetrate the root zone. This process is essential for breaking up the thatch layer, which should never exceed a half-inch in thickness. Excessive thatch acts as a hydrophobic barrier. It prevents water from reaching the soil. It also harbors pests like chinch bugs. We use heavy-duty aerators that pull at least nine holes per square foot. If your aerator is just poking holes without removing cores, you are actually increasing compaction around the hole. Don’t do it. Use a machine that pulls a plug at least three inches deep. This is where the biology happens. It forces the roots to dive deeper, which protects the plant when the July heat waves hit. It is about building resilience now. It will save the lawn later.
2. Pre-Emergent Application and Soil Temperature
Applying pre-emergent herbicides in March creates a chemical barrier that stops crabgrass and other broadleaf weeds from germinating as soil temperatures reach 55 degrees Fahrenheit. You must track the soil temperature at a two-inch depth for three consecutive days. If you wait until you see the weeds, you have already lost the battle. We typically use Dithiopyr or Pendimethalin. These chemicals interfere with the enzyme production in the seedling. It kills the weed before it ever breaks the surface. But beware of the dosage. Over-application can lead to root stunting in your desirable turf. Follow the label. Exact measurements are the difference between a clean lawn and a dead one.
| Task Type | Recommended Material | Target Metric |
|---|---|---|
| Fertilization | Slow-release Polymer Coated | 1 lb Nitrogen per 1,000 sq ft |
| Weed Control | Dithiopyr Pre-emergent | 55°F Soil Temperature |
| Soil Amendment | Pelletized Dolomitic Lime | Target pH 6.5 |
| Aeration | Core Aerator | 3-inch plug depth |
3. The Irrigation System Hydraulic Audit
A March irrigation audit involves pressurizing the lines, checking for frost-damaged lateral pipes, and calibrating sprinkler head arc patterns for even distribution. We look for ‘head-to-head’ coverage. If your spray pattern doesn’t reach the next head, you will have dry spots. We also check the static and dynamic pressure. If your PSI is too high, the water atomizes into a mist and blows away. If it is too low, the heads won’t pop up.
“Irrigation efficiency is not just about how much water you apply, but the uniformity of the application. Poor distribution leads to localized dry spots and increased fungal pressure in over-watered areas.” – ICPI Hardscape Engineering Axiom
How much modified gravel do I need for a patio base?
Calculating gravel for a hardscape base requires multiplying the total square footage by the desired depth in feet, then dividing by 27 to find cubic yards. For a standard pedestrian patio, a 4-inch compacted base of 21A or CR-6 modified stone is the minimum requirement for stability. For driveways or areas with heavy clay, you must increase this to 6 or 8 inches. You then multiply the cubic yardage by 1.5 to account for compaction. If you don’t compact in two-inch lifts, the base will settle. The pavers will shift. It will fail. Use a plate compactor with at least 3,000 lbs of centrifugal force. Don’t skip the geotextile fabric between the subgrade and the stone. It prevents the soil from migrating into your clean stone. It is a simple step that doubles the life of the install.
4. Structural Grading and Site Drainage
Correcting yard drainage in March prevents hydrostatic pressure buildup and ensures that water moves away from the home foundation at a minimum slope of two percent. This is where the transit comes out. We identify low spots where water ponds. We install French drains or catch basins if the natural grade isn’t sufficient. Use 4-inch perforated PVC pipe, not the cheap corrugated black tubing. The corrugated stuff clogs with roots and silt within three years. Use solid pipe for the discharge. Surround the perforated pipe with clean #57 stone and wrap it in a silt sock. Do it right the first time. It is cheaper than digging it up in 2029.
5. Professional Sod Install Prep
Preparing for a March sod install requires tilling the soil to a depth of six inches, removing all debris, and incorporating organic compost to improve soil structure. You want a firm but not compacted seedbed. We use a landscape rake to create a smooth surface. If you can leave a footprint deeper than a quarter-inch, the soil is too loose. The sod roots need tight contact with the soil. Any air pockets will kill the grass. We roll the sod with a water-filled roller immediately after laying it. This eliminates those air gaps. It ensures the capillary action can pull water from the soil into the roots. Water it twice a day for the first fourteen days. Don’t walk on it. Let the roots knit.
Is it too early to install new sod in March?
Installing sod in March is highly effective as long as the ground is not frozen, as the cool temperatures and high spring moisture promote rapid root establishment without the stress of summer heat. However, you must ensure the soil is dry enough to grade without creating ‘clods’ or destroying the soil structure. If the soil sticks to your boots, it is too wet to work. Wait for a dry window. Patience saves the project.
The Essential March Cleanup Checklist
- Test soil pH and nutrient levels via a certified lab.
- Remove leaf litter and winter debris from planting beds.
- Prune ornamental grasses and summer-flowering shrubs before new growth starts.
- Apply pre-emergent herbicide when soil hits 55 degrees.
- Inspect and clean all irrigation filters and nozzles.
- Edge all garden beds to a 3-inch depth for clean definition.
- Apply a 2-inch layer of double-shredded hardwood mulch, keeping it away from tree flares.