
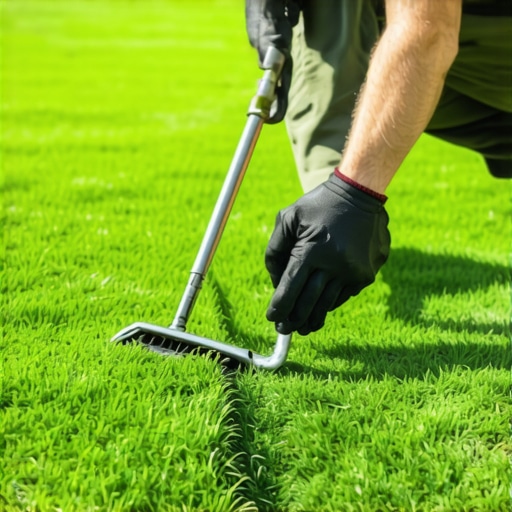
The Forensic Autopsy of Dying Sod Seams
To stop 2026 sod edges from browning, you must eliminate the air pockets at the seams by using the tucking tactic, which involves physically pressing the edge of the new sod install into the soil and beneath the existing turf line to prevent root desiccation. This mechanical seal prevents the wicking of moisture from the delicate root zone. It is the difference between a failed project and a permanent lawn.
I always drill into my new crew members: if you don’t fix the soil grading first, every plant you put in the ground is just expensive compost. Last season, I walked onto a job site where a homeowner had spent four thousand dollars on premium fescue. Within six days, the perimeter looked like toasted tobacco. They thought they had a fungus. They didn’t. They had air gaps. The edges were sitting high, catching the wind, and the irrigation water was just running off the high spots instead of soaking into the roots. I had to explain that a sod blade is like a straw; if the bottom isn’t submerged in wet soil, it just sucks air until the cell walls collapse.
“Successful turfgrass establishment depends on maximizing soil-to-root contact and minimizing the exposure of the cut edges to atmospheric drying.” – Texas A&M Agrilife Extension
The Physics of Edge Desiccation
When you perform a landscaping project involving sod, the edge is the most vulnerable point. It is a raw, open wound where the root system has been severed by a sod cutter. If that edge is left exposed, the moisture inside the plant’s vascular system—the xylem and phloem—evaporates at an accelerated rate. This is called the wicking effect. The surrounding dry soil or the air itself pulls moisture out of the sod piece faster than the irrigation system can replace it. You aren’t just watering the grass; you are fighting the laws of thermodynamics.
The Tucking Tactic: A Step-by-Step Mechanical Seal
The tucking tactic is a specialized sod install technique where the installer uses a spade or a hand-trowel to bevel the soil at the edge of the installation area and manually presses the sod margin downward into a sealed pocket. This ensures that the cut edge of the sod is entirely encased in moist earth, preventing air from reaching the roots. It creates a physical barrier against moisture loss.
| Feature | Standard Butting | The Tucking Tactic |
|---|---|---|
| Air Exposure | High at seams | Zero/Minimal |
| Root Zone Temp | Fluctuates | Stable soil-buffered |
| Water Retention | Run-off common | Maximum absorption |
| Edge Longevity | High brown-out risk | Uniform greening |
How to Execute the Tuck
First, don’t just lay the sod on top of the dirt. You need a yard cleanup that includes a 1-inch excavation at the perimeter. This creates a trench. When the sod piece goes down, the edge should fall into that trench. Use the back of a garden spade to firmly press the edge into the vertical wall of the trench. This is the tuck. It feels like more work because it is. But it stops the edges from curling. If the sod curls, it dies. Period. Don’t skip this.
How much water does new sod need?
Newly installed sod requires 1 inch of water immediately upon installation to saturate the top 6 inches of soil. For the first 14 days, you must maintain a consistent moisture level by watering 2-3 times daily in short bursts, typically 10-15 minutes, to ensure the root zone never drops below 60% field capacity. After the roots knit—usually when you can’t pull the sod up with a light tug—you transition to deep, infrequent watering to force root expansion.
Why are my sod seams turning brown?
Sod seams turn brown primarily due to moisture stress caused by air gaps between the sod rolls or between the sod and the soil. This is often exacerbated by poor soil compaction or failing to roll the sod after installation. When air circulates under the sod, it dries the roots before they can penetrate the native soil. This is often misdiagnosed as a nitrogen deficiency or pest issue, but it is purely mechanical failure.
“Poorly prepared base layers lead to uneven settling, which creates air pockets that are the primary cause of localized dry spots in new turf.” – Penn State Center for Turfgrass Science
Soil Prep: The Foundation of the Tuck
Before the first piece of grass touches the ground, the soil chemistry must be right. I’m talking about a pH between 6.0 and 7.0 for most cool-season grasses. If your soil is heavy clay, you need to incorporate organic matter to break up the density. If it’s sand, you’re fighting a losing battle with nutrient leaching. You need a yard cleanup that removes every rock larger than a marble. A single rock under a sod seam creates an air pocket. That air pocket is a death sentence. Use a starter fertilizer with a high phosphorus count—look for the middle number on the N-P-K bag—to stimulate root branching immediately.
- Checklist for Sod Success:
- Perform a soil test to determine lime and nutrient requirements.
- Grade the soil to slope away from foundations at a 2% minimum.
- Excavate a 1-inch deep perimeter trench for the tucking tactic.
- Moisten the bare soil slightly before laying the first roll.
- Roll the entire area with a water-filled lawn roller to remove air gaps.
- Inspect seams daily for signs of shrinking or gapping.
Landscaping isn’t about the day you finish; it’s about the following three years. If you don’t manage the irrigation and the mechanical installation correctly in the first hour, you are just throwing money into a hole. The tucking tactic is the only way to ensure the edges don’t become the weak link in your lawn’s armor. It takes an extra hour. It saves the entire job. Do it right or don’t do it at all.