
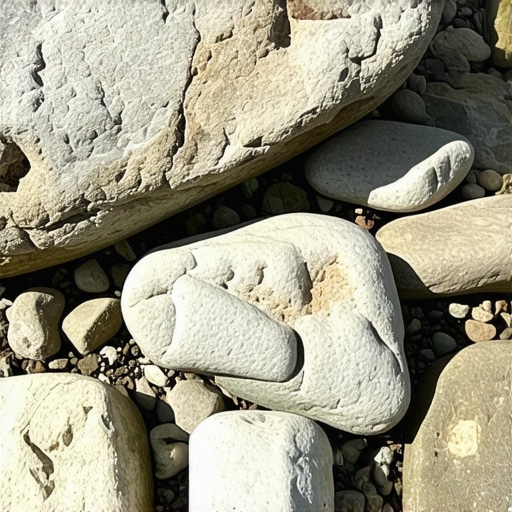
The Anatomy of a Sinking Pond Edge
Sinking pond rocks occur when hydrostatic pressure and soil erosion undermine the structural integrity of the pond perimeter. This failure usually stems from improper liner anchoring or a lack of geotextile underlayment, causing the rock shelf to collapse into the water feature over time. I recently got called out to tear up a $30,000 patio that was sinking because the previous contractor failed to account for sub-grade saturation. The pond adjacent to it was the culprit. Water was weeping behind the liner, turning the base-layer into a slurry. It was a disaster. Most ‘mow-and-blow’ hacks will just throw more rock on top, but that only increases the dead load and accelerates the sinking. You have to fix the physics, not just the aesthetics. The soil grading around the pond must be perfect. If you have a negative grade leaning toward the pond shelf, every rainstorm is a hydraulic hammer hitting your stone work.
Why Traditional Mortar Fails in Aquatic Environments
Mortar fails because it is rigid and prone to freeze-thaw cracking, which allows water to penetrate behind the rock work. Once water enters these fissures, capillary action draws it into the surrounding soil, further destabilizing the pond shelf and leading to stone displacement. Unlike a driveway, a pond is a living, moving environment. The temperature fluctuates, the water shifts, and the ground breathes. Mortar doesn’t breathe. It cracks. When you see those 1/8-inch fissures in your mortar joints, you’re looking at the beginning of a total structural collapse.
“A retaining wall doesn’t fail because of the stone; it fails because of the water trapped behind it.” – Hardscape Engineering Axiom
This axiom applies double to water features. You aren’t just fighting gravity; you’re fighting hydrostatic lift. If water gets under your rocks and freezes, it expands with enough force to lift a 200-pound granite boulder as if it were a cork.
How do I stop pond rocks from sliding?
To stop pond rocks from sliding, you must establish a mechanical bond using closed-cell polyurethane foam and ensure the sub-grade shelf is cut at a slight inward angle. This creates a natural gravity-lock where the weight of the stone pushes into the shelf rather than off the edge. In my 20 years of doing this, I’ve seen too many ‘professionals’ cut a flat shelf. Physics hates a flat shelf in a wet environment. You need a 5-degree inward pitch. Combine that with the expanding foam hack, and those rocks aren’t going anywhere.
The Expanding Foam Hack: Engineering the Fix
Using black waterfall foam (a polyurethane-based sealant) creates a semi-flexible, waterproof bond that adheres rocks to the EPDM liner. This foam fills the voids where water would otherwise flow, preventing the undercutting of stones and maintaining the structural aesthetic of the pond. This isn’t your standard hardware store spray foam. You need the closed-cell stuff designed for UV exposure and constant submersion. The foam acts as a diversionary barrier. By filling the gaps between the rocks, you force the water to flow over the stones rather than behind them. This protects the liner from mechanical abrasion and stops the fine sediment from washing out from behind the rocks. It will rot if you use the cheap interior stuff. Use the pro-grade cans with the applicator gun for precise PSI control.
| Material Choice | Flexural Strength | Hydrostatic Resistance | Durability (Years) |
|---|---|---|---|
| Type S Mortar | Low | Moderate | 5-7 |
| Waterfall Foam | High | High | 15-20 |
| Masonry Glue | Medium | Low | 2-4 |
| Concrete Grout | Low | Moderate | 8-10 |
How much expanding foam do I need for a pond repair?
A standard 24oz canister of waterfall foam covers approximately 5 to 8 linear feet of rock work, depending on the depth of the interstitial voids. For a full 2026-spec pond restoration, always estimate 20% more than you think to account for over-expansion and waste. Don’t be the guy who runs out in the middle of a lift. You want a continuous bead. Breaks in the foam lead to pathway leakage, which defeats the entire purpose of the hack.
The Critical Role of Yard Cleanup and Soil Stabilization
Successful pond repair requires addressing the surrounding yard cleanup and sod install to ensure water drains away from the feature. Proper irrigation management prevents over-saturation of the soil, which is the primary cause of hydrostatic pressure against the pond walls. If your yard is a mess, your pond will be too. I tell my crew: if the soil grading isn’t fixed first, every plant is just expensive compost. After fixing the rocks, you need a high-quality sod install. Use a cultivar that can handle the specific moisture profile of a pond edge—something with deep roots to lock that soil in place.
“Effective erosion control on slopes exceeding 3:1 requires deep-rooted vegetation or mechanical stabilization to prevent sub-grade migration.” – USDA NRCS Technical Manual
We aren’t just making it look pretty; we’re using the rhizomatous growth of the grass to act as a biological rebar. This is landscaping as civil engineering.
Step-by-Step Restoration Checklist
- Drain the water level 12 inches below the target repair zone.
- Scrub the EPDM liner with a stiff brush to remove algae and biofilm; foam won’t stick to slime.
- Inspect the geotextile underlayment for tears or thinning.
- Apply 2-inch beads of polyurethane foam in the gaps between the shelf and the rocks.
- Immediately press crushed stone or sand into the wet foam to provide UV protection and aesthetic blending.
- Allow for a 45-minute cure time before restarting the pump.
- Perform a yard cleanup to remove any displaced sediment that could clog the skimmer basket.
- Finish with a sod install up to the rock edge to prevent future sediment runoff.
Maintaining the Integrated System
Maintenance isn’t about looking at the yard; it’s about checking your irrigation zones and soil density. Every spring, check for liner heaving. If you see the foam pulling away, it means you have a drainage issue further up the slope. Fix the grade, or the foam won’t matter. Your landscaping is a holistic system. The irrigation should never spray directly onto the pond rocks; this leads to calcium buildup and weakens the foam bond over time. Set your rotors to a 180-degree pattern facing away from the feature. Deep, infrequent watering—exactly 1 inch per week—is better for the sod and the pond. It forces roots down, creating a stable soil matrix. Don’t be lazy. Check your 811/Dig Safe markings before any heavy excavation. It’s better than hitting a lateral line and flooding your yard. It will rot if you don’t watch the moisture. Keep it dry, keep it stable, and your pond will stay put for decades. “