
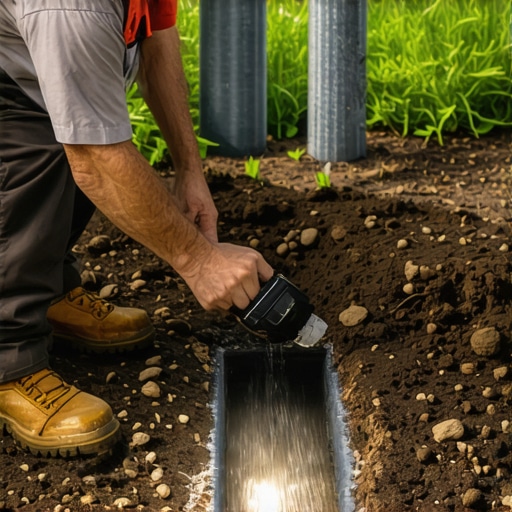
Identifying the Signs of a Main Line Irrigation Leak
Detecting a main line leak involves monitoring your water meter for movement when all zones are off, identifying localized soft spots or unexplained pooling in your turf, and observing a sudden drop in operating pressure across multiple zones. These leaks are high-pressure failures that occur before the zone valves.
I always drill into my new crew members: if you don’t fix the soil grading first, every plant you put in the ground is just expensive compost. The same logic applies to your irrigation system. I once had an apprentice who spent three hours replacing sprinkler heads because the pressure was low, only to realize the entire main line was split ten feet back. He was treating the symptom, not the disease. In landscaping, the disease is often hidden under six inches of compacted clay or sandy loam. When a main line fails, it is not a slow drip; it is a pressurized injection of water into your subgrade. This destroys the structural integrity of your yard and turns your expensive sod install into a muddy graveyard. You are not just losing water; you are losing the very foundation of your landscaping. A main line leak exists under constant pressure, usually between 40 and 80 PSI. Unlike a lateral line leak, which only loses water when a specific zone is running, a main line leak is a 24-7 hemorrhage. It will bypass your drainage systems, undermine your hardscapes, and rot the root flares of your prize trees before you even see a puddle.
“Water movement through soil is governed by hydraulic head and pore-size distribution. Excessive saturation from irrigation failures leads to anaerobic conditions that kill beneficial soil microbes.” – Penn State Extension Agronomy Manual
The Water Meter Diagnostic: Is Your Yard a Sponge?
Performing a water meter diagnostic requires shutting off the main house supply while leaving the irrigation main open to isolate the leak to the outdoor line. If the low-flow indicator on your meter continues to spin, you have a confirmed breach in your pressurized irrigation main.
To perform a forensic autopsy on your water usage, you must first locate your meter pit. This is usually near the curb. Open the lid and find the small triangular or star-shaped dial known as the leak indicator. If that dial is moving even a fraction of a millimeter while no water is being used inside the house, you have a problem. In a professional landscaping operation, we do not guess. We use a pressure gauge attached to a hose bib on the irrigation side. If the static pressure drops once the system is isolated, the pipe is compromised. This is where the physics of soil comes into play. If you have heavy clay soil, the water might not reach the surface for weeks. Instead, it will travel laterally along the pipe trench, often emerging far from the actual break. This is called ‘wicking.’ You might find a wet spot near your driveway, but the actual fracture is twenty feet away under your lawn. This constant saturation causes the soil to lose its load-bearing capacity. If you have a retaining wall nearby, that hydrostatic pressure can and will push the wall out of alignment. Do not ignore a high water bill. It is the first warning sign of a structural failure.
How do I know if my underground water line is leaking?
Look for ‘ghost’ running of your pump, persistent soggy areas that never dry out even in heat, or a significant increase in your monthly utility costs without a change in weather. A localized patch of turf that is darker green than the rest of the yard often indicates a nitrogen flush caused by excessive localized moisture. This is a common indicator that the main line is weeping directly into the root zone.
| Leak Symptom | Likely Cause | Repair Urgency |
|---|---|---|
| Puddling only when Zone 1 runs | Lateral line crack or loose fitting | Moderate |
| Constant mud near the valve box | Main line fitting or manifold failure | Critical |
| Drop in pressure across all zones | Main line split or pump failure | High |
| Water weeping from under sidewalk | Main line sleeve failure | Critical |
Root Rot and Anaerobic Soil: The Biological Cost of Leaks
Excessive water from a main line leak replaces oxygen in the soil pores, causing anaerobic conditions that lead to Pythium root rot and plant death. When soil remains saturated for more than 48 hours, the roots of your turf and ornamentals literally suffocate from a lack of gas exchange.
As a veteran horticulturist, I see homeowners mistake leak damage for a need for more fertilizer. This is a fatal error. When the soil is saturated, the roots can no longer take up nutrients. The plant wilts because its root system is rotting, not because it needs water. This is the irony of a main line leak. You are drowning the plant while it looks thirsty. During a yard cleanup, if I pull up a handful of soil and it smells like rotten eggs, I know we have an irrigation disaster. That smell is hydrogen sulfide gas, a byproduct of anaerobic bacteria. At this point, the soil chemistry is toxic. You cannot just fix the leak; you have to remediate the soil. This often involves aeration or even soil replacement if the compaction is too severe. If you recently did a sod install, a main line leak will lift the new netting and prevent the roots from ever knitting into the native soil. The sod will simply slide off the mud like a carpet on a waxed floor. This is why we check the main line before we ever lay a single piece of grass.
“A retaining wall doesn’t fail because of the stone; it fails because of the water trapped behind it.” – Hardscape Engineering Axiom
Does a main line leak affect water pressure?
Yes, a significant main line leak reduces the dynamic pressure available to your sprinkler heads, causing them to fail to pop up fully or resulting in poor spray patterns. If your rotors are barely turning or your misting heads are just dribbling, you likely have a volume loss in the main line that is starving the valves of the PSI required for operation.
The Professional Main Line Repair Checklist
Fixing a main line requires excavating the damaged section, cutting out the fracture, and using high-pressure rated PVC couplings and solvent cement to restore the seal. It is critical to use a primer and cement rated for wet conditions if the trench cannot be kept completely dry during the repair process.
- Call 811 to mark underground utilities before digging any trench.
- Isolate the irrigation main at the backflow preventer to stop the flow of water.
- Excavate at least 12 inches around the leak to provide enough room for the pipe to flex during the repair.
- Cut the pipe cleanly using a PVC cutter; do not use a hacksaw as the burrs will weaken the joint.
- Use ‘Blue Glue’ or a similar wet-dry solvent cement for a faster set time in muddy conditions.
- Wait at least 30 minutes before pressure testing the line to ensure the chemical bond has cured.
- Backfill the trench in 3-inch lifts, tamping each layer to prevent future settling or sinkholes.
Once the repair is done, the work isn’t over. You need to address the yard cleanup. The excess water has likely leached the nutrients out of the soil. I recommend a light application of a slow-release nitrogen fertilizer and a soil conditioner to help restore the microbial balance. If the area is heavily compacted from the repair work, use a core aerator to get oxygen back into the root zone. Landscaping is a system of checks and balances. When you break the water balance, you have to work to put it back. Don’t skip the compaction step. If you just throw dirt back in the hole, it will settle in six months, and you will have a dangerous trip hazard in the middle of your lawn. The tamper should literally bounce off the compacted base when you are finished. That is the only way to ensure the ground won’t move again. Stop the waste. Fix the leak. Protect your investment.