
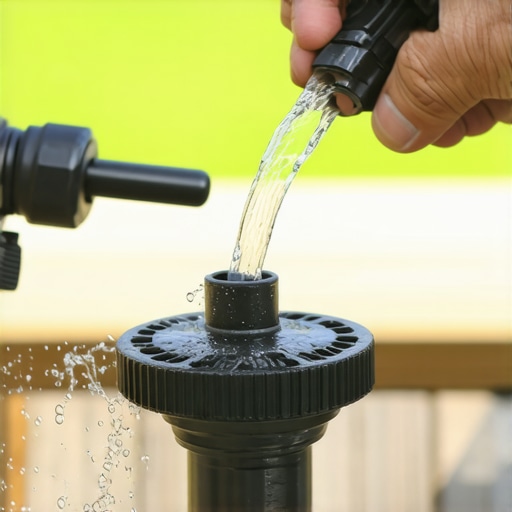
The Anatomy of a Failing Drip System: Why Pressure Drops
To resolve low pressure in drip irrigation, you must isolate the in-line filter, typically found downstream of the zone valve, and remove the organic debris or mineral scale obstructing the mesh screen to restore the necessary 20 to 30 PSI required for emitters to weep correctly. When the pressure gauge at the head of the system drops, your landscape enters a state of physiological stress. I see it every summer: homeowners assume the pump is dying or there is a break in the line. They spend hundreds on a yard cleanup or new sod install, only to watch the turf brown out because they ignored a five-dollar mesh screen. I always drill into my new crew members: if you don’t fix the soil grading and check the filtration first, every plant you put in the ground is just expensive compost. Irrigation is not a set-it-and-forget-it utility. It is a hydraulic system that demands clean, laminar flow to function. Without it, your drip emitters—those tiny 0.5 to 2.0 gallon-per-hour nozzles—become clogged with fine silt or calcium carbonate precipitates. Once those emitters are blocked, they are often impossible to clear. The filter is your only line of defense. Don’t skip this.
“Irrigation water filtration is the primary defense against emitter plugging, which is the most frequent cause of drip system failure.” – Texas A&M AgriLife Extension
How do I know if my drip filter is clogged?
You can identify a clogged drip filter by observing irregular wetting patterns, a visible drop in emitter output, or a shrill whistling sound coming from the filter housing, which indicates that water is being forced through a restricted mesh aperture. In-line filters work by trapping particles larger than the mesh size. Over time, these particles form a ‘filter cake,’ a layer of sludge that increases friction and causes a massive pressure drop. If you have 30 PSI at the valve but only 5 PSI at the end of the line, your filter is likely the bottleneck. It is simple physics. A system that cannot maintain its operating pressure cannot distribute water evenly, leading to localized drought and root death. Stop the guesswork. Check the screen.
| Filter Mesh Count | Micron Rating | Filtration Level | Typical Use Case |
|---|---|---|---|
| 100 Mesh | 150 Microns | Coarse | City water with minimal sediment |
| 150 Mesh | 100 Microns | Standard | Most residential drip systems |
| 200 Mesh | 75 Microns | Fine | Well water or reclaimed water sources |
The Forensic Deep Clean: Restoring Flow to the Zone
A professional deep clean of an irrigation filter involves more than just a quick rinse; it requires a chemical soak in a mild acidic solution to dissolve calcium deposits and a mechanical scrubbing of the stainless steel screen to ensure every micron-sized opening is clear. Start by shutting off the main water supply. If you are working on a system following a fresh sod install, expect a lot of construction grit. Unscrew the filter cap carefully—don’t lose the O-ring. If that O-ring dries out or gets nicked, you will have a slow leak that ruins your soil compaction. Pull the screen out. If it looks like it’s covered in white crust, that is hard water. If it is green or brown slime, you have biological growth. This is common in systems that haven’t had a proper yard cleanup in years. Use a soft nylon brush. Never use a wire brush on a plastic mesh screen. It will tear. Replace it if the mesh is frayed. It is cheaper than replacing a dead Japanese Maple.
The Step-by-Step Filter Maintenance Checklist
- De-pressurize the Mainline: Turn off the controller and the manual shut-off valve to prevent a geyser.
- Extract the Filter Element: Unscrew the canister and remove the mesh or disc assembly.
- Visual Inspection: Check for tears in the mesh or cracks in the housing. Replace if compromised.
- Vinegar Soak: For mineral scaling, soak the element in a 50/50 water-vinegar mix for 30 minutes.
- Flush the Housing: Open the flush valve briefly with the filter removed to blow out sediment.
- Reassemble and Test: Ensure the O-ring is seated with a touch of silicone lubricant.
“A pressure differential of 5-7 PSI across a filter indicates that cleaning is required to maintain system efficiency.” – Hardscape Engineering Axiom
Can I run drip irrigation without a filter?
You should never run drip irrigation without a filter because unfiltered particulates like sand, rust, and algae will permanently plug the internal labyrinth of the emitters, requiring a complete lateral line replacement that costs thousands of dollars compared to basic filter maintenance. I have seen contractors skip filters to save twenty bucks on a bid. It is criminal. Within one season, the emitters are calcified shut. You might as well have buried a dry pipe. In my 20 years, I’ve dug up miles of drip tubing that was essentially garbage because someone didn’t want to spend ten minutes cleaning a screen. Don’t be that person. If you are doing a high-end landscaping project, the filtration system should be the most accessible part of the yard. Put it in a jumbo valve box. Make it easy to find.
The Long-Term Impact: Soil Health and Plant Longevity
Maintaining optimal hydraulic pressure through clean filters ensures that the soil rhizosphere receives deep, consistent moisture, preventing salt buildup and encouraging downward root migration which is essential for surviving summer heat waves. When pressure is low, only the emitters closest to the valve work. The ones at the end of the run do nothing. This creates ‘hot spots’ in your garden. Plants at the end of the line will wilt, develop marginal leaf burn, and eventually die. The homeowner usually responds by turning up the watering time, which just over-saturates the plants near the valve, leading to root rot. It is a death spiral caused by a dirty filter. If you want a landscape that thrives, you have to master the mundane tasks. Clean your filters every spring and every fall. If you are on a well, do it monthly. It is the difference between a landscape that matures and one that needs a total overhaul every five years. Take care of the gear, and the gear takes care of the yard. It is that simple. [{“@context”:”https://schema.org”,”@type”:”HowTo”,”name”:”Cleaning an In-Line Drip Filter”,”step”:[{“@type”:”HowToStep”,”text”:”Shut off the water supply to the irrigation zone.”},{“@type”:”HowToStep”,”text”:”Unscrew the filter housing cap and remove the screen or disc element.”},{“@type”:”HowToStep”,”text”:”Rinse the element under high-pressure water to remove loose debris.”},{“@type”:”HowToStep”,”text”:”Soak the element in an acidic solution if mineral scale is present.”},{“@type”:”HowToStep”,”text”:”Reinsert the element and tighten the cap, ensuring the O-ring is properly seated.”}],”totalTime”:”PT15M”},{“@context”:”https://schema.org”,”@type”:”FAQPage”,”mainEntity”:[{“@type”:”Question”,”name”:”How often should I clean my drip filter?”,”acceptedAnswer”:{“@type”:”Answer”,”text”:”At minimum, clean your filter twice a year—once in the spring before the heat hits and once in the fall. If using well water or reclaimed water, monthly inspections are recommended.”}},{“@type”:”Question”,”name”:”What happens if I don’t clean the filter?”,”acceptedAnswer”:{“@type”:”Answer”,”text”:”The system will lose pressure, emitters will clog permanently with sediment, and plants will suffer from uneven watering, eventually leading to plant death and costly system replacement.”}}]}]