
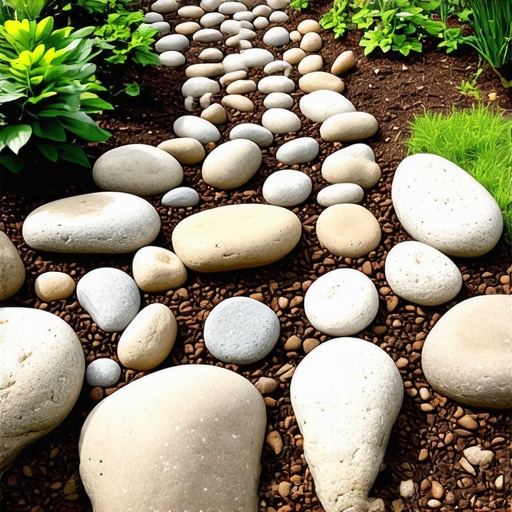
Designing for Drainage: The Hardscape Engineering Approach
A maintenance-free dry creek bed requires a combination of angular base stone for stability, non-woven geotextile fabric for weed suppression, and rounded river rock of varying sizes (3 to 12 inches) to mimic natural water flow while preventing erosion. Engineering these features involves calculating slope and hydraulic load to ensure water moves effectively without scouring the soil or dislodging the aggregate. I recently got called out to tear up a $30,000 patio that was sinking because the previous contractor thought they could just dump river rock on top of loose topsoil without a compacted base. The entire structure had become a muddy mess because the hydrostatic pressure had nowhere to go. This is why you never shortcut the excavation phase. In my firm, we treat every creek bed as a civil engineering project. You start with the sub-grade. If you do not strip the organic material and reach the B-horizon soil, your stones will eventually vanish into the earth. Landscaping is not just about aesthetics; it is about managing the physics of water. Before any stone touches the ground, we perform a thorough yard cleanup to remove debris that could rot under the base layer. We then look at the existing irrigation lines. If you have an irrigation head spraying directly into a creek bed, you are inviting scale buildup and algae on your expensive stone. Every sod install we do adjacent to these features is graded at a 2% slope away from the house and toward the channel. This prevents ponding and ensures the structural integrity of the home foundation. We use 4-inch perforated PVC pipes wrapped in sleeves if the volume of water exceeds what a surface channel can handle. Precision is non-negotiable.
“A retaining wall doesn’t fail because of the stone; it fails because of the water trapped behind it.” – Hardscape Engineering Axiom
What is the best size rock for a dry creek bed?
The optimal size for a dry creek bed is a mixture of 1-3 inch river jacks for the bed and 6-12 inch boulders for the banks. This creates a natural look while providing the necessary weight to prevent stones from shifting during heavy rain events. Larger rocks should be buried one-third of the way into the ground to anchor the edges and resist the lateral force of moving water. Using a single size of rock looks artificial and fails to lock together. Angular rip-rap at the bottom provides the ‘grip’ needed to keep rounded river stones from sliding down a slope. Below is a comparison of common materials used in professional drainage projects.
| Material Type | Typical Size | Primary Function | Longevity Factor |
|---|---|---|---|
| River Jack (Rounded) | 2″ – 5″ | Surface Aesthetics / Water Path | High (Resists weathering) |
| Rip Rap (Angular) | 6″ – 12″ | Bank Stabilization / Erosion Control | Extreme (Interlocking) |
| #57 Limestone | 0.75″ – 1″ | Structural Sub-base | High (Compaction grade) |
| Pea Gravel | 0.375″ | Filling Small Voids | Low (Migrates easily) |
The Science of Geotextiles and Soil Compaction
Successful dry creek beds rely on heavy-duty, 4-ounce non-woven needle-punched geotextile fabric to separate the stone from the soil while allowing water to permeate. Cheap, woven plastic fabrics from big-box stores will slick over with silt in two seasons, creating a slide for your rocks to move right out of the channel. We excavate at least 12 to 18 inches deep. We then compact the sub-grade using a plate compactor until it hits a minimum of 95% Proctor density. This is where most DIY jobs fail. If the soil is soft, the stones will shift. Once the fabric is laid, we pin it with 6-inch steel staples every 12 inches. We don’t just ‘lay’ it; we tension it.
“Soil erosion is a physical process driven by the kinetic energy of falling rain and the power of surface runoff.” – USDA NRCS Soil Conservation Manual
How much modified gravel do I need for a patio base?
For a standard patio or a heavy stone creek crossing, you need 4 to 6 inches of compacted 21A or 3/4-inch modified gravel. Calculate the volume by multiplying the square footage by the depth in feet, then divide by 27 to get cubic yards. For a 100-square-foot area at a 6-inch depth, you need approximately 1.85 cubic yards of aggregate. This base layer provides the structural footprint that prevents heaving during freeze-thaw cycles. In areas with heavy clay, we often increase this to 8 inches to ensure drainage is handled below the frost line. Failure to account for this leads to the ‘settling’ that ruins high-end landscaping. Use a vibratory rammer for the edges and a plate compactor for the main body. The base should be so hard that a hammer bounces off it. This is the only way to guarantee a maintenance-free finish.
The Zero-Failure Installation Checklist
- Identify utility lines by calling 811 before any excavation begins.
- Calculate the drainage basin volume to size the channel width properly.
- Excavate the channel with a ‘V’ or ‘U’ shaped profile, deeper in the center.
- Remove all organic matter, roots, and debris during the yard cleanup phase.
- Install a 4oz non-woven geotextile fabric with at least 12-inch overlaps at seams.
- Place larger anchor boulders first at ‘bends’ in the creek to break water velocity.
- Fill the center with medium-sized river stone to a depth of at least 4 inches.
- Hand-place smaller stones to hide all visible fabric and secure the edges.
- Integrate the creek terminus into a rain garden or a legal municipal discharge point.
Maintenance and Botanical Integration
Maintaining a dry creek bed involves an annual leaf blowout and checking the ‘outfall’ for sediment buildup to ensure the path remains clear for storm surges. We often pair these builds with a fresh sod install around the perimeter. We use a turf-type tall fescue or a resilient zoysia, depending on the USDA hardiness zone, to create a ‘filter strip’ that catches grass clippings before they enter the stone. We avoid planting invasive species near the creek. Instead, we use native sedges or ornamental grasses like Switchgrass (Panicum virgatum) that have deep root systems to further stabilize the soil. These plants thrive on the moisture that collects at the edges of the channel without requiring supplemental irrigation once established. If you ignore the edges, weeds will eventually find the silt trapped between the rocks. A quick application of a pre-emergent in early spring is the professional’s secret to keeping the stone looking clean. Don’t use salt-based killers; they will leach into the groundwater and kill the surrounding landscaping. Stick to mechanical removal or targeted herbicide if necessary. It is about biology as much as it is about rocks. Keep the silt out, and the bed will last thirty years. It’s that simple.