
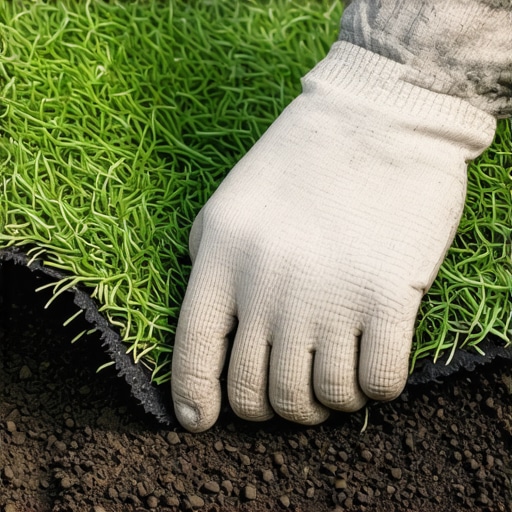
The Forensic Autopsy of a Failed Sod Install
Visible sod seams are typically caused by improper soil moisture management, lack of soil-to-root contact, and poor site preparation during the initial sod install. When the edges of the turf rolls dry out, they shrink away from each other, creating air gaps that prevent lateral root growth and leave your lawn looking like a grid of disjointed green rectangles.
I always drill into my new crew members: if you don’t fix the soil grading first, every plant you put in the ground is just expensive compost. I have seen countless homeowners and ‘weekend warrior’ contractors drop twenty pallets of high-quality Kentucky Bluegrass onto a surface that looks like the surface of the moon and then wonder why the yard looks like a checkerboard six months later. Sod is a living, breathing organ transplant. When you cut a roll of sod, you are severing nearly 90 percent of its root system. You are placing a traumatized plant into a new environment. If that environment is a compacted, dry, and uneven base, the plant will go into survival mode. It will pull moisture from its own extremities to keep the crown alive. The first parts to die are the edges. When those edges desiccate, they shrink. Once a gap of half an inch forms, the roots are exposed to the air. They stop growing. They call it ‘air pruning.’ It is the death knell for a tight, uniform lawn. You cannot just ‘water your way’ out of a bad structural install. You have to understand the physics of the soil interface.
The Primary Culprit: Root Desiccation and Edge Shrinkage
Edge shrinkage occurs when the evapotranspiration rate exceeds the moisture uptake at the periphery of the sod slab, leading to permanent cellular collapse in the leaf tissue. This process is driven by the surface area to volume ratio: the edges of the sod are exposed to air on both the top and the vertical side, doubling the rate of water loss compared to the center of the roll.
“Proper soil preparation prior to sodding is as important as the quality of the sod itself. Soil should be moistened to a depth of 6 inches before installation to prevent the dry soil from wicking moisture away from the new roots.” – University of Maryland Agricultural Extension
Many people think sod is like a carpet you just roll out. It is not. It is a biological system that requires a capillary bridge between the thin layer of peat or silt it was grown in and the native soil of your yard. If you have a ‘hydrophobic’ soil layer, meaning the soil actually repels water because it is too dry or contains too much un-decomposed organic matter, the water you spray on top will never reach the roots. It will just run off into the seams, further eroding the soil and widening the gaps. You need to check your PSI. You need to check your soil pH. If your soil is at a 5.5 and that sod was grown in a 6.5 environment, those roots are going to hit that acidic barrier and stop. They won’t cross the seam. They will stay huddled in their own little square until they eventually choke themselves out. This is called root girdling at a turf level. It is a slow death. Don’t skip the soil test.
How much water does new sod need to close gaps?
To facilitate seam closure, new sod requires one inch of water per day applied in multiple short bursts to keep the thatch layer consistently moist without saturating the subsoil to the point of anaerobic failure. Once the roots knit (usually day 14), you must transition to deep, infrequent watering to encourage downward root migration. If you keep it too wet for too long, you will get Pythium blight. It will rot. Watch for the ‘squish’ factor. If you step on the sod and water pools around your boot, you are drowning the plant. But if the seams are turning brown, you are failing the edges. It is a balancing act that requires a calibrated irrigation system, not just a hose and a prayer.
Should I put sand in sod seams?
Filling sod seams with USGA-spec top-dressing sand or a 50/50 mix of sand and screened compost is an effective way to bridge gaps, as it protects exposed roots from air pruning and provides a medium for rhizomatous spread. Do not use heavy clay or un-screened ‘fill dirt.’ The material must be porous. It must allow for gas exchange. If you pack the seams with heavy clay, you are creating a tomb for the roots. Sand allows the stolons of grasses like Bermuda or the rhizomes of Bluegrass to push through easily. It acts as a thermal blanket, keeping the root zone temperature stable during the heat of the day. It works.
The Data: Turf Variety and Recovery Speed
Understanding which species you are working with is vital for setting expectations. Not all grass is created equal. Some spread like wildfire; others are bunch-grasses that will never ‘fill in’ a gap wider than an inch.
| Turf Variety | Lateral Growth Rate | Typical Seam Closure Time | Primary Spreading Mechanism |
|---|---|---|---|
| Kentucky Bluegrass | Moderate | 14-21 Days | Rhizomes (Underground) |
| Bermuda Grass | Aggressive | 7-14 Days | Stolons and Rhizomes |
| Tall Fescue | Slow | 30+ Days | Bunch-forming (Minimal spread) |
| Zoysia | Slow to Moderate | 21-28 Days | Stolons and Rhizomes |
If you have a Tall Fescue lawn and you see gaps, they are likely permanent unless you intervene. Fescue does not have the biological machinery to ‘crawl’ across a gap. You will have to over-seed those seams in the fall. If you have Bermuda and the seams aren’t closing, you have a major irrigation or compaction issue, because Bermuda is an invasive beast that should cover a gap in a week if it is happy. Roots don’t lie. Dig up a corner. If the roots are white and fuzzy, you are winning. If they are brown and slimy, you are over-watering. If they are dry and brittle, you are losing the battle to desiccation.
The 7-Day Sod Rescue Checklist
If your 2026 sod install is looking like a grid, follow this protocol immediately. Do not wait for the heat of summer to fix a spring problem.
- Hydraulic Assessment: Check your irrigation heads for head-to-head coverage. A single clogged nozzle will leave a dry ‘shadow’ that kills seams.
- Mechanical Compression: Use a water-filled lawn roller over the entire area. You must eliminate the air pockets. No contact means no growth.
- Top-Dressing: Fill any gap wider than a quarter-inch with a sand/compost mix. Level it with a broom.
- Nutrient Injection: Apply a high-phosphorus ‘starter’ fertilizer (e.g., 10-25-10) to stimulate root elongation.
- Height Management: Do not mow too low. Keep the grass at 3 inches to shade the soil and reduce evaporation at the seam level.
- Soil Probe: Use a screwdriver to test compaction. If you can’t push it 6 inches deep, your subsoil is too hard.
- Fungal Watch: Monitor for ‘melting out’ or leaf spot. Stressed sod is a magnet for pathogens.
The Infrastructure Failure: Irrigation and Grading
Most sod failures are actually civil engineering failures. If your yard cleanup didn’t include a laser-level check of the grade, you are in trouble. Water follows the path of least resistance. If you have low spots, the water will pool, the soil will become anaerobic, and the sod will die. If you have high spots, the mower will scalp the seams, exposing the crown to the sun. Both lead to visible gaps.
“A retaining wall doesn’t fail because of the stone; it fails because of the water trapped behind it. The same logic applies to turf: the grass doesn’t fail because of the blade; it fails because of the drainage environment beneath it.” – Hardscape Engineering Axiom
In 2026, we are seeing more extreme weather patterns. You need a smart irrigation controller that adjusts for ET (evapotranspiration) rates. If you are still using a manual dial timer, you are living in the stone age. These systems use local weather station data to calculate exactly how much water the plant lost that day. It is precision medicine for your lawn. Without it, you are just guessing. And guessing is expensive when a pallet of sod costs $500. Check the gauge. Fix the grade. Close the seams. Stop acting like a ‘mow-and-blow’ hack and start acting like a land manager. Your lawn will thank you. Or at least, it will stop dying in squares.