
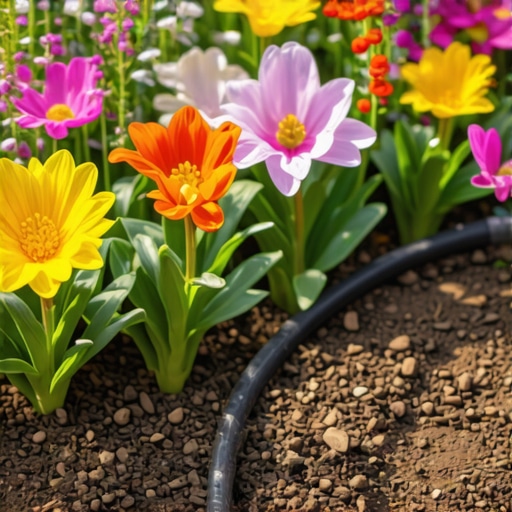
Converting Your Flower Beds to Drip Irrigation Fast
I always drill into my new crew members: if you don’t fix the soil grading and the delivery system first, every plant you put in the ground is just expensive compost. I have seen too many rookies slap down five-gallon shrubs and walk away, only for the homeowner to drown the foliage with a standard oscillating sprinkler. By the time I get called back, the landscaping is a mess of powdery mildew and root rot. Engineering a proper drip system isn’t about being fancy; it is about the physics of soil saturation and the biology of the root flare. If you want results, you stop watering the air and start watering the dirt.
Why Professionals Choose Drip Over Spray
Converting your flower beds to drip irrigation involves replacing high-volume overhead spray nozzles with low-flow pressure-compensated emitters to deliver water directly to the root zone. This irrigation strategy reduces water waste by up to 50% and prevents foliar diseases by keeping moisture off the leaves, which is critical for species like roses or hydrangeas. It is the only way to ensure 100% distribution uniformity across varying terrain.
“Standard drip systems operate most efficiently between 20 and 30 PSI; exceeding this limit often leads to catastrophic fitting failure and emitter blowouts.” – Irrigation Association Technical Manual
How much water do my plants actually need?
Water requirements depend on the soil texture and the evapotranspiration rate of the specific plant species. For most ornamental beds, a target of 1 to 1.5 inches of water per week is standard. However, you must deliver this in GPH (gallons per hour), not the high-pressure gallons per minute used in sod install or turf zones. A 1-GPH emitter running for 60 minutes delivers approximately 1.6 inches of water to a one-square-foot area. Do the math before you buy the tubing.
The Hydraulic Fundamentals: GPH and PSI
The difference between a hack job and a professional install is the pressure regulator. Most residential hose bibbs or irrigation valves push 50 to 80 PSI. Drip components are designed for 25 PSI. If you skip the regulator, the fittings will pop. We use 1/2-inch poly header lines and 1/4-inch distribution tubing, but the real secret is the emitter type. Use pressure-compensated (PC) emitters. These ensure that the plant at the start of the line gets the exact same volume of water as the plant 100 feet away, regardless of elevation changes.
| Soil Type | Emitter Flow Rate (GPH) | Emitter Spacing (Inches) | Wetted Diameter (Inches) |
|---|---|---|---|
| Heavy Clay | 0.5 GPH | 18″ – 24″ | 18″ – 22″ |
| Loam | 0.9 GPH | 12″ – 18″ | 12″ – 16″ |
| Sandy Soil | 2.0 GPH | 10″ – 12″ | 8″ – 10″ |
What PSI should a drip system run at?
Drip systems require a consistent 25 PSI to operate the internal diaphragms of the emitters properly. Lower pressure results in uneven flow, while higher pressure causes the polyethylene tubing to expand and slip off the barbed fittings. Always install a 200-mesh filter upstream of the regulator to prevent mineral scale and silt from clogging the microscopic orifices of the emitters.
The Ground-Up Build: Step-by-Step Conversion
Before you touch a shovel, you need a yard cleanup to clear out mulch and debris. You cannot see the soil grade if it is covered in three inches of dyed cedar chips. 1. The Source Connection: If you are converting an existing spray zone, use a head-to-drip conversion kit. Cap off all other heads in the zone. 2. Manifold Setup: Install the filter and the 25 PSI regulator. 3. Mainline Layout: Run 1/2″ poly tubing through the center of the bed. Use galvanized landscape staples every 3 feet. 4. Emitter Placement: For larger shrubs, use two emitters per plant on opposite sides of the root ball. 5. The Flush: Leave the end caps off and run the water for two minutes to clear out any PVC shavings or dirt. 6. Pressure Test: Close the system and look for the tell-tale ‘squirt’ of a loose fitting. If the tamper-like thud of the water hitting the soil is consistent, you are ready for mulch.
- Backflow Preventer: Prevents irrigation water from siphoning back into your drinking water.
- 25 PSI Regulator: Essential for protecting low-pressure emitters.
- 200 Mesh Filter: Stops particulates from clogging the system.
- 1/2-inch Poly Tubing: The ‘trunk’ of your delivery system.
- Bug Caps: Installed on the end of 1/4″ lines to keep insects from nesting.
Soil Logic and Environmental Controls
In regions with heavy clay, like the Southeast, you have to be careful with ‘ponding.’ Clay has a low infiltration rate. If you dump 2 GPH into clay, it will just sit on top and drown the root flare. In sandy loams, water moves vertically very fast, so you need closer emitter spacing to ensure the root zone is actually hit. This is why we use capillary action logic. You want the wetted patterns to slightly overlap under the surface. It is invisible to the eye but vital for the plant. If you are doing a sod install nearby, never tie the drip zone into the turf zone; their run times are incompatible. Turf needs high-frequency, short-duration bursts; shrubs need low-frequency, deep-soak cycles.
“The goal of drip irrigation is to maintain soil moisture at field capacity, avoiding the stress of wilting point cycles.” – Texas A&M AgriLife Extension
Maintenance and The Winterization Protocol
Don’t bury your drip lines too deep. Two inches under the mulch is the sweet spot. If they are in the dirt, roots will eventually grow into the emitters—a process called root intrusion. Every spring, pull the end caps and flush the lines. If you live in a freeze-thaw climate, use compressed air to blow out the lines. Even a small amount of trapped water will crack a plastic regulator when it turns to ice. It is a simple system, but it requires a disciplined eye. Check your filter once a month. If it is slimy, you have an algae problem in your water source; if it is gritty, you have a failing well or city main issues.