
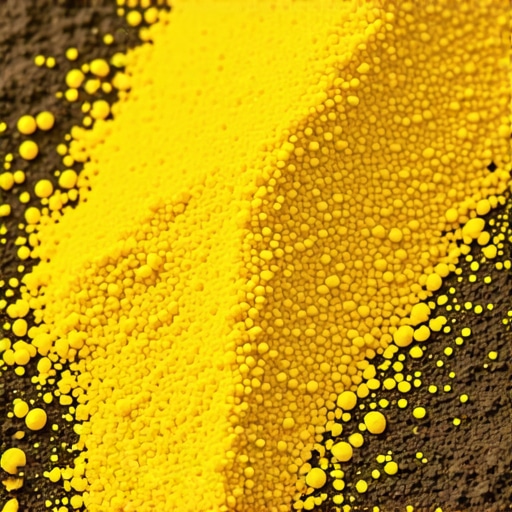
When soil pH climbs above 7.5, your landscape is systematically starving. Iron, manganese, and phosphorus lock up tightly in the dirt, rendering them completely unavailable to your grass and ornamental plantings. Let’s look at how to properly apply elemental sulfur to safely correct this chemical imbalance before your next sod install or landscape project.
The Chemical Nightmare: Why High Soil pH Destroys Turf and Ornamental Plants
High soil pH levels prevent essential micronutrients like iron from dissolving in water, which starves your lawn and leads to severe iron chlorosis, a condition where grass turns pale yellow and dies. To solve this, you must introduce elemental sulfur to drive the pH down into the optimal 6.0 to 6.8 range.
A homeowner called me in a panic after they completely torched their front lawn by applying three bags of raw agricultural sulfur right before a 95-degree heatwave. They thought more was better. Instead of slowly lowering the soil pH, they created a rapid sulfuric acid reaction that literally boiled the root zone of their turf. The yard smelled like a volcano, and the grass was charred black down to the soil line. We had to excavate the top three inches of dead organic matter, flush the soil with hundreds of gallons of water, and start completely fresh with a brand new sod install. It was a costly lesson in soil chemistry that could have been avoided with simple math and patience.
“Soil pH is the single most important chemical property of soil because it controls the availability of all other essential plant nutrients.” – Texas A&M AgriLife Extension Service
How does high soil pH affect nutrient uptake?
When soil pH is too high, or alkaline, chemical reactions bind essential nutrients like iron, manganese, zinc, and phosphorus to soil particles. Even if your soil is rich in these minerals, plants cannot absorb them. This leads to stunted growth, poor root development, and yellowing foliage. Applying more fertilizer to alkaline soil does absolutely nothing because the nutrients will simply lock up upon contact with the dirt.
[IMAGE_PLACEHOLDER]
The Blueprint for Soil Remediation: Sulfur Application Protocols
Lowering high soil pH requires applying granulated elemental sulfur during cool weather, allowing active soil bacteria to metabolize the sulfur into sulfuric acid over several months. Attempting to rush this biological process will burn plant roots and ruin your soil structure.
| Soil Type | Sulfur Needed per 1,000 Sq. Ft. (To lower pH from 7.5 to 6.5) | Max Single Application Limit | Application Frequency |
|---|---|---|---|
| Sandy Loam | 10 to 15 lbs | 5 lbs | Every 6 to 8 weeks |
| Silt Loam | 15 to 20 lbs | 5 lbs | Every 6 to 8 weeks |
| Heavy Clay | 20 to 30 lbs | 5 lbs | Every 8 to 12 weeks |
Do not dump all the sulfur at once. Split the total required amount into multiple light applications. Your local soil microbes need time to process the sulfur. If you exceed 5 pounds of sulfur per 1,000 square feet in a single pass, you risk destroying those beneficial soil microbes entirely.
How long does it take for sulfur to lower soil pH?
Lowering soil pH is a slow biological process that typically takes 3 to 6 months depending on soil temperature, moisture levels, and bacterial activity. Because soil microbes must convert the elemental sulfur into sulfate, the chemical shift only occurs when the soil is warm and active. Do not expect overnight results. Test your soil again after 4 months to assess the progress before adding more sulfur.
The Step-by-Step Sulfur Remediation Process
Correcting your soil chemistry requires precise mechanical steps to ensure the sulfur is distributed evenly and integrated into the root zone safely.
- Step 1: Get a professional soil test. Never guestimate your soil pH. Use a local university extension office lab to get precise readings of your current pH, soil type, and buffering capacity.
- Step 2: Calculate your total sulfur needs. Use the soil chart above to determine how many total pounds of elemental sulfur your specific square footage requires.
- Step 3: Core aerate the yard. Punching deep holes into the dirt allows the granulated sulfur to penetrate directly into the root zone instead of sitting on top of the thatch layer.
- Step 4: Calibrate your rotary spreader. Set your spreader to a low setting to ensure you do not apply more than 5 pounds per 1,000 square feet in a single pass.
- Step 5: Apply sulfur during cool weather. Only spread sulfur when ambient air temperatures are consistently below 80 degrees Fahrenheit to prevent chemical leaf burn.
- Step 6: Activate your irrigation system. Immediately irrigate the treated area with at least half an inch of water to wash the sulfur granules off the grass blades and down into the soil core holes.
“Applying sulfur without addressing drainage issues is futile; waterlogged soils lack the oxygen required for thiobacillus bacteria to convert sulfur into plant-available sulfates.” – Penn State Extension Agronomy Manual
Keep your irrigation calibrated. Wet soil is essential for sulfur conversion, but standing water will stop the process completely. Let the soil breathe between waterings.
Year-Round Maintenance and Sod Installation Prep
A successful sod install on alkaline soil requires lowering the pH of the topsoil at least three months prior to laying down the new turfgrass rolls. Testing and treating the subsoil beforehand ensures your new root system can establish deep anchors without hitting a chemical wall.
If you are planning a complete yard cleanup or major landscaping overhaul, the soil chemistry must be your absolute first priority. Do not waste thousands of dollars on premium nursery stock or sod rolls only to plant them in hostile, high-pH dirt. They will slowly starve, lose their color, and eventually die. Treat the soil, monitor the moisture, and keep the pH balanced for a thriving, resilient landscape.