
The Forensic Autopsy of a Dying Pond
You wake up and the waterfall sounds hollow. You check the skimmer and the water line has dropped six inches overnight. In the world of high-end water features, this isn’t just a nuisance; it is a structural emergency that threatens the entire nitrogen cycle of your ecosystem. When a pond liner fails, the surrounding soil becomes saturated, leading to hydrostatic pressure imbalances that can collapse the very shelves you meticulously carved out of the earth. I recently got called out to tear up a $30,000 patio that was sinking because the previous contractor ignored a small puncture in the underlying pond liner. The water had been tunneling beneath the pavers for months, eroding the 21A modified gravel base until the whole structure was suspended over a void. If you do not fix the source of the leak, your yard cleanup and landscaping efforts are just expensive window dressing on a sinking ship.
Why Pond Liners Fail in 2026: The Microscopic Reality
2026 pond liner punctures are primarily caused by hydrostatic pressure spikes, root intrusion from invasive species, or sharp aggregate migration beneath the membrane. Identifying the specific UV adhesive compatibility with EPDM or PVC materials is the first step in ensuring a permanent hydraulic seal that survives seasonal freeze/thaw cycles. Most failures I see are not manufacturing defects but installation shortcuts. If the non-woven geotextile underlayment is too thin, a single sharp piece of 3/4 inch flint will eventually punch through the 45-mil EPDM membrane due to the weight of the water column. We are talking about 8.34 pounds per gallon. In a 5,000-gallon pond, that is over 41,000 pounds of pressure constantly pushing down. Any inconsistency in the substrate is a ticking time bomb.
“A retaining wall doesn’t fail because of the stone; it fails because of the water trapped behind it.” – Hardscape Engineering Axiom
The Science of UV Adhesive in Hydraulic Seals
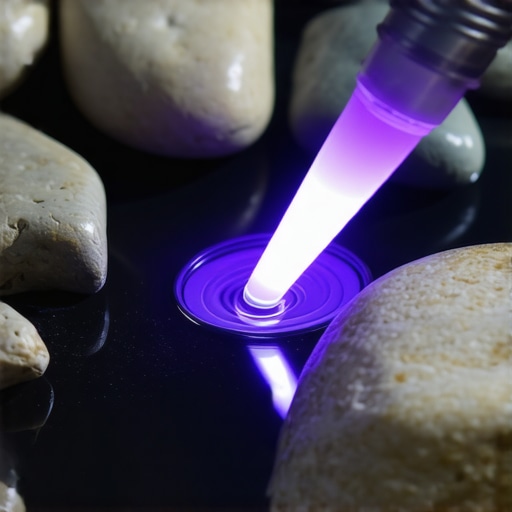
Modern 2026 UV-cured adhesives use photo-initiators that react to specific ultraviolet wavelengths, typically between 365nm and 395nm, to create a molecular cross-link across the puncture site. Unlike traditional cold glues or solvent-based cements that rely on evaporation and can take 24 hours to cure, UV adhesives reach full 900 PSI tensile strength in under 60 seconds. This is critical because it allows the liner to be submerged immediately, preventing the surrounding soil from drying out and shifting. You have to understand the chemistry: if the liner surface is not prepped with a heptane-based primer, the UV resin will only sit on the surface rather than bonding at a molecular level. It will fail. Don’t skip the prep. I see guys trying to apply this over pond muck all the time. It is a waste of money.
How much UV adhesive do I need for a pond repair?
Calculating the volume of resin depends on the micron thickness of the application and the diameter of the puncture. For a standard 1/4 inch puncture, you need approximately 5ml of high-viscosity UV resin to create a reinforced bead that overlaps the wound by at least two inches in all directions. This overlap is vital to distribute the hydrostatic load across the healthy section of the liner. If the puncture is larger than an inch, the resin must be used in conjunction with a reinforced fiberglass mesh to prevent the patch from bowing under pressure.
The Step-by-Step Remediation Process
Fixing a puncture requires more than just a dab of glue; it requires a forensic approach to cleaning and stabilizing the repair site. Follow this checklist to ensure the repair lasts 20 years instead of 20 minutes.
- Isolate the Leak: Fill the pond and mark the level where the water stops dropping. This indicates the exact horizontal plane of the puncture.
- Clean the Substrate: Use a stiff nylon brush to remove all bio-film and algae. Scrub until the black EPDM or grey PVC is visible.
- Solvent Wash: Apply a professional-grade liner primer. This etched surface is what the UV adhesive actually bites into.
- Apply the Resin: Work in the shade or under a tarp. UV resin will start to kick the moment it hits daylight.
- Cure with 365nm Lamp: Hold the UV light two inches from the site for a minimum of 60 seconds.
- The Pressure Test: Wait five minutes, then apply 5 PSI of manual pressure with a seam roller to check for any lifting edges.
| Material Type | Bond Strength (PSI) | Cure Time | Longevity |
|---|---|---|---|
| UV Adhesive (2026 Tech) | 950+ | 60 Seconds | 25 Years |
| EPDM Seam Tape | 400 | 4 Hours | 15 Years |
| Cold Glue Solvent | 350 | 24 Hours | 10 Years |
| Butyl Putty | 150 | Instant | 2 Years (Temporary) |
Irrigation and Sod Install: The Aftermath of a Leak
Once the liner is secured, you must address the saturated soil zones created by the leak to prevent root rot in your new sod install. Water that escapes a pond doesn’t just disappear; it creates anaerobic pockets in the soil that will kill any grass or plants installed over them. If you are doing a yard cleanup after a pond repair, you need to core aerate the area to a depth of 4 inches to allow oxygen to reach the soil microbes. If the soil is heavy clay, you may even need to incorporate gypsum to help break up the compaction caused by the water weight. If your irrigation system was running during the leak, check your zones for low-head drainage. The excess water from the pond often flows into the irrigation trenches, causing the pipes to settle and the sprinkler heads to tilt. It is all connected. You can’t fix one without looking at the other.
“Soil compaction is the silent killer of urban landscapes, reducing pore space and suffocating the microbial life necessary for nutrient cycling.” – Penn State Agricultural Extension
Can I install sod directly over a repaired pond area?
You can install high-quality fescue or bermuda sod over a repaired area only after the soil has reached a moisture content of less than 20%. Installing sod over saturated, muddy ground will lead to rhizome suffocation and fungal outbreaks like Pythium blight. Use a soil moisture meter. If it reads ‘Wet’ in the red zone, wait another three days and add a layer of coarse sand to improve drainage before laying the turf.
The Long-Term Outlook
A pond is a living, breathing piece of engineering. You cannot treat it like a plastic bathtub. Every puncture you fix is a lesson in why the initial build matters. Use the right UV adhesives, understand the physics of the water column, and never trust a contractor who doesn’t own a transit level. If you take care of the structural integrity of the liner, the biology of the pond will take care of itself. Keep your filters clean, keep your pH at 7.5, and stop buying cheap repair kits from big-box stores. They will fail. Every time.