
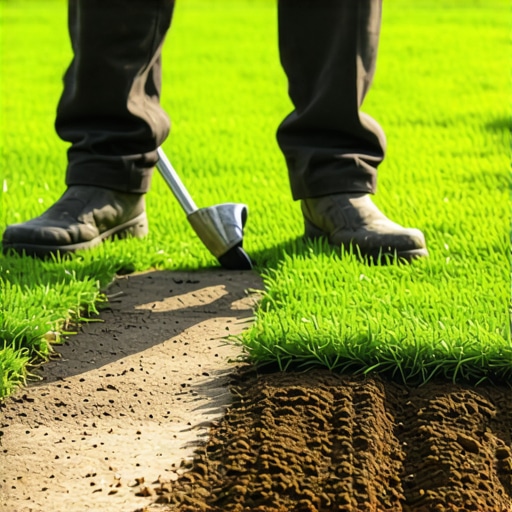
Fixing 2026 Sod Seams: The Step-and-Pack Technique
I always drill into my new crew members: if you don’t fix the soil grading first, every plant you put in the ground is just expensive compost. Last season, I walked onto a site where a ‘mow-and-blow’ outfit had slapped down four pallets of high-end Tall Fescue over what looked like sun-baked concrete. Three weeks later, the yard looked like a crossword puzzle. The gaps between the rolls were an inch wide, the edges were crispier than a potato chip, and the homeowner was out five grand. They didn’t understand that sod isn’t carpet; it is a vascular system that requires immediate hydraulic connection to the Earth. If you leave a gap, you’re not just looking at an eyesore; you’re creating a localized desert where the roots will never venture. We had to rip it out, remediate the soil, and show them how a professional sod install actually works.
Why Sod Seams Fail: The Forensic Breakdown
Fixing sod seams involves restoring capillary action and root-to-soil contact through mechanical compaction and top-dressing. The Step-and-Pack Technique is a specific manual method used to bridge gaps by physically forcing the sod edges into the sub-base, preventing edge desiccation and promoting lateral rhizome growth in new turf. It is a critical part of any professional landscaping project. It will rot if you don’t do it right. Don’t skip this.
When a sod roll is cut at the farm, its root system is severed at a depth of about 0.5 to 0.75 inches. This is a traumatic event for the plant. Once it’s laid on your property, the edges are the most vulnerable part of the organism. They have the highest surface area-to-volume ratio, meaning they lose moisture faster than the center of the roll. If there is even a 1/4-inch gap between rolls, air circulates under the sod. This air dries out the exposed roots, causing the grass blades to curl and die. This is called ‘edge burn.’ Once those edges die back, the gap widens, and you’re left with a permanent brown grid. This isn’t just about aesthetics; it’s about structural integrity. Soil erosion starts in these seams. Weeds find their way through these seams. It is a failure of basic yard cleanup and preparation.
“Successful sod establishment is dependent on the rapid development of a functional root system that penetrates the underlying soil. Any air pocket between the sod and the soil surface acts as a thermal barrier, increasing temperature and preventing root penetration.” – Texas A&M AgriLife Extension
The Physics of the Step-and-Pack Technique
The Step-and-Pack Technique is the industry standard for professional landscaping crews who actually care about the 2026 standards of water efficiency and turf longevity. It’s not just walking on the grass. It is a deliberate application of hydrostatic pressure and lateral force. You are essentially ‘welding’ two living pieces of tissue together using soil as the medium. You start by ensuring the sub-grade is friable—meaning it’s crumbly, not packed hard. If the ground is like a brick, the roots won’t penetrate, and the seams will never close.
How much soil pressure is needed for sod seams?
The goal is to achieve roughly 15-20 PSI (pounds per square inch) of downward pressure specifically at the interface where two rolls meet. This is typically achieved by a 180-pound technician applying weight through the heel of their work boot while simultaneously using a ‘shuffling’ motion to push the edges together. This eliminates the air pocket and creates a ‘lip’ that sits slightly lower than the rest of the turf, which allows moisture to pool exactly where it is needed most: at the seam. It works every time.
| Material/Tool | Requirement | Purpose |
|---|---|---|
| Screened Topsoil | 3-5 lbs per linear ft | Filling remaining micro-gaps |
| Starter Fertilizer (10-20-10) | 0.5 lbs per 100 sq ft | Promoting rapid root initiation |
| Compaction Roller | 250-300 lbs (water-filled) | Broad-scale soil contact |
| Irrigation Gauge | 3-5 units per zone | Measuring exact water delivery |
Step-by-Step Seam Remediation Protocol
If you’re dealing with existing seams that have already begun to pull apart, the yard cleanup process must be surgical. You can’t just throw seeds in a 1-inch gap and hope for the best. You have to create a environment for the existing sod to ‘knit.’ First, you must hydrate the area until the sod is pliable. Dry sod is brittle; if you try to pack it, it will snap. Once the edges are hydrated, you use a flat-head spade to gently lift the edge of the roll and tuck a 50/50 mix of sand and organic compost underneath. This provides a fresh ‘bed’ for the roots to dive into. Then, you perform the Step-and-Pack. Place your heel on the very edge of the roll and lean your weight forward, pushing the roll toward its neighbor. You should see the gap vanish.
- Hydrate the turf for 24 hours prior to remediation to increase elasticity.
- Lift the edges and remove any accumulated debris or dead organic matter.
- Apply a high-phosphorus starter fertilizer directly into the seam.
- Use the Step-and-Pack method to close the gap to within 1/8th of an inch.
- Top-dress the remaining hairline gap with screened topsoil.
- Roll the entire area with a water-weighted roller to ensure uniform grade.
Why is my new sod pulling apart at the edges?
Sod pulls apart primarily due to moisture stress and improper anchoring. If the irrigation system is not providing deep, infrequent soakings, the sod will shrink as it loses water content. In 2026, we are seeing more drought-tolerant hybrids that have higher ‘elasticity’ requirements, meaning they need consistent moisture during the first 14 days to prevent the cellular walls of the grass blades from collapsing and shrinking the entire roll. If your sod install didn’t involve a 300-pound roller, you likely have air pockets that are sucking the moisture out of your soil.
The Critical Role of Irrigation Calibration
You can’t fix seams if your irrigation is trash. Most homeowners think ‘watering’ means getting the grass wet. Wrong. Irrigation is about soil saturation to a depth of 6 inches. For sod seams to heal, the water must reach the sub-base to encourage the roots to grow downward. If you only water the surface, the roots will stay in the top 1/2 inch of the sod, and as soon as the sun hits it, they will cook. We use the ‘cycle-and-soak’ method. Run the zone for 10 minutes, let it sit for an hour to soak in, then run it again. This prevents runoff and ensures the moisture reaches the seam’s ‘root zone.’ If you see water running down the driveway, you’ve failed the physics test. Stop the water. Let it soak.
“Irrigation scheduling must account for the evapotranspiration (ET) rates of the specific cultivar. For newly laid sod, the first 72 hours are critical for maintaining turgor pressure within the plant cells.” – Journal of Agronomy and Crop Science
Advanced Troubleshooting: Soil Chemistry and PH
Sometimes, the Step-and-Pack doesn’t work because the soil chemistry is hostile. I’ve seen guys spend days on yard cleanup and perfect grading only for the sod to die because the pH was 8.5. Turf grass generally thrives in a slightly acidic environment (6.0 to 7.0 pH). If the soil is too alkaline, the phosphorus—the very nutrient needed for root growth—becomes ‘locked’ and unavailable to the plant. You can pack those seams all day, but if the roots aren’t chemically signaled to grow, they won’t. Before any sod install, we run a soil test. It costs $20 and saves $20,000. If the pH is off, we amend with elemental sulfur or lime before the first roll hits the ground. That is the difference between a professional and a hack.