
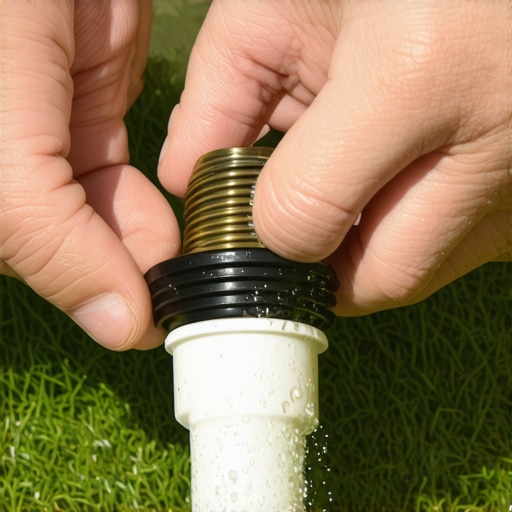
The Anatomy of a Chattering Irrigation Valve
Sprinkler zone chatter is a rapid, mechanical vibration occurring when the internal rubber diaphragm of an irrigation valve fails to seal properly, causing pressure fluctuations that rattle the solenoid. This issue typically stems from microscopic grit, algae buildup, or mineral deposits lodging between the flexible rubber diaphragm and the plastic seating surface of the valve body. It is not an electrical issue; it is a physical obstruction. Left unaddressed, this vibration will crack your PVC manifolds, burn out your solenoid coils, and destroy your system. Don’t ignore it.
“An irrigation system is only as reliable as its hydraulic control points. Even a single grain of silica sand under a valve diaphragm will disrupt pressure regulation and trigger systemic failure.” – Texas A&M AgriLife Extension Irrigation Manual
I always drill into my new crew members: if you don’t fix the soil grading and clean your main lines first, every plant you put in the ground is just expensive compost. Just last month, we had a fresh crew lay down 4,000 square feet of high-end sod, only to have a single dirty valve chatter itself to pieces overnight, flooding the low zones and washing away $1,200 worth of soil prep. The homeowner thought they had a electrical short. I showed my apprentice how a tiny fleck of PVC shaving from a sloppy installer had wedged itself inside the valve seat. Once that piece of plastic was cleared, the zone ran silent. Soil, water, and mechanics are always connected.
How to Diagnose a Chattering Valve
To diagnose a chattering sprinkler valve, locate your underground valve box, activate the malfunctioning zone manually, and feel for high-frequency vibration while listening for a distinct machine-gun buzzing sound. If the sound disappears when you open the manual bleed screw on top of the valve but returns when closed, the culprit is almost certainly a dirty or torn diaphragm rather than a failing solenoid. You must isolate the valve before disassembling it.
Why is my sprinkler valve buzzing or making a clicking sound?
The buzzing sound is the physical vibration of the internal metal plunger inside the solenoid as it struggles to hold its position against unstable hydraulic pressure. When dirt or mineral scale prevents the diaphragm from sealing the chamber, the water pressure on both sides of the rubber membrane equalizes unevenly. This forces the valve to rapidly cycle between open and closed positions, which translates to a loud acoustic chatter. This is a common issue on systems fed by municipal water with high calcium content or shallow well systems drawing fine sand.
| Symptom | Probable Cause | Required Remediation Action |
|---|---|---|
| High-frequency buzzing (chatter) | Debris in diaphragm chamber or worn rubber | Disassemble valve body, clean diaphragm and seat |
| Faint clicking with no water flow | Burned-out solenoid coil or wiring break | Test solenoid resistance with multimeter; replace coil |
| Constant weeping or slow leak at heads | Scratched valve seat or ruptured diaphragm | Replace diaphragm assembly and inspect plastic seat |
Step-by-Step Guide to Cleaning an Irrigation Valve Diaphragm
Cleaning a chattering sprinkler valve involves shutting off the main water line, unscrewing the valve bonnet, removing the internal diaphragm, washing away all mineral deposits, and reassembling the components. This simple maintenance protocol costs virtually nothing and saves you from purchasing expensive replacement valves. Follow these instructions precisely to avoid stripping plastic threads or losing small internal parts.
Before you turn a single screw, call 811 or dig safe if you plan to excavate around the valve box. Digging blind is a rookie mistake. Clear all packed dirt and mud away from the valve lid before opening it. If mud drops into the valve body during disassembly, you will make the problem ten times worse. Keep a clean bucket of water and a soft toothbrush nearby for cleaning the components.
How do I clean a Rain Bird or Hunter valve diaphragm?
To clean a standard residential valve, first turn off your main water supply and relieve system pressure by running a manual zone cycle for ten seconds. Next, unscrew the solenoid by turning it counterclockwise and carefully remove the plunger and spring inside if they are loose. Unscrew the bonnet screws securing the top cap to the valve body. Lift the cap straight up to reveal the diaphragm and spring. Wash the rubber diaphragm with clean water, scrub the plastic valve seat with a toothbrush, inspect the small weep holes for blockages, and reassemble in reverse order. Hand-tighten all screws before snugging them down with a driver.
- Step 1: Shut off the water source. Never attempt to disassemble a pressurized valve under any circumstances.
- Step 2: Clear the work area. Vacuum or scoop out any standing water inside the plastic valve box.
- Step 3: Remove the bonnet. Use a nut driver or screwdriver to remove the stainless steel screws in a crisscross pattern.
- Step 4: Inspect the diaphragm. Check the rubber disc for pinholes, tears, warping, or embedded grit.
- Step 5: Flush the valve body. Crack the main water supply valve open for three seconds to blow out any hidden debris from the line.
- Step 6: Reassemble. Ensure the spring is centered on the diaphragm and tighten the bonnet screws evenly.
“Hydrostatic pressure must remain balanced across the internal membrane of a pilot-operated valve; any pressure drop on the upper chamber prevents positive closure.” – ICPI System Standards Guide
Year-Round Irrigation and Yard Maintenance
Maintaining clean irrigation valves requires a seasonal preventive maintenance schedule that includes spring flushing, winterization blowouts, and regular filter cleaning on systems utilizing well or pond water. Neglecting these steps allows algae, rust, and scale to accumulate inside your lateral lines, which guarantees valve chatter and clogged spray nozzles by mid-summer. A clean system protects your sod investment.
While the internet tells you to water every day, turf grass actually needs deep, infrequent watering—exactly 1 inch per week—to force roots to chase the water down. Over-watering creates a shallow root zone and encourages fungal pathogens that rot your grass from the soil level up. Ensure your sprinkler run times are set to deliver heavy soakings twice a week rather than light daily mists. This practice keeps your grass healthy and reduces the workload on your automatic valves, prolonging diaphragm life span.