
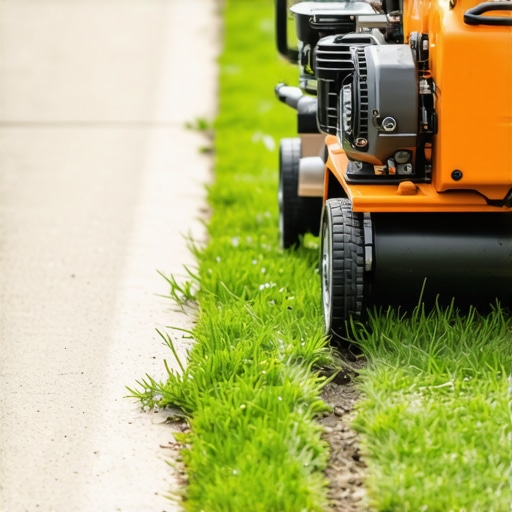
The Structural Reality of a Clean Edge
Professional driveway edging is the precise mechanical removal of encroaching turfgrass and accumulated organic debris to create a 90-degree vertical channel between the hardscape and the root zone. This process is not merely aesthetic; it serves as a critical drainage management strategy that prevents lateral root pressure from undermining the driveway’s sub-base. When done correctly, it protects your hardscape investment while establishing a clear biochemical boundary for your lawn.
The Apprentice Lesson: Why Grading Matters First
I always drill into my new crew members: if you don’t fix the soil grading first, every plant you put in the ground is just expensive compost. This applies double to edging. Years ago, I watched a rookie take a power edger to a driveway where the lawn was sitting three inches higher than the asphalt due to years of thatch buildup. He followed the pavement line, but because he didn’t understand hydrostatic pressure, the first heavy rain turned that new edge into a micro-canal. The water couldn’t shed off the driveway; instead, it trapped against the vertical cut, saturated the aggregate base, and by winter, the freeze-thaw cycle had cracked the edge of the driveway. You don’t just cut a line; you manage how water leaves the property. If your grade is wrong, your edge is a liability. You have to ensure the soil density and topography allow for surface runoff to move past the edge, not sit in it.
“A retaining wall doesn’t fail because of the stone; it fails because of the water trapped behind it.” – Hardscape Engineering Axiom
The Engineering of the Vertical Cut
To achieve a professional finish, you must understand the difference between surface-level trimming and structural edging. Most homeowners use a string trimmer at a 45-degree angle, which creates a ‘scalped’ look that invites opportunistic weeds like crabgrass to germinate in the exposed soil. A pro uses a vertical blade—either a manual half-moon or a gas-powered bed redefiner—to create a clean, 90-degree shear. This depth, typically 2 to 3 inches, severs the rhizomes of spreading grasses like Kentucky Bluegrass or Bermuda. It stops them cold. If you are performing a sod install, this edge is your anchor point. The sod must be tucked into this edge to prevent root desiccation. We call this the ‘locking’ phase. Without it, the edges of your new turf will brown and peel back like a dead scab. In landscaping, the edge is the frame of the portrait. If the frame is rotten, nobody looks at the art.
How deep should a driveway edge be?
A professional driveway edge should be exactly 2 to 3 inches deep to successfully sever grass stolons and provide a catchment area for mulch or decorative stone. This depth ensures that the root architecture of the turf cannot easily bridge the gap back to the driveway surface. If you go deeper than 4 inches, you risk striking the compacted gravel base (often #57 stone or CR-6) that supports your driveway, which can lead to structural raveling. Precision is mandatory. Measurement matters. Don’t guess.
| Tool Type | Ideal Use Case | PSI / Impact Level | Precision Rating |
|---|---|---|---|
| Half-Moon Manual Edger | Small residential, high-detail curves | Low (Manual force) | High |
| Gas-Powered Vertical Edger | Long straight driveways, heavy clay soil | Medium (High RPM) | Medium-High |
| Bed Redefiner (Trenching tool) | Creating deep mulch reservoirs | High (Torque-heavy) | Professional Only |
The Mechanical Workflow: A Step-by-Step Protocol
Start with a yard cleanup. You cannot see the line if it is buried under decomposing organic matter. Blow off the driveway and identify the highest point of the grade. Use a chalk line or a tight string if the driveway isn’t perfectly straight. Position your body over the hardscape, not the grass. This gives you a leverage advantage and ensures the tool doesn’t ‘drift’ into the turf. Apply steady downward pressure. If using a power tool, let the RPMs do the work. Don’t force the blade. If you hit a rock, stop. Forcing it will shatter the carbide tip or kick back and gouge the asphalt. Once the cut is made, use a square-point shovel to remove the ‘ribbon’ of turf. Do not leave this debris on the lawn. It will re-root. It will rot. Haul it away. This is where irrigation comes into play. After edging, check your sprinkler head alignment. Often, an edger will nick a head that was buried too close to the pavement. A professional always does a zone test after the mechanical work is finished.
What is the best tool for cutting a clean lawn edge?
The best tool for a professional-grade edge is a gas-powered stick edger with a 10-inch hardened steel blade. For those seeking Information Gain, the secret is the blade thickness; a 1/8-inch blade provides a sharper, cleaner shear than the standard 1/16-inch blades found in big-box stores. Thicker blades resist deflection when striking heavy red clay or compacted silt. For curves, a manual half-moon allows for micro-adjustments that a machine simply cannot replicate. Precision over speed. Every time.
- Clear the debris: Use a high-velocity blower to expose the pavement edge.
- Mark the line: Use marking paint for complex geometric designs.
- Check for utilities: Call 811 if you are doing deep trenching near the street.
- Execute the cut: Maintain a constant depth of 2.5 inches.
- Manual Finish: Use hand shears for the spots where the machine can’t reach.
- Hydration: Water the edge immediately if you’ve exposed fresh root mass.
“Soil pH and compaction levels at the driveway interface often vary significantly from the rest of the lawn due to heat radiation and salt runoff.” – Agronomy Field Manual
The Longevity Factor: Maintenance and Irrigation
Once you’ve established the edge, maintenance is about chemical and physical suppression. While many suggest pre-emergent herbicides, the best defense is a thick turf canopy. However, driveway edges are heat sinks. They absorb solar radiation and bake the adjacent soil, leading to localized dry spots. You must adjust your irrigation schedule to ensure the ‘edge zones’ get 15% more water than the center of the lawn. If the soil pulls away from the driveway, you get fissures. These fissures allow weed seeds to bypass the surface and germinate deep in the moist sub-soil. Keep it tight. Keep it hydrated. Don’t skip the details. It’s a system, not a chore.