
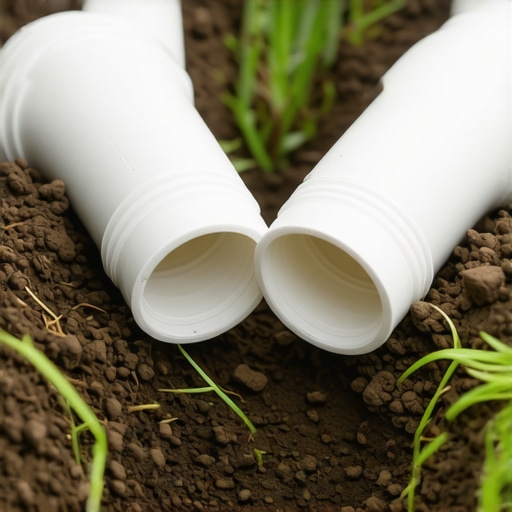
The Diagnostic Signs of a Failed Irrigation Line
To fix a broken sprinkler pipe with a slip coupling, you must excavate the damaged section, remove the fractured PVC, and bridge the gap using a telescoping repair coupling that slides into place without requiring pipe flexibility. This method creates a high-pressure solvent weld that restores hydraulic integrity to the lateral or main line.
I always drill into my new crew members: if you don’t respect the soil’s physics, every repair is just a temporary patch. I once saw a rookie try to force a standard coupling onto a 1-inch Sch 40 line by prying the pipe up with a shovel. He got it to fit, but the constant mechanical stress on that joint caused a catastrophic failure two months later, right after the homeowner had finished a $12,000 sod install. The resulting washout looked like a miniature canyon. We don’t ‘force’ pipe in this business. We use the right engineering solutions.
“Proper irrigation maintenance is not merely about stopping leaks; it is about maintaining the specific pressure requirements necessary for uniform water distribution across the turf canopy.” – Agricultural Irrigation Extension Manual
Why Irrigation Failures Happen
Most breaks aren’t accidents. They are the result of three things: mechanical impact (the ‘shovel-through-the-dirt’ syndrome), root intrusion from poorly placed trees, or ground heave. When the soil shifts, rigid PVC doesn’t have the tensile strength to flex. It snaps. If you find a wet spot in your yard that feels like a sponge, or if you notice your heads aren’t popping up fully, you have a pressure drop. Your pump is working, but the water is escaping into the sub-base, leaching out nitrogen and drowning the aerobic bacteria your soil needs to stay alive.
The Anatomy of the Slip Coupling Fix
The slip coupling, often called a telescoping coupling, is a specialized irrigation fitting designed for repairs in tight spaces where the pipe cannot be moved. It features an internal O-ring and a sliding barrel that expands to bridge the gap cut into the pipe. This is superior to ‘bell’ ends or standard couplings because it eliminates the need to bend the pipe, which preserves the structural integrity of the PVC wall.
How much pressure can a PVC slip coupling handle?
A standard Schedule 40 PVC slip coupling is typically rated for 150 to 200 PSI, which far exceeds the 30 to 60 PSI found in most residential irrigation systems. However, the integrity of the fix depends entirely on the chemical solvent weld between the pipe and the coupling sleeve, not the mechanical sliding mechanism itself.
| Material Type | Typical Application | Pressure Rating (PSI) | Flexibility |
|---|---|---|---|
| Schedule 40 PVC | Main Lines / Laterals | 200+ PSI | Low |
| Class 200 PVC | Low-cost Laterals | 200 PSI | Moderate |
| Swing Pipe (Funny Pipe) | Head Connections | 80-120 PSI | High |
| HDPE Poly Pipe | Cold Climates | 100-160 PSI | High |
The Step-by-Step Restoration Process
Stop the water first. You cannot solvent weld in a puddle. Use a hand pump or a bucket to clear the hole. If there is mud on the pipe ends, the primer won’t bite. Clean the pipe until it looks like it just came off the shelf at the supply house.
- Excavate: Clear a 2-foot radius around the break. You need room for your hands and your cutters.
- Cut: Use a ratcheting PVC cutter for a square edge. Do not use a hacksaw if you can avoid it; the burrs will ruin the seal.
- Measure: The gap you cut must be slightly shorter than the fully extended length of the slip coupling.
- Prime: Use purple primer on both the pipe ends and the inside of the coupling. This softens the plastic.
- Cement: Apply medium-bodied gray or blue ‘hot’ glue. Blue is better for wet conditions.
- Slide: Collapse the coupling, position it, and slide it out over the pipe ends. Twist a quarter turn to set the weld.
Do I need primer for irrigation repair?
Yes. Purple primer is non-negotiable for a professional-grade repair because it initiates a chemical reaction that cleans the surface and ‘pre-melts’ the PVC. Without primer, the solvent cement only creates a surface bond that will eventually shear off under the constant water hammer of the valves closing.
The Impact of Leaks on Landscaping and Soil Health
A broken pipe does more than waste water. It destroys soil structure. When a high-pressure line ruptures underground, it creates a ‘boil’ that forces silt and clay particles to the surface, leaving behind a porous pocket of sand that will never hold nutrients again. If you just finished a sod install, a leak underneath the new turf will cause the roots to rot before they can even knit into the soil. This is why yard cleanup after a repair must include soil compaction. You can’t just throw the dirt back in the hole. You have to lift it in 3-inch lifts and tamp it down, or you’ll have a sinkhole within a year.
“Hydrostatic pressure from underground leaks can destabilize retaining wall footings and lead to localized soil liquefaction in extreme cases.” – Hardscape Engineering Axiom
Post-Repair Maintenance Checklist
Don’t bury the pipe immediately. Turn the zone on and let it run for five minutes. Check for ‘weeping’ at the joints. If it’s dry, you’re golden. If it’s damp, cut it out and start over. There is no such thing as a ‘small’ leak in a pressurized system. It will grow. Once the fix is confirmed, backfill with clean fill, avoiding large rocks that could vibrate against the pipe and cause a secondary break. This is the difference between a landscaper and a guy with a truck.