
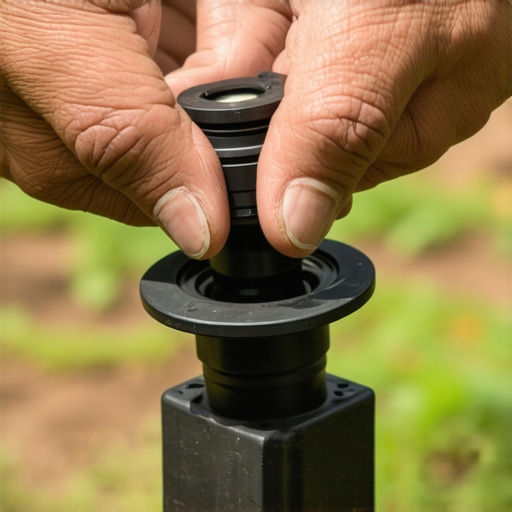
You notice the squish before you see the water. That rhythmic, saturated ‘thwack’ of your boots hitting a patch of sod that should be firm but is instead a localized swamp. This isn’t just a nuisance; it is a failure of the hydraulic integrity of your landscaping. A leaking irrigation valve diaphragm is the most common culprit when a zone won’t shut off or ‘weeps’ water 24 hours a day. Left unaddressed, this hydrostatic imbalance will rot the root flares of your ornamental trees and turn a professional sod install into a fungal breeding ground. Replacing the diaphragm is a surgical procedure for your yard’s circulatory system that requires precision, not just a pair of pliers.
The Anatomy of Irrigation Valve Failure
An irrigation valve diaphragm is a flexible rubber membrane that regulates water flow using pressure differentials; when it fails due to mineral buildup, rubber fatigue, or debris infiltration, the valve cannot create a watertight seal, leading to constant leaking or ‘weeping’ in the zone. You must identify if the leak is coming from the ‘bonnet’ (the top of the valve) or if it is internal, allowing water to bypass the seal and exit through the sprinkler heads.
I always drill into my new crew members: if you don’t fix the soil grading first, every plant you put in the ground is just expensive compost. But irrigation? Irrigation is the technical heart. Last year, I had a rookie who thought he could ‘clean’ a 10-year-old diaphragm with a rag. I told him, ‘Son, once the EPDM rubber loses its elasticity or takes a set, you’re just putting a band-aid on a gunshot wound.’ We don’t clean parts that cost twelve dollars when the labor to go back and fix it a second time costs two hundred. You replace the guts, you check the seat for pitting, and you move on. Professionalism is about minimizing call-backs, not saving pennies on rubber gaskets.
“Irrigation systems require regular inspection to ensure that valves close completely, as a ‘weeping’ valve can waste thousands of gallons of water per month, leading to significant runoff and potential plant pathogens.” – University of Florida IFAS Extension
Essential Tools and Preparation for Valve Repair
Before you crack open a valve box, you need the right kit. This isn’t a job for a generic ‘all-in-one’ tool. You are dealing with plastic threads and specific torque requirements. One slip of a standard screwdriver and you’ve gouged the valve body, turning a $15 diaphragm swap into a $500 manifold excavation. Don’t be that guy.
- Phillips #2 and Flathead Screwdriver: Most bonnets use a hybrid screw head.
- Needle-Nose Pliers: For removing the solenoid and the internal spring.
- Replacement Diaphragm Kit: Must be the exact brand and model (e.g., Hunter PGV, Rain Bird DV).
- Small Wire Brush: For cleaning the valve seat (brass only, never steel).
- Multimeter: To verify the solenoid’s 24VAC resistance (typically 20-60 ohms).
How do I know if my sprinkler valve is bad?
A bad sprinkler valve typically presents as a low-pressure leak at the lowest head in the zone or a constant flow that never stops. If you see water pooling around the valve box or notice your water bill spiking without an increase in run times, your diaphragm has likely suffered a structural failure or is being propped open by a small pebble.
| Symptom | Probable Cause | Required Action |
|---|---|---|
| Zone won’t turn off | Ruptured Diaphragm | Replace Diaphragm and Spring |
| Water leaking from bonnet | Loose Screws / Cracked O-Ring | Tighten or Replace Bonnet O-ring |
| Zone won’t turn on | Failed Solenoid / Clogged Port | Test Ohms / Clean Bleed Port |
| Low pressure at heads | Partial Blockage in Valve | Flush Valve Body |
The Forensic Step-by-Step Replacement Process
First, shut off the main water supply to the irrigation system. Do not rely on the controller to ‘turn it off’—we are dealing with 60 to 80 PSI of static pressure. If you open a valve under pressure, you will lose the internal spring, and it will likely end up in the next county. Once the water is off, use the manual bleed screw to relieve the remaining pressure in the line. You should hear a hiss, then silence. Now you can work.
Unscrew the solenoid by turning it counter-clockwise. Watch the two wires; do not twist them into a knot. Remove the bonnet screws in a ‘star pattern,’ much like the lug nuts on a truck tire. This prevents the plastic bonnet from warping under uneven tension. Lift the bonnet carefully. Inside, you will find the spring and the diaphragm. Note the orientation. Some diaphragms have a small hole (the ‘bleed port’) that must align with a specific channel in the valve body. If you misalign this, the valve will never close. It will stay open forever, and you will be back here tomorrow morning.
Inspect the valve seat. This is the plastic ridge that the diaphragm presses against. If there is a grain of sand or a PVC shaving from a previous ‘hack’ repair, the new diaphragm will leak. Wipe it clean with a lint-free rag. Drop the new diaphragm in, place the spring on the center post, and set the bonnet back on. Hand-tighten the screws first, then use your screwdriver to snug them down in that same star pattern. Do not over-torque. These are plastic threads. ‘Snug’ is a measurement. ‘Stripped’ is a nightmare.
Can I just replace the diaphragm or do I need a new valve?
In 90% of cases, replacing the diaphragm is the correct move because the valve body (the part glued to the pipes) rarely fails. Replacing the entire valve requires cutting into the PVC manifold, which introduces more points of failure and takes significantly more time. Unless the valve body is cracked or the seat is heavily pitted, stick to the guts.
“A retaining wall doesn’t fail because of the stone; it fails because of the water trapped behind it. Similarly, an irrigation system fails when the control mechanism cannot withstand the hydrostatic pressure of the main line.” – Hardscape Engineering Axiom
Post-Repair Validation and Maintenance
Once the valve is reassembled, turn the main water back on slowly. Going from 0 to 80 PSI instantly can cause a ‘water hammer’ that shatters fittings down the line. Listen for the rush of water. If the zone starts running immediately, don’t panic. Sometimes the diaphragm needs a moment to seat under pressure. Manually cycle the valve using the controller. It should click, engage, and then shut off cleanly within 10 to 30 seconds. If it keeps weeping, you likely have debris trapped under the new rubber.
Yard cleanup isn’t just about raking leaves; it’s about maintaining the infrastructure. Every spring, check your valve boxes. If they are filled with mud, your solenoids are at risk. Dig the mud out, put down two inches of 3/4-inch crushed stone for drainage, and ensure the lids are secure. This prevents the freeze-thaw cycles from pushing silt into the valve’s bleed ports. Irrigation isn’t ‘set and forget.’ It is an engineered system that demands respect for the physics of water. Respect the PSI, and your landscaping will thrive. Ignore it, and you’re just paying for a swamp.