
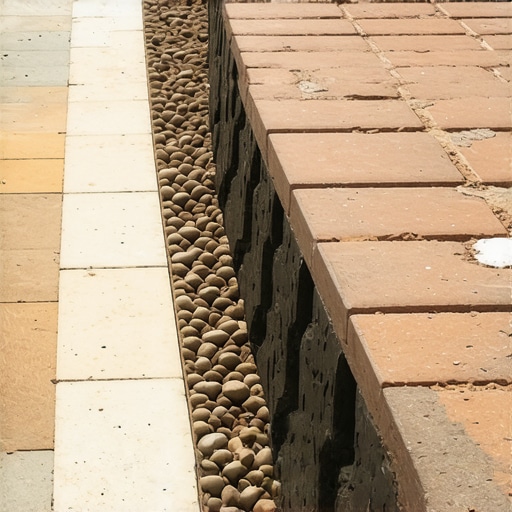
Why Paver Edging Fails and the Physics of Lateral Pressure
Paver edging prevents spreading by creating a rigid structural boundary that counteracts the lateral pressure exerted by foot traffic and heavy equipment. Without a secured perimeter, the polymeric sand in the joints fails, leading to gapping, shifting, and structural collapse of the entire hardscape system.
I recently got called out to tear up a $30,000 patio that was sinking and spreading because the previous contractor skipped the perimeter restraint. The homeowners were devastated. Upon excavation, I discovered they used cheap plastic edging with 6-inch spikes in soft, non-compacted soil. The lateral force of the pavers had literally pushed the edging out of the ground. This is a classic case of failing to understand that a patio is a floating system. It must be locked in place with engineering-grade materials, not just a thin strip of plastic. If the base isn’t right, the edging is useless. We had to excavate 8 inches of clay, replace it with modified gravel, and use heavy-duty aluminum restraints to save the investment. It was an expensive lesson in doing things right the first time.
“A retaining wall or paver system doesn’t fail because of the stone; it fails because of the water trapped behind it or the lack of a proper edge restraint.” – ICPI (Interlocking Concrete Pavement Institute) Tech Bulletin
How much modified gravel do I need for a patio base?
Calculating base depth is critical for edge stability. For a standard pedestrian patio, you need a minimum of 4 to 6 inches of compacted 21A or 57 stone. In freeze-thaw climates, increase this to 8 inches to prevent the heaving that often pops edging spikes out of the ground during spring thaws. Do not use pea gravel; it acts like ball bearings and offers zero structural integrity.
Selecting the Right Edging System: Materials and Durability
The best paver edging material depends on the expected load and soil conditions, with rigid aluminum and heavy-duty PVC being the industry standards. Aluminum provides the highest tensile strength for straight lines, while high-density plastic allows for radius curves without sacrificing the integrity of the interlocking pavers.
| Edging Type | Best Use Case | Pros | Cons |
|---|---|---|---|
| Aluminum | Straight Lines/Modern | Non-rusting, high rigidity | Higher cost, less flexible |
| Rigid PVC | Curves/Walkways | Easy to shape, affordable | UV degradation over 20 years |
| Concrete Haunching | Driveways | Extreme durability | No drainage, labor intensive |
In my firm, we rarely use anything but industrial-grade aluminum. It doesn’t rot, and it doesn’t warp under the heat of the summer sun. Cheap big-box store plastic edging is the enemy. It becomes brittle in winter and snaps under the weight of a lawnmower. If you want a 30-year patio, you don’t buy 5-year edging. Also, consider the vertical height of the edging. It should sit approximately 1/2 inch below the top of the paver to allow for turf growth and soil coverage without being visible.
The Installation Process: Securing the Perimeter
Securing paver edging requires driving 10-inch or 12-inch galvanized steel spikes directly into the compacted aggregate base, not the surrounding dirt. The spikes must be driven at a slight inward angle—a technique known as toeing-in—to create a mechanical lock that resists the outward thrust of the paver units.
How many spikes per paver edging piece should I use?
Standard practice for paver stability is one spike every 12 inches for straight runs and one spike every 8 inches for radius curves. In areas with high clay content or heavy rainfall, I recommend using one spike every 6 inches to combat the hydrostatic pressure that builds up behind the restraint during saturation events. Spikes are cheap; a failed patio is not.
“Ensure that the aggregate base extends at least 6 inches beyond the edge of the pavers to provide a stable foundation for the edge restraint spikes.” – Penn State Department of Plant Science
When driving the spikes, the compaction density of your base is the deciding factor. If your base is 98% Proctor density, that spike will be incredibly difficult to drive in—and that is exactly what you want. If the spike slides in easily, your base is too loose, and your pavers will eventually settle. Use a 3-pound sledgehammer. The tool should literally bounce back slightly when the base is fully compacted and the spike is home. This is hardscaping engineering at its most basic level.
Soil Grading and Backfilling: The Invisible Anchor
Proper backfilling and grading against the paver edge provides the necessary counter-weight to prevent the edging from tilting or rotating outward over time. Once the edging is spiked, you must immediately backfill with topsoil or sod install to create a seamless transition that hides the hardware and protects the aggregate base from erosion.
- Step 1: Clear all debris from the excavation trench during yard cleanup.
- Step 2: Verify the screed layer is level and the pavers are set tightly.
- Step 3: Install edging flush against the pavers.
- Step 4: Drive galvanized spikes through the edging into the aggregate.
- Step 5: Apply polymeric sand and vibrate into the joints.
- Step 6: Backfill with soil and tamp firmly to lock the system.
- Step 7: Configure irrigation heads to spray away from the edge to prevent washouts.
Don’t ignore the irrigation system during this phase. If you have sprinkler heads right next to your edging, the constant water saturation will soften the soil and the aggregate base, eventually leading to lateral shift. We always offset irrigation heads by at least 12 inches from the hardscape perimeter. This keeps the base dry and structural. If you’re doing a sod install up to the edge, ensure the soil is 1 inch higher than the edging to allow for settling. This prevents the edging from being caught by a lawnmower blade later.
Long-Term Stabilization and Polymeric Sand
Polymeric sand acts as the bonding agent for the entire system, filling the gaps between pavers and creating a flexible but firm joint that resists weed growth and water infiltration. Without high-quality sand, the pavers will move independently, putting excessive stress on the edging restraints and causing the perimeter to fail.
The chemistry of polymeric sand is complex. It contains specialized polymers that activate when wet, turning the sand into a substance similar to grout but with thermal flexibility. This allows the patio to expand and contract with the seasons without cracking. However, if the edging isn’t secure, the sand will crack anyway. You cannot fix a bad structural base with good sand. Clean the joints thoroughly before application. Use a plate compactor with a protective mat to vibrate the sand into the full depth of the paver. If you only fill the top 1/4 inch, the joint will fail within one season. It needs to be a solid plug of material. This is how you prevent the spreading that ruins most DIY projects.
How do I stop my pavers from moving?
To stop paver movement, you must address the three pillars of stability: a 6-inch compacted stone base, a securely spiked edge restraint, and properly activated polymeric sand. If any of these three elements is missing, the system will eventually fail. Regular yard maintenance to ensure the backfill soil remains against the edge is also crucial. Inspect your edges every spring for spike heaving and hammer them back down if necessary.