
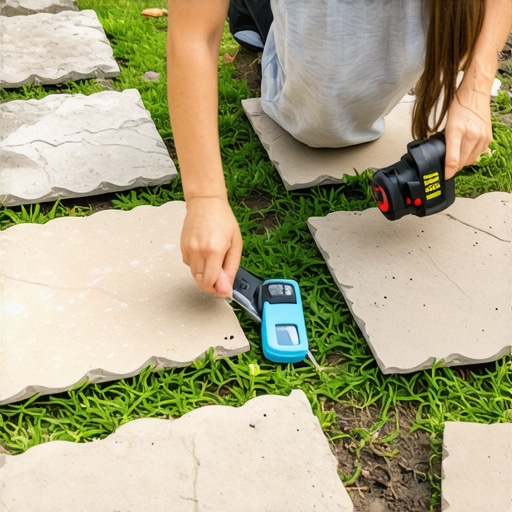
The Core Mechanics of Level Stepping Stone Installation
Installing heavy stepping stones evenly requires precise sub-base excavation and the use of a compacted modified gravel base topped with a 1-inch layer of coarse sand to prevent stone shifting and frost heave. Most failures occur because homeowners place stones directly on soil, which lacks the structural integrity to support 50-to-100-pound slabs over time without settling. If you want a path that lasts, you must treat every stone as a miniature foundation.
I recently got called out to tear up a $30,000 patio and path system that was sinking because the previous contractor thought they could skip the base prep in heavy clay soil. The homeowner was literally tripping over six-inch granite slabs that had tilted nearly 20 degrees. When we excavated, I found nothing but rotting organic matter and wet mud beneath the stones. There was no drainage, no compaction, and zero engineering. We had to haul out forty tons of material just to fix a mistake that could have been avoided with a few loads of 21A crushed stone. It was a textbook case of a ‘mow-and-blow’ crew trying to do hardscaping without understanding hydrostatic pressure or soil bearing capacity.
“A retaining wall or stone path doesn’t fail because of the stone; it fails because of the water trapped behind it or the lack of a stable base below it.” – Hardscape Engineering Axiom
Why Soil Type Dictates Your Installation Strategy
Before you move a single stone, you have to understand what is under your boots. If you have heavy red clay, your drainage is non-existent. Clay holds water, and when that water freezes, it expands. This expansion will kick a 200-pound flagstone out of the ground like a bottle cap. If you have sandy loam, you have better drainage but less stability. In either case, the soil must be stripped of its organic layer. Grass, roots, and thatch are the enemies of stability. They decompose. Decomposition creates air pockets. Air pockets lead to sinking. We always excavate at least 6 inches deep, even for a simple path. This allows for 4 inches of compacted aggregate and 1 to 2 inches of bedding material. Don’t skip this. If you put stone on top of turf, you are just making expensive compost.
The “Sand-Pillow” Trick for Massive Stones
The real secret to getting heavy stones perfectly level isn’t a bigger hammer; it is the dry-pack suction method. When dealing with irregular natural stones that vary in thickness, you cannot use a flat screed alone. You create a ‘pillow’ of slightly damp coarse sand over your compacted gravel. You set the stone, then use a dead-blow mallet to ‘set’ the stone into the sand. The trick is to lift the stone back up and look at the sand. The indentations will tell you exactly where the stone is hitting and where it is ‘bridging’ over thin air. You add or subtract sand to match the topography of the bottom of the stone. This ensures 100% contact between the stone and the base. Without this, the stone will eventually crack or tilt under foot traffic.
| Material Type | Compaction Rating | Drainage Capability | Best Use Case |
|---|---|---|---|
| Bank Run Gravel | High | Low | Structural Fill |
| #57 Crushed Stone | Medium | Excellent | Drainage Layers |
| 21A / Modified Gravel | Very High | Moderate | Primary Path Base |
| Coarse Concrete Sand | Low | Good | Leveling/Bedding |
How much modified gravel do I need for a patio base?
Calculating base material volume requires multiplying your total square footage by the desired depth (usually 0.33 feet for 4 inches) and then dividing by 27 to get cubic yards. For a standard 50-foot path that is 3 feet wide, you will need approximately 2 cubic tons of modified gravel to account for a 20% compaction factor. Never order exactly what the math says. You will always need more because the tamper will drive that stone deep into the sub-grade. If you don’t feel the tamper bouncing off the ground, the ground isn’t hard enough. Keep going until the machine screams.
Integrating Stepping Stones with New Sod and Irrigation
When we do a sod install around new stepping stones, the stone must sit 1/2 inch above the soil grade but flush with the top of the grass blades. This allows a lawnmower to pass over the stones without shattering a blade or chipping the stone. This is where most guys fail. They set the stone flush with the dirt, then they lay the sod, and suddenly the stone is buried in a hole. This leads to water pooling on the stone, which eventually causes algae growth and a slip hazard. Furthermore, you must flag every single irrigation head before excavation. A single 18-inch trenching shovel can sever a lateral line in seconds. If you find a pipe, you don’t just bury it under the stone. You sleeve it in a larger PVC pipe to protect it from the weight of the stone. If that stone settles even an inch, it will crush a standard poly-pipe, and you’ll have a geyser under your new path.
“Subgrade compaction should reach at least 95% of the standard Proctor density to ensure long-term stability of pedestrian pavements.” – ICPI Tech Spec No. 2
What is the best way to level large flagstones?
The most effective way to level large flagstones is using a 4-foot bubble level and a straight-edge screed board to bridge the gap between the stone you are setting and the previous stone in the path. You must maintain a 1% to 2% slope away from any building foundations to ensure proper landscaping drainage. Even a ‘flat’ path should never be truly level; it should always have a subtle ‘pitch’ so water doesn’t sit on the surface. During your yard cleanup, if you notice water standing on your stones for more than 20 minutes after a rain, your pitch is wrong. You’ll need to pull the stone and adjust the sand bed before the freeze cycle starts or you’ll be doing the whole job over in the spring.
The Pre-Installation Checklist
- Call 811 to mark underground utility lines including gas and electric.
- Remove all organic debris and perform a thorough yard cleanup.
- Excavate to a minimum depth of 6 inches for the path footprint.
- Install a non-woven geotextile fabric to separate soil from gravel.
- Run a plate compactor over the sub-grade before adding any stone.
- Ensure irrigation lines are sleeved or relocated away from stone pressure points.
Maintenance is the part no one wants to talk about. In the first year, your stones will settle slightly. This is normal. You should have a few bags of polymeric sand or extra bedding sand on hand to fill the gaps. Do not use ‘play sand’ from a big-box store. It is too fine and will wash away in the first thunderstorm. Use a sharp, angular sand that locks together. If you see weeds popping up between the stones, it’s not because they are growing through the base; it’s because wind-blown seeds have landed in the dirt that collected on top. Keep the path clean. Use a leaf blower. Don’t let organic matter build up or you’re just inviting the ‘mow-and-blow’ hacks back to spray toxic chemicals on your property.